
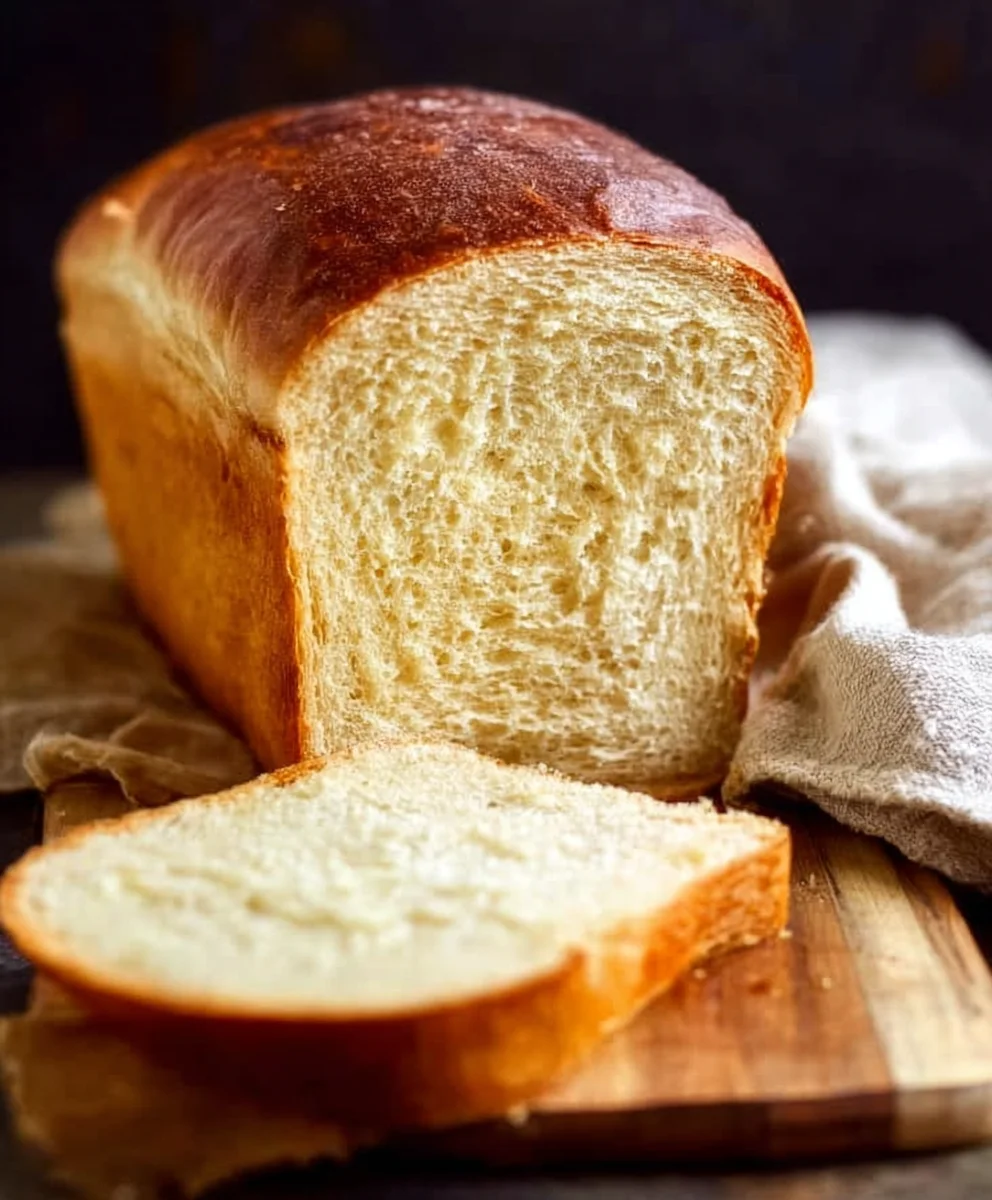
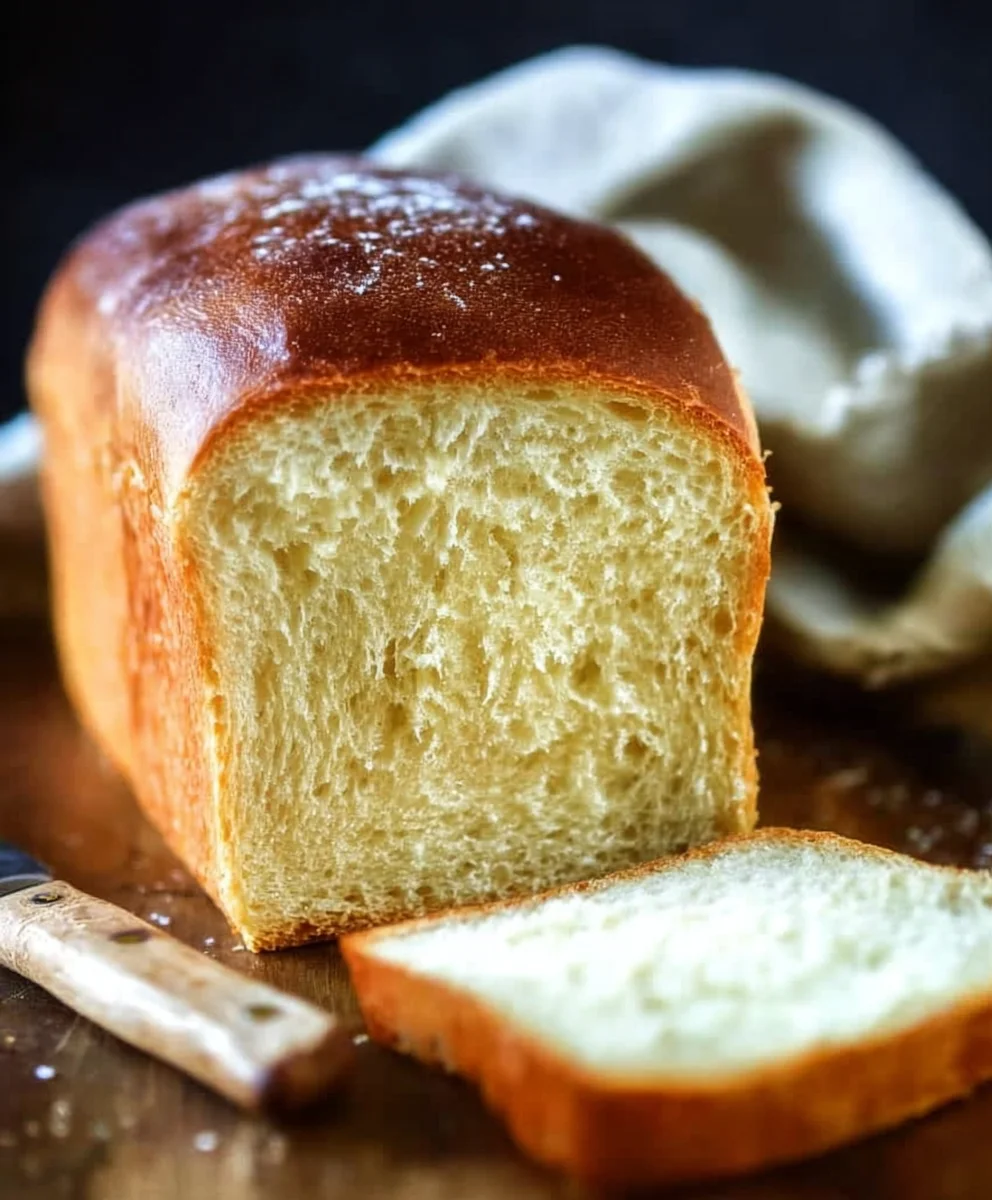
Buttermilk Bread Recipe. There’s something undeniably comforting about a warm slice of homemade bread, and when that bread is made with the magic of buttermilk, the experience elevates to an entirely new level. This Buttermilk Bread Recipe is a cherished classic for so many reasons. Its aroma alone, wafting from the oven, is enough to make your home feel instantly cozier. People adore this loaf because of its incredibly tender crum extractb and a subtly tangy flavor profile that sets it apart from ordinary white bread. What truly makes this Buttermilk Bread Recipe special is the remarkable moisture it retains, ensuring every bite is soft, slightly chewy, and utterly delightful, perfect for toasting, slathering with butter, or serving alongside your favorite soup or stew.

Ingredients:
- 1 packet active dry yeast
- 1 pinch ground gin extractger
- 1 teaspoon granulated sugar
- 1/4 cup warm water (105°F – 110°F)
- 2 cups cultured buttermilk (warm, 105°F – 110°F)
- 1/3 cup honey
- 1 teaspoon kosher salt (or 3/4 teaspoon table salt)
- 3/4 teaspoon baking soda
- 6 cups bread flour (all-purpose flour can be substituted)
- 1/4 cup unsalted butter, melted and cooled to warm
Preparing the Dough
Step 1: Blooming the YeastStep 2: Combining Wet Ingredients
While the yeast is blooming, let’s prepare the other liquid ingredients. In a large mixing bowl, or the bowl of your stand mixer fitted with a dough hook, pour in the warm cultured buttermilk. Add the honey and the melted and cooled butter. Gently whisk these together until they are well combined. Make sure the butter is warm to the touch but not hot, as excessive heat can kill the yeast. Once the yeast mixture is foamy, carefully pour it into the bowl with the buttermilk mixture. Add the kosher salt and the gin extractch of ground ginger. Stir everything together to incorporate.
Step 3: Adding Flour and Initial Mixing
Now it’s time to introduce the flour. Gradually add the bread flour to the wet ingredients, about one cup at a time. Mix the flour into the wet ingredients with a wooden spoon or the dough hook on your stand mixer on a low speed. Continue adding gin extractur until the dough begins to pull away from the sides of the bowl and forms a shaggy mass. At this stage, the dough will still be quite sticky, and that’s perfectly normal for a buttermilk dough. Resist the urge to add too much extra flour at this point, as it can make the bread dense.
Step 4: Kneading the Dough
Once the dough has formed a shaggy mass, it’s time to knead. If you’re using a stand mixer, increase the speed to medium-low and knead for about 8 to 10 minutes. The dough should become smooth, elastic, and slightly tacky but not stick to your fingers when lightly touched. If you are kneading by hand, turn the shaggy dough out onto a lightly floured surface. Knead the dough by pushing it away from you with the heel of your hand, then folding it over on itself and repeating. Continue this process for about 10 to 15 minutes. You’re looking for a smooth, pliable dough that springs back slowly when gently poked. If the dough is too sticky, lightly dust your hands and the work surface with flour, but use sparingly.
Step 5: First Rise (Bulk Fermentation)
Lightly grease a clean large bowl with a little oil or cooking spray. Place the kneaded dough into the prepared bowl, turning it to coat all sides with the grease. Cover the bowl tightly with plastic wrap or a clean kitchen towel. Find a warm, draft-free place for the dough to rise. This could be in a slightly warmed oven (turned off, of course!) or simply on your countertop. Let the dough rise for about 1 to 1.5 hours, or until it has doubled in size. The warm buttermilk helps to create a wonderfully soft crum extractb, so be patient with this rise.
Step 6: Shaping the Loaves
Once the dough has doubled in size, gently punch it down to release the air. Turn the dough out onto a lightly floured surface and divide it into two equal portions for two loaves. Shape each portion into your desired loaf shape. You can create classic sandwich loaves by flattening each portion into a rectangle, then tightly rolling it up from one end to the other, pinching the seams closed. Or, for a rustic look, you can simply form them into round or oval shapes. Place the shaped loaves into greased loaf pans or onto a parchment-lined baking sheet, seam-side down.
Step 7: Second Rise and Baking Preparation
Cover the shaped loaves loosely with plastic wrap or a clean kitchen towel and let them rise again in a warm place for another 45 minutes to 1 hour, or until they have nearly doubled in size and look puffy. While the dough is on its second rise, preheat your oven to 375°F (190°C). If you’re using loaf pans, ensure they are lightly greased. If you’re baking freeform on a baking sheet, ensure the parchment paper is secure.
Step 8: Baking the Buttermilk Bread
Once the loaves have completed their second rise and the oven is preheated, it’s time to bake! Carefully place the loaves into the preheated oven. Bake for 30 to 40 minutes, or until the crust is golden brown and the internal temperature of the bread reaches 190°F to 200°F (88°C to 93°C) on an instant-read thermometer. You can also tap the bottom of the loaf; it should sound hollow. If the crust is browning too quickly, you can loosely tent the loaves with aluminum foil.
Step 9: Cooling and Enjoying
Once baked, immediately remove the bread from the loaf pans and place it on a wire rack to cool completely. This is crucial to prevent the bottom crust from becoming soggy. Resist the urge to slice into the warm bread too soon, as the internal structure is still setting. Allowing it to cool will result in the best texture and flavor. Once cooled, slice and enjoy your homemade Buttermilk Bread! It’s perfect for toasting, sandwiches, or simply slathered with butter.
Conclusion:
There you have it – your guide to creating the most wonderfully soft and flavorful Buttermilk Bread Recipe! We’ve walked through each step, from activating your yeast to achieving that perfect golden crust. This Buttermilk Bread Recipe isn’t just a loaf; it’s a warm hug, perfect for any occasion. Its tender crum extractb and subtle tang make it incredibly versatile. Enjoy it slathered with butter, as the base for your favorite sandwiches, or alongside a hearty soup. Don’t be afraid to experiment! Adding a sprinkle of herbs like rosemary or chives to the dough, or even a touch of garlic powder, can elevate this classic. For a sweeter twist, consider a cinnamon-sugar swirl. The beauty of this Buttermilk Bread Recipe lies in its adaptability. So, get baking, have fun, and savor the delicious results!
Frequently Asked Questions about Buttermilk Bread Recipe:
Q: My Buttermilk Bread Recipe didn’t rise as much as I expected. What could have gone wrong?
A: Several factors can affect bread rising. Ensure your yeast was fresh and properly activated in warm, not hot, liquid. Over-kneading or under-kneading can also impact the rise, as can the ambient temperature of your kitchen – a warmer environment is generally better for proofing. Make sure you allowed the dough to proof for the full recommended time.
Q: Can I use regular milk instead of buttermilk for this Buttermilk Bread Recipe?
A: While you can substitute regular milk, the texture and flavor won’t be quite the same. To achieve a similar tang and tenderness, you can make a buttermilk substitute by adding one tablespoon of white vinegar or lemon juice to one cup of regular milk and letting it sit for 5-10 minutes before using it in your Buttermilk Bread Recipe. This will mimic the acidity of real buttermilk.
Easy Buttermilk Bread Recipe-Soft & Delicious
A soft and delicious homemade buttermilk bread recipe that’s easy to make and perfect for any occasion.
Ingredients
-
1 packet active dry yeast
-
1 pinch ground ginger
-
1 teaspoon granulated sugar
-
1/4 cup warm water (105°F – 110°F)
-
2 cups cultured buttermilk (warm, 105°F – 110°F)
-
1/3 cup honey
-
1 teaspoon kosher salt
-
3/4 teaspoon baking soda
-
6 cups bread flour
-
1/4 cup unsalted butter, melted and cooled
Instructions
-
Step 1
In a small bowl, combine warm water, sugar, and yeast. Let sit for 5-10 minutes until foamy. -
Step 2
In a large bowl, whisk together warm buttermilk, honey, and melted butter. Add the foamy yeast mixture, salt, and ginger. Stir to combine. -
Step 3
Gradually add bread flour, about one cup at a time, mixing until a shaggy dough forms and pulls away from the sides of the bowl. -
Step 4
Knead the dough for 8-10 minutes (stand mixer) or 10-15 minutes (by hand) until smooth and elastic. -
Step 5
Place dough in a greased bowl, cover, and let rise in a warm place for 1 to 1.5 hours, or until doubled in size. -
Step 6
Punch down dough, divide into two, and shape into loaves. Place in greased loaf pans or on a baking sheet. -
Step 7
Cover loaves and let rise for 45 minutes to 1 hour. Preheat oven to 375°F (190°C). -
Step 8
Bake for 30-40 minutes, or until golden brown and internal temperature reaches 190°F-200°F (88°C-93°C). -
Step 9
Remove from pans and cool completely on a wire rack before slicing and enjoying.
Important Information
Nutrition Facts (Per Serving)
It is important to consider this information as approximate and not to use it as definitive health advice.
Allergy Information
Please check ingredients for potential allergens and consult a health professional if in doubt.
Leave a Comment