
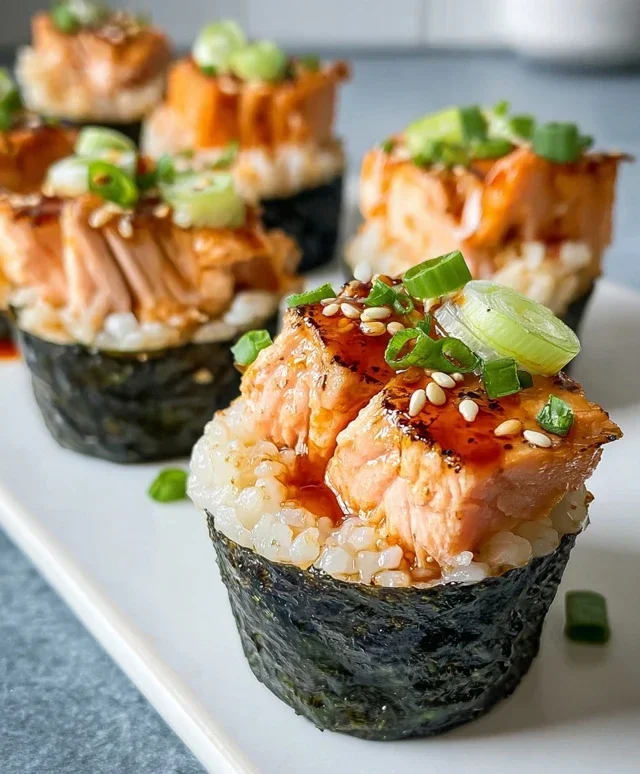
Spicy Salmon Sushi Cups are about to become your new go-to for weeknight dinners and impressive appetizer spreads! Forget the fuss of rolling intricate maki; these delightful little flavor bombs deliver all the vibrant taste of your favorite sushi in a ridiculously easy-to-assemble cup. We all love the satisfying chew of perfectly cooked sushi rice, the rich, buttery texture of fresh salmon, and that irresistible kick of spicy mayo, right? Well, Spicy Salmon Sushi Cups bundle all those beloved elements into individual portions that are as beautiful as they are delicious. What truly sets these Spicy Salmon Sushi Cups apart is their incredible versatility. You can customize them with your favorite toppings – think crunchy sesame seeds, slivers of avocado, or a sprinkle of green onions. They’re perfect for a quick and healthy meal, a crowd-pleasing party appetizer, or even a fun and interactive culinary adventure to embark on with friends and family. Get ready to impress yourself and everyone you share them with!

Spicy Salmon Sushi Cups
Get ready to impress yourself and your guests with these vibrant and delicious Spicy Salmon Sushi Cups! These little flavor bombs are surprisingly easy to make and offer a delightful explosion of textures and tastes. They’re perfect for a light lunch, an appetizer, or even a fun dinner party. Forget the fuss of rolling; these cups are all about accessible, fantastic sushi flavor.
Ingredients:
Cooking Instructions:
1. Prepare the Sushi Rice
The foundation of any good sushi dish is perfectly cooked rice. I start by rinsing my ⅔ cup of sushi rice (or sticky Jasmine rice if you can’t find sushi rice) under cold running water. Keep rinsing until the water runs mostly clear; this removes excess starch and prevents the rice from becoming gummy. Then, I cook the rice according to the package instructions. Typically, this involves combining the rinsed rice with the specified amount of water in a saucepan and bringin extractg it to a boil. Once boiling, I reduce the heat to low, cover the pot tightly, and let it simmer for about 15-20 minutes, or until all the water is absorbed. It’s crucial to resist the urge to lift the lid during this steaming process! Once cooked, I let the rice sit, covered, off the heat for another 10 minutes to steam through completely. While the rice is still warm, I gently stir in the 1 tablespoon of rice vinegar. This adds that signature slightly tangy flavor that makes sushi rice so special. I then spread the rice onto a baking sheet or large plate to cool down to room temperature, which helps to prevent it from clumping.
2. Create the Spicy Salmon Filling
This is where the magic happens! In a medium bowl, I combine the cubed 1 lb of salmon. I then add the 2 tablespoons of Japanese mayonnaise, which provides a wonderfully creamy base. For a kick, I stir in 1 tablespoon of sriracha. If you prefer a milder flavor, you can certainly reduce or omit the sriracha. A ¼ teaspoon of sesame oil adds a lovely nutty depth. Finally, I drizzle in 1 ½ tablespoons of soy sauce for that essential umami punch. I gently mix everything together until the salmon is evenly coated. Be careful not to overmix, as we don’t want to break down the salmon too much. The goal is to have distinct, bite-sized pieces of salmon coated in that flavorful sauce.
3. Assemble the Nori Cups
Now for the fun part – creating our edible vessels! I take the 3 nori sheets and, using kitchen scissors, I cut each sheet into 4 equal squares. This gives us 12 squares, which will be our sushi cup bases. To make them pliable enough to form into cups, I briefly pass each nori square over a low flame on my gas stovetop for a few seconds per side. You can also do this by holding it close to a toaster element, but be very careful not to burn it. This step makes the nori slightly crisp and then pliable, allowing it to be molded without cracking. I then gently press each nori square into a small muffin tin or into the palm of my hand, creating a small cup or bowl shape.
4. Fill and Decorate Your Sushi Cups
With our nori cups ready, it’s time to fill them! I start by placing a spoonful of the cooled sushi rice into each nori cup, pressing it down gently to form a base. Then, I generously top the rice with the prepared spicy salmon mixture. I aim for a good mound of salmon in each cup, ensuring there’s plenty of that delicious sauce. For the spicy mayo drizzle, in a small bowl, I combine ¼ cup of Japanese mayonnaise with 1 tablespoon of sriracha. I stir this until it’s smooth and creamy. Using a small spoon or a piping bag, I drizzle this spicy mayo generously over the salmon in each cup.
5. Add the Finishing Touches
The final flourish makes these Spicy Salmon Sushi Cups truly irresistible. I sprinkle a generous amount of sliced green onions over the spicy mayo. Their fresh, sharp flavor and bright green color add a wonderful contrast. Next, I sprinkle on some sesame seeds. Toasted sesame seeds add a delightful nutty crunch and visual appeal. I like to toast mine in a dry skillet over medium heat for a minute or two until fragrant, but store-bought toasted sesame seeds work perfectly too. If you have any extra spicy mayo, you can add another small drizzle for extra oomph. These cups are best served immediately to enjoy the crispness of the nori and the freshness of the ingredients. They are a fantastic way to enjoy sushi flavors without the rolling mat!
Conclusion:
There you have it – your guide to creating delicious and vibrant Spicy Salmon Sushi Cups! This recipe is fantastic because it delivers all the incredible flavors and textures of sushi in a fun, bite-sized, and incredibly approachable format. Perfect for a quick weeknight meal, a stunning appetizer, or even a party centerpiece, these sushi cups are sure to impress. The combination of perfectly cooked, seasoned salmon with the tangy sushi rice and a kick of spice is simply irresistible. I encourage you to give these Spicy Salmon Sushi Cups a try; you might just find yourself making them again and again!
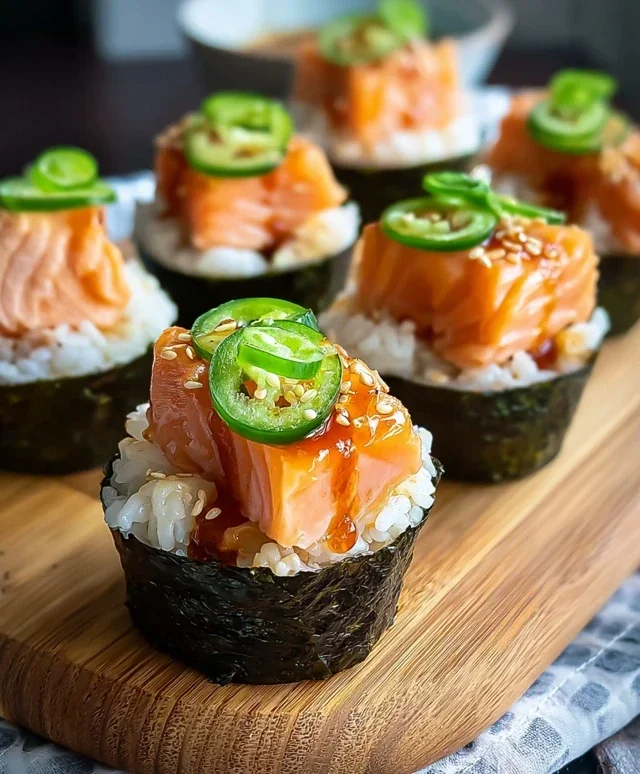
For serving, consider garnishing with extra sesame seeds, thinly sliced scallions, a drizzle of sriracha mayo, or even some pickled gin extractger on the side. They also pair beautifully with a simple cucumber salad or some edamame.
If you’re looking for variations, don’t hesitate to experiment! You could swap the salmon for cooked shrimp, tuna, or even firm tofu for a vegetarian option. Adjust the spice level to your preference by adding more or less sriracha, or even a pinch of cayenne pepper. Some fresh avocado cubes or a sprinkle of tobiko would also be delightful additions.
Frequently Asked Questions:
Can I use raw salmon for these sushi cups?
While this recipe focuses on cooked salmon for safety and ease, you absolutely can use sushi-grade raw salmon if you prefer. Ensure it’s specifically labeled as safe for raw consumption and handle it with care.
How long do the spicy salmon sushi cups last in the refrigerator?
For the best flavor and texture, I recommend enjoying your sushi cups within 24 hours. Store them in an airtight container in the refrigerator.
What is the best way to ensure the sushi rice is perfectly seasoned?
The key is to season the rice while it’s still warm. Gently fold in the seasoned rice vinegar mixture until evenly distributed. Allow it to cool slightly before assembling the cups for the best texture.
Spicy Salmon Sushi Cups
Delicious and easy-to-make spicy salmon sushi cups, perfect for a quick appetizer or light meal.
Ingredients
-
1 lb salmon, cut into small cubes
-
2 tablespoons Japanese mayonnaise
-
1 tablespoon sriracha
-
1 ½ tablespoons soy sauce
-
3 nori sheets, cut into 4 squares each
-
⅔ cup uncooked sushi rice
-
Water as per rice package instructions
-
1 tablespoon rice vinegar
-
¼ cup Japanese mayonnaise
-
1 tablespoon sriracha
-
Sliced green onions
-
Sesame seeds
Instructions
-
Step 1
Cook sushi rice according to package instructions. Once cooked, let it cool slightly. -
Step 2
In a bowl, combine the cubed salmon with 2 tablespoons of Japanese mayonnaise, 1 tablespoon of sriracha, sesame oil, and 1 ½ tablespoons of soy sauce. Mix well. -
Step 3
In a separate small bowl, mix 1 tablespoon of rice vinegar with the ¼ cup of Japanese mayonnaise and 1 tablespoon of sriracha to create the spicy mayo topping. -
Step 4
Gently fold the cooked sushi rice with the rice vinegar until evenly distributed. -
Step 5
Take a nori square and press it into the bottom of a small ramekin or muffin tin to form a cup shape. -
Step 6
Fill each nori cup with a portion of the seasoned sushi rice. -
Step 7
Top the rice with the spicy salmon mixture. -
Step 8
Drizzle generously with the prepared spicy mayo. -
Step 9
Garnish with sliced green onions and sesame seeds before serving.
Important Information
Nutrition Facts (Per Serving)
It is important to consider this information as approximate and not to use it as definitive health advice.
Allergy Information
Please check ingredients for potential allergens and consult a health professional if in doubt.


Leave a Comment