
Easy St. Patrick’s Day Cookies are about to become your new favorite way to celebrate the luck of the Irish! This recipe is designed for everyone, from baking novices to seasoned pros, who want to add a touch of festive fun to their St. Paddy’s Day without the fuss. We all know the joy of a homemade treat, and these delightful cookies are no exception. They’re wonderfully simple to whip up, meaning you can spend less time in the kitchen and more time enjoying the vibrant green spirit of the holiday with loved ones. What truly makes these easy St. Patrick’s Day cookies so special is their adaptability. Whether you prefer a classic sugar cookie base or want to experiment with a hint of mint, they’re the perfect canvas for your creativity. Get ready to bake up some smiles and a whole lot of green cheer!
Why You’ll Love These Easy St. Patrick’s Day Cookies
Simple Ingredients, Big Flavor
Perfect for All Ages
Guaranteed to Bring a Smile

Easy St. Patrick’s Day Cookies
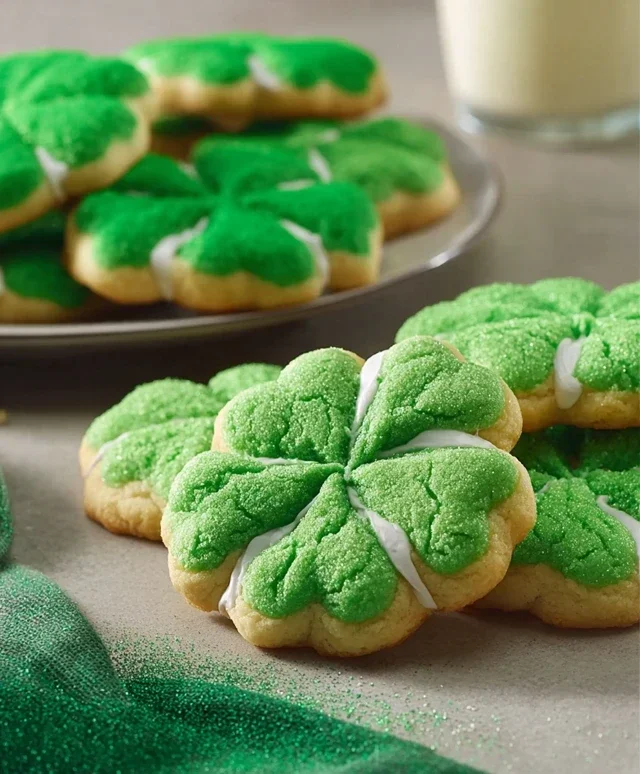
Get ready to add a touch of festive cheer to your St. Patrick’s Day celebrations with these incredibly easy and utterly delicious cookies! Forget complicated doughs and long chilling times. These cookies come together in a flash, making them perfect for last-minute bakers or even as a fun activity to do with little ones. The vibrant green color is instantly recognizable and sure to bring smiles to everyone’s faces. They have a delightful cake-like texture that’s wonderfully soft and slightly chewy, making them incredibly moreish. Plus, the simple sugar glaze adds just the right amount of sweetness without being overpowering. These are the kind of cookies that are as enjoyable to make as they are to eat!
Ingredients:
Getting Started: The Cookie Dough
This is where the magic begin extracts, and trust me, it’s remarkably simple. To start, gather all your ingredients. Having everything measured out beforehand will make the process even smoother. In a large mixing bowl, combine your dry white cake mix. You don’t need to do anything special to it; just pour the entire contents of the box into the bowl. Next, crack in your two large eggs. Make sure your eggs are at room temperature; this helps them incorporate more evenly into the batter. Then, measure out your 1/3 cup of vegetable oil. Pour this directly into the bowl with the cake mix and eggs. Now, for that iconic St. Patrick’s Day color, it’s time for the Kelly green gel food coloring. Gel food coloring is fantastic because it’s highly concentrated, meaning you get a vibrant hue without adding too much liquid, which could affect the cookie’s texture. Start with the 1/4 teaspoon, and you can always add a tiny bit more if you desire a deeper green, but this amount usually provides a beautiful, festive shade.
Mixing the Dough: A Quick and Easy Process
Once all your ingredients are in the bowl, it’s time to mix. You can use an electric mixer on low speed, or if you’re feeling energetic, a sturdy whisk or spatula will do the job perfectly. Start by gently mixing the ingredients until they are just combined. Be careful not to overmix at this stage. Overmixing can develop the gluten in the cake mix too much, leading to tougher cookies. You’re looking for a thick, slightly sticky dough. It will resemble a very thick cake batter. Scrape down the sides of the bowl a couple of times to ensure everything is fully incorporated. The dough will be a lovely, consistent shade of green. If you feel the color isn’t quite as vibrant as you’d like, now is the time to add another tiny drop of gel food coloring and mix it in gently until you achieve your desired shade. Remember, gel colors are potent, so a little goes a long way!
Shaping Your Festive Cookies
Now that your beautiful green dough is ready, it’s time to form the cookies. You have a couple of options here, both equally easy. The first method is to simply roll the dough into small balls, about 1 inch in diameter. You can use a small cookie scoop for consistent sizing, or just your hands. As you roll the balls, the dough can be a little sticky. To prevent this, you can lightly grease your hands with a little bit of vegetable oil or flour them lightly. Place these dough balls onto baking sheets lined with parchment paper. Leave about 2 inches of space between each cookie, as they will spread slightly during baking. If you prefer a flatter cookie, you can lightly press down on each dough ball with the palm of your hand or the bottom of a glass. Another fun option, especially for kids, is to use small St. Patrick’s Day-themed cookie cutters. Lightly flour your work surface and rolling pin, then gently roll out the dough to about 1/2 inch thickness and cut out your shapes. Be aware that the dough is quite soft, so work quickly and carefully if using cutters.
Baking the Perfect Green Cookies
Preheat your oven to 350°F (175°C) while you’re shaping your cookies. This ensures the oven is at the correct temperature when your cookies are ready to bake. Place your prepared baking sheets into the preheated oven. The baking time will vary slightly depending on the size and thickness of your cookies, but generally, they will need about 10 to 12 minutes. You’re looking for the edges of the cookies to be lightly golden brown, and the centers to appear set. They shouldn’t be deeply browned, as this will result in a dry cookie. It’s always better to underbake slightly than overbake, especially with cake mix cookies, as they will continue to firm up as they cool. Keep a close eye on them in the last few minutes of baking.
The Simple Sugar Glaze
While your cookies are baking, let’s get the simple, yet effective, sugar glaze ready. In a small bowl, combine the 3 tablespoons of granulated sugar and the 6 tablespoons of powdered sugar. This combination provides a lovely balance of sweetness and texture. Gradually whisk in a tiny amount of milk or water, starting with about 1 tablespoon. Add more liquid, a teaspoon at a time, until you reach a smooth, pourable consistency. You want it thick enough to coat the cookies but thin enough to drizzle. If it’s too thick, add a little more liquid; if it’s too thin, whisk in a little more powdered sugar.
Decorating for St. Paddy’s Day Fun!
Once your cookies are out of the oven, let them cool on the baking sheets for a few minutes. This allows them to firm up enough to be moved. Then, carefully transfer them to a wire rack to cool completely. It’s crucial that the cookies are fully cooled before glazing, otherwise, the glaze will just melt and slide off. Once the cookies are at room temperature, it’s time for the final decorative touch. You can either dip the tops of the cooled cookies into the glaze, or use a spoon to drizzle the glaze over them. For extra festive flair, you can sprinkle them with green sanding sugar or even tiny green sprinkles while the glaze is still wet. Let the glaze set completely before stacking or storing your delightful St. Patrick’s Day cookies. Enjoy your easy, homemade treats!
Conclusion:
There you have it – a recipe for incredibly Easy St. Patrick’s Day Cookies that are sure to bring a smile to everyone’s face! We’ve designed this recipe to be as straightforward and enjoyable as possible, perfect for bakers of all skill levels, and a fantastic way to add a festive touch to your celebrations. The simplicity of the ingredients and the minimal steps make these cookies a guilt-free treat to whip up, even at the last minute. Their delightful buttery flavor and charming green hue are guaranteed to be a hit at any St. Patrick’s Day gathering.
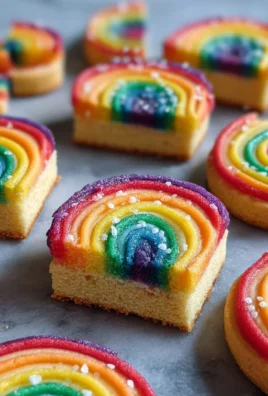
For serving suggestions, these cookies are wonderful on their own, but they also pair beautifully with a glass of cold milk or a cup of hot tea. Consider arrangin extractg them on a festive platter alongside other green treats for a truly eye-catching dessert table. If you’re looking for variations, feel free to experiment with different extracts like almond or peppermint for a unique twist. You could also try adding a sprinkle of edible gold glitter or green sanding sugar before baking for extra sparkle. Don’t be afraid to get creative and make these Easy St. Patrick’s Day Cookies your own!
I truly hope you enjoy making and sharing these cheerful cookies. They are a simple yet effective way to embrace the spirit of the holiday and create some sweet memories. Give them a try – I’m confident you’ll be delighted with the results!
Frequently Asked Questions:
Can I make these cookies ahead of time?
Absolutely! These cookies store very well. Once completely cooled, you can store them in an airtight container at room temperature for up to 3-4 days. This makes them perfect for preparing a day or two in advance of your St. Patrick’s Day festivities.
What if I don’t have green food coloring?
No problem at all! While green is traditional for St. Patrick’s Day, these cookies are delicious regardless of their color. You can omit the green food coloring altogether for a classic butter cookie, or you could use other colors if you’re feeling adventurous. They’ll still be wonderfully tasty!
Can I freeze the cookie dough?
Yes, you can! You can form the dough into balls and freeze them on a baking sheet until solid, then transfer them to a freezer-safe bag or container. Bake directly from frozen, adding a minute or two to the baking time. This is a great way to have homemade cookies ready on demand.
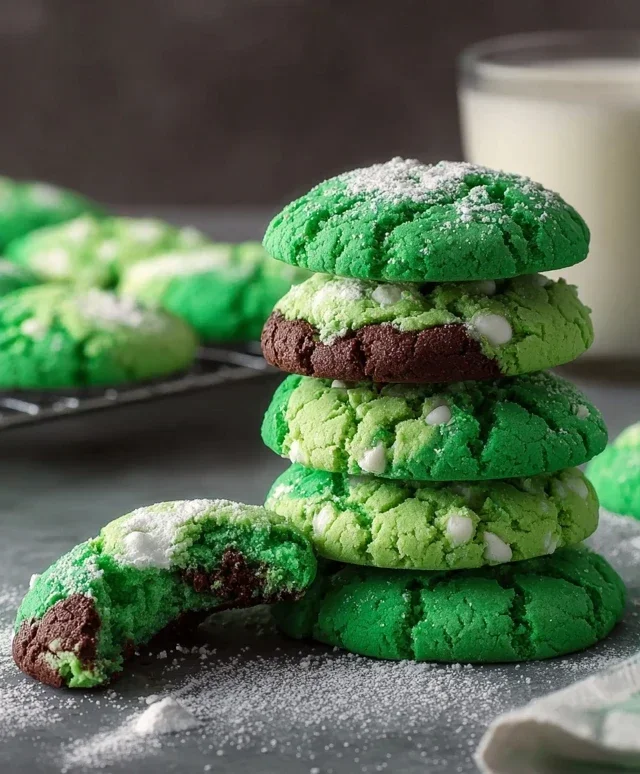
Easy St. Patrick’s Day Cookies
Simple and festive green cookies perfect for St. Patrick’s Day celebrations, made with cake mix for ultimate ease.
Ingredients
-
1 box (15.25 oz) white cake mix (about 3 cups)
-
2 large eggs
-
1/3 cup vegetable oil
-
1/4 teaspoon Kelly green gel food coloring
-
3 tablespoons granulated sugar
-
6 tablespoons powdered sugar
Instructions
-
Step 1
Preheat oven to 350°F (175°C). Line baking sheets with parchment paper. -
Step 2
In a large bowl, combine the white cake mix, eggs, and vegetable oil. Mix until well combined. -
Step 3
Add the Kelly green gel food coloring and mix thoroughly until the dough is a uniform vibrant green color. -
Step 4
Roll the dough into 1-inch balls. In a small bowl, combine the granulated sugar. Roll each dough ball in the granulated sugar. Place the balls about 2 inches apart on the prepared baking sheets. -
Step 5
Bake for 8-10 minutes, or until the edges are lightly golden and the centers are set. -
Step 6
Let the cookies cool on the baking sheets for a few minutes before transferring them to a wire rack to cool completely. Once cooled, dust with powdered sugar.
Important Information
Nutrition Facts (Per Serving)
It is important to consider this information as approximate and not to use it as definitive health advice.
Allergy Information
Please check ingredients for potential allergens and consult a health professional if in doubt.

Leave a Comment