
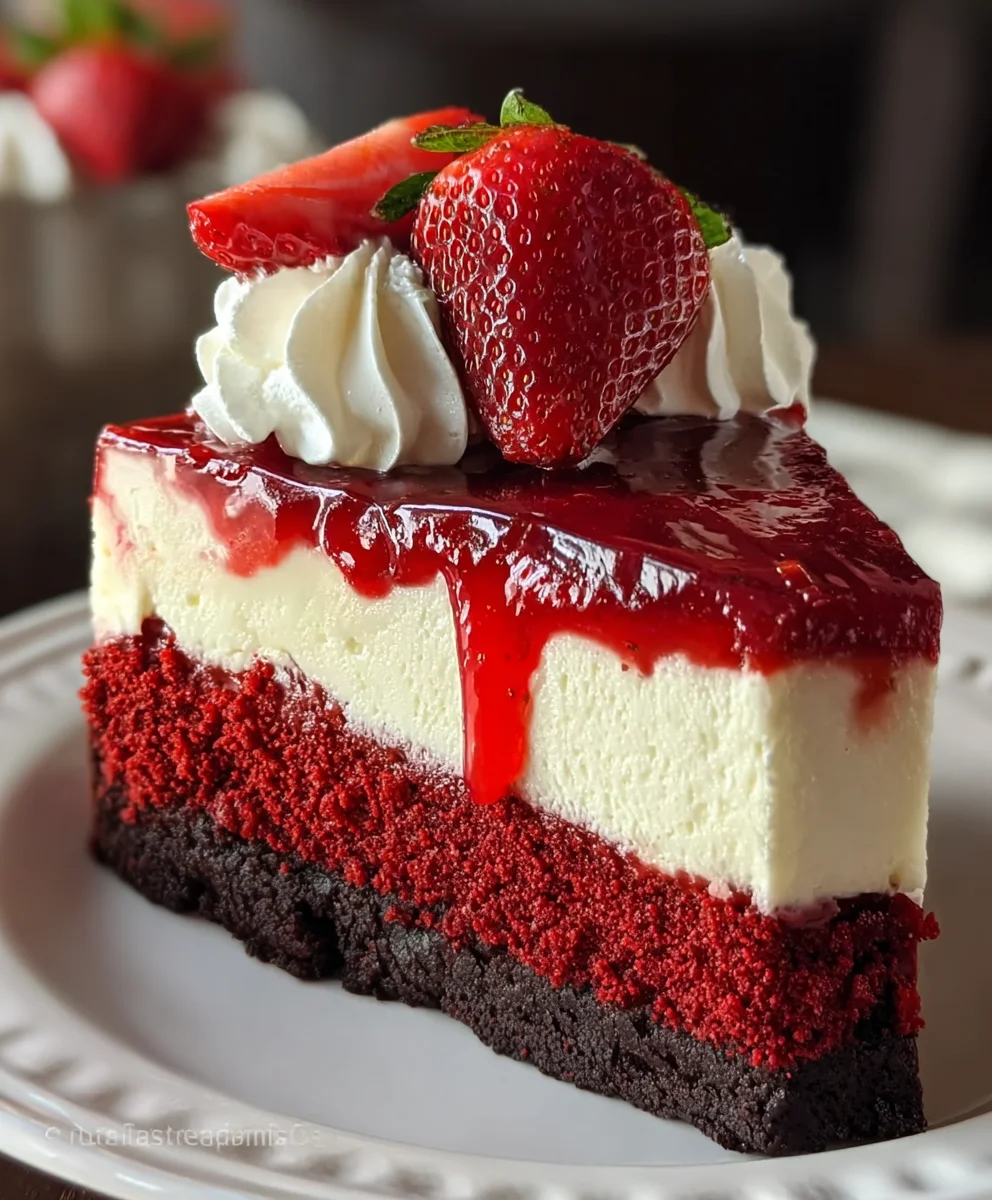
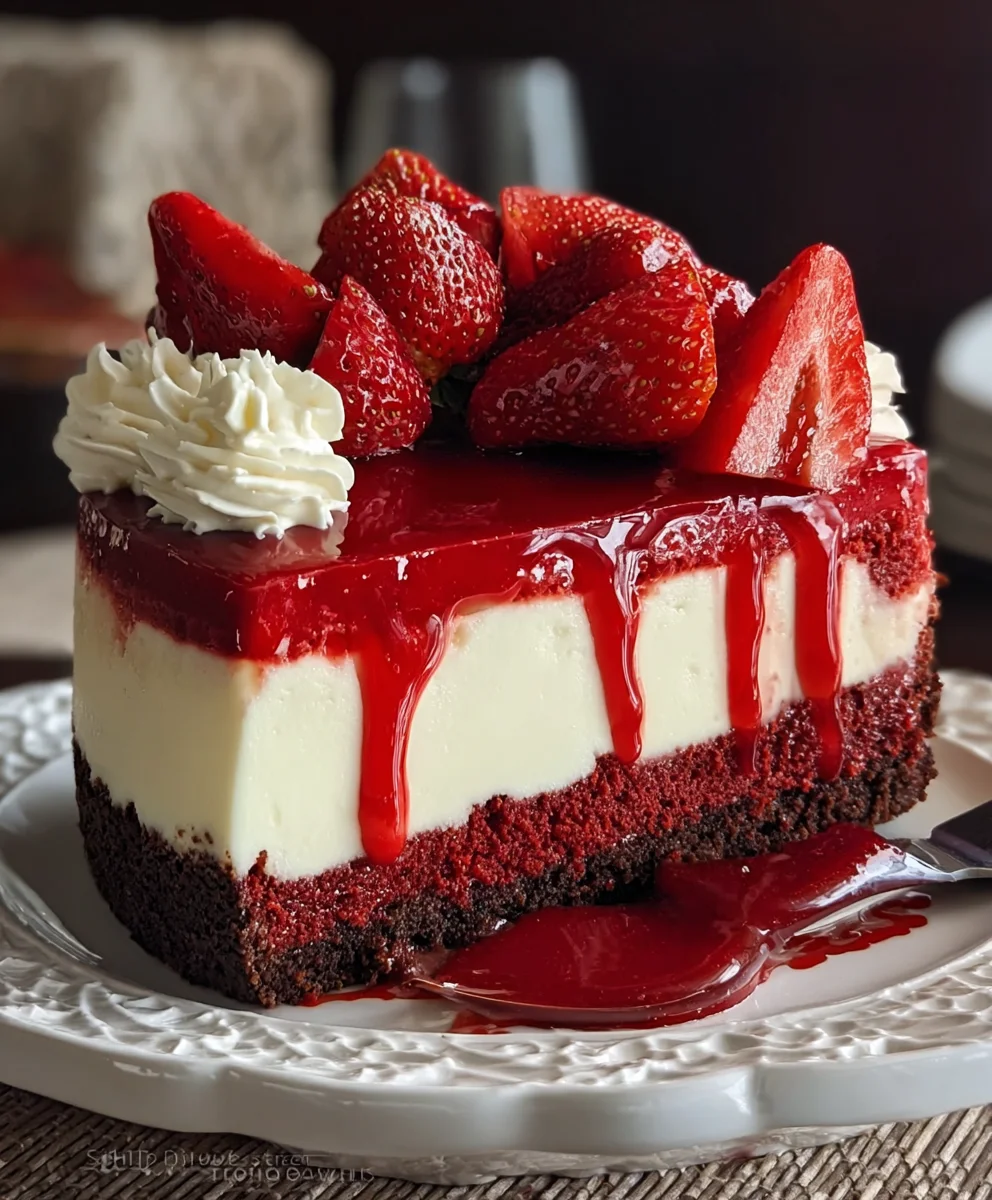
Red Velvet Strawberry Cheesecake is more than just a dessert; it’s an experience that captivates the senses. Imagin extracte the deep, rich cocoa notes of classic red velvet cake embracing a velvety smooth, tangy cheesecake filling, all crowned with a vibrant swirl of sweet, fresh strawberry compote. It’s a dessert that whispers indulgence and shouts celebration. People adore this magnificent creation because it harmoniously blends contrasting textures and flavors – the slightly crum extractbly cake base, the creamy cheesecake, and the burst of juicy strawberries. What truly makes the Red Velvet Strawberry Cheesecake so special is its visual appeal; the dramatic red hue, the creamy white cheesecake, and the ruby-red strawberry topping create a stunning tableau that’s almost too beautiful to eat. It’s the perfect centerpiece for birthdays, anniversaries, or simply a moment when you deserve a truly decadent treat.

Ingredients:
- 1 1/2 cups all-purpose flour
- 1 cup granulated sugar (for red velvet cake layer)
- 1/4 cup unsweetened cocoa powder
- 1 teaspoon baking powder
- 1/2 teaspoon baking soda
- 1/2 teaspoon salt
- 1 cup vegetable oil
- 1/2 cup buttermilk
- 1 large egg
- 2 tablespoons red food coloring
- 1 teaspoon vanilla extract
- 1 teaspoon white vinegar
- 16 ounces cream cheese, softened (for cheesecake layer)
- 1 cup granulated sugar (for cheesecake layer)
- 1/2 cup sour cream
Preparing the Red Velvet Cake Layer
Dry Ingredients Combine
In a medium-sized mixing bowl, I whisk together the 1 1/2 cups of all-purpose flour, 1 cup of granulated sugar designated for the cake, the 1/4 cup of unsweetened cocoa powder, 1 teaspoon of baking powder, 1/2 teaspoon of baking soda, and 1/2 teaspoon of salt. It’s crucial to whisk these thoroughly to ensure even distribution of leavening agents and seasoning, preventing any dense pockets or overly salty bites in the final cake. This step forms the foundation of our vibrant red velvet crum extractb.
Wet Ingredients Blend
In a separate, larger mixing bowl, I combine the 1 cup of vegetable oil, 1/2 cup of buttermilk, the 1 large egg, the striking 2 tablespoons of red food coloring, and 1 teaspoon of vanilla extract. Whisk these ingredients together until they are fully emulsified and the color is a rich, uniform red. The buttermilk is key here, as its acidity reacts with the baking soda to create a rum extractder crumb and a subtle tang that complements the sweetness. The red food coloring is what gives this cake its signature hue, so don’t be shy!
Combining and Activating
Now, I create a well in the center of the dry ingredients and pour the wet ingredients into it. I begin extract to mix these together gently with a spatula or whisk. Once they’re partially combined, I add the 1 teaspoon of white vinegar. The vinegar, when mixed with the buttermilk and baking soda, will create a chemical reaction that further enhances the cake’s leavening and contributes to its characteristic soft, velvety texture. Be careful not to overmix at this stage; a few streaks of flour are acceptable as they will disappear during baking. Overmixing can develop the gluten too much, resulting in a tougher cake.
Baking the Red Velvet Base
I preheat my oven to 350°F (175°C). I will then prepare a springform pan by greasing and flouring it, or lining the bottom with parchment paper to prevent sticking. I pour the red velvet batter evenly into the prepared pan. I’ll bake this for approximately 30-35 minutes, or until a toothpick inserted into the center comes out clean. Once baked, I let the red velvet cake cool in the pan for about 10-15 minutes before carefully inverting it onto a wire rack to cool completely. A fully cooled cake is essential for the next layers.
Crafting the Creamy Cheesecake Layer
Cream Cheese Foundation
While the red velvet cake is cooligin extract I begin preparing the cheesecake filling. In a large mixing bowl, I beat the 16 ounces of softened cream cheese with an electric mixer until it is completely smooth and creamy, free of any lumps. This is a critical step to ensure a silky smooth cheesecake texture. Make sure your cream cheese is truly at room temperature – this makes all the difference.
Sweetening and Enriching
To the smooth cream cheese, I gradually add the 1 cup of granulated sugar designated for the cheesecake layer, mixing on low speed until it’s just incorporated. I then add the 1/2 cup of sour cream and the remaining 1 teaspoon of vanilla extract (if you have any left from the cake ingredients or have extra). I continue to mix until everything is well combined and the mixture is homogenous and luscious. Again, avoid overmixing here to prevent incorporating too much air, which can lead to cracks in the cheesecake.
Assembling the Red Velvet Strawberry Cheesecake
Layering and Chilling
Once the red velvet cake layer is completely cool, I spread the creamy cheesecake mixture evenly over the top of the cake. I then place the entire assembly into the refrigerator for at least 4-6 hours, or preferably overnight, to allow the cheesecake layer to set firmly. This chilling time is crucial for the flavors to meld and for the cheesecake to achieve its characteristic dense, yet creamy consistency. If I were adding a strawberry topping, this is when I would prepare it and have it ready to go.
Conclusion:
There you have it – a guide to creating the show-stopping Red Velvet Strawberry Cheesecake! We’ve walked through each step, from crafting the moist red velvet cake layers to swirling in that vibrant strawberry puree and achieving that perfectly creamy cheesecake texture. This dessert is a true celebration of flavors and textures, making it ideal for birthdays, anniversaries, or any occasion that calls for a touch of decadence. Serve it chilled, garnished with fresh strawberries or a dollop of whipped cream, and watch it disappear. Don’t be afraid to experiment with variations; perhaps a chocolate ganache drizzle or a different berry puree could add another layer of deliciousness to your Red Velvet Strawberry Cheesecake.
I encourage you to try making this Red Velvet Strawberry Cheesecake. While it might seem intricate, each step is manageable, and the end result is incredibly rewarding. Enjoy the process and savor every delicious bite!
Frequently Asked Questions:
Can I make the Red Velvet Strawberry Cheesecake ahead of time?
Absolutely! The Red Velvet Strawberry Cheesecake is best made a day in advance. This allows the flavors to meld beautifully and the cheesecake to set completely, resulting in a firmer, more enjoyable texture. Store it covered in the refrigerator.
What if I don’t have fresh strawberries? Can I use frozen?
Yes, you can definitely use frozen strawberries for the puree. Thaw them completely before pureeing. You might need to strain out some of the excess liquid if they release a lot during thawing to ensure your cheesecake batter isn’t too thin. The flavor will still be wonderful!
Red Velvet Strawberry Cheesecake Delight-Easy Recipe
A delightful layered dessert combining a moist red velvet cake base with a creamy cheesecake topping. Easy to make and perfect for any occasion.
Ingredients
-
1 1/2 cups all-purpose flour
-
1 cup granulated sugar (for red velvet cake layer)
-
1/4 cup unsweetened cocoa powder
-
1 teaspoon baking powder
-
1/2 teaspoon baking soda
-
1/2 teaspoon salt
-
1 cup vegetable oil
-
1/2 cup buttermilk
-
1 large egg
-
2 tablespoons red food coloring
-
1 teaspoon vanilla extract
-
1 teaspoon white vinegar
-
16 ounces cream cheese, softened (for cheesecake layer)
-
1 cup granulated sugar (for cheesecake layer)
-
1/2 cup sour cream
Instructions
-
Step 1
In a medium bowl, whisk together flour, 1 cup sugar, cocoa powder, baking powder, baking soda, and salt for the red velvet cake. -
Step 2
In a separate larger bowl, whisk together vegetable oil, buttermilk, egg, red food coloring, and vanilla extract until emulsified and uniformly red. -
Step 3
Create a well in the dry ingredients and pour in the wet ingredients. Mix gently. Add white vinegar and mix until just combined, being careful not to overmix. -
Step 4
Preheat oven to 350°F (175°C). Grease and flour a springform pan. Pour batter evenly into the pan and bake for 30-35 minutes, or until a toothpick comes out clean. Cool the cake in the pan for 10-15 minutes, then invert onto a wire rack to cool completely. -
Step 5
While the cake cools, beat softened cream cheese in a large bowl until smooth. Gradually add 1 cup sugar and mix until incorporated. Stir in sour cream and remaining vanilla extract until homogenous. -
Step 6
Once the red velvet cake is completely cool, spread the cheesecake mixture evenly over the top. Refrigerate for at least 4-6 hours, or preferably overnight, to set.
Important Information
Nutrition Facts (Per Serving)
It is important to consider this information as approximate and not to use it as definitive health advice.
Allergy Information
Please check ingredients for potential allergens and consult a health professional if in doubt.


Leave a Comment