
Low-Carb Mushroom Pizza is more than just a meal; it’s a culinary revelation for anyone seeking delicious satisfaction without the carb overload. Imagin extracte a symphony of earthy mushrooms, creamy mozzarella, and savory herbs, all nestled atop a delightfully crispy, guilt-free crust. This isn’t your average weeknight dinner; it’s a sophisticated yet incredibly simple pleasure that will have you questioning why you ever settled for traditional pizza again. People adore this dish because it delivers all the comforting, cheesy goodness of a classic pizza experience, but with a smarter, health-conscious twist. What truly makes our Low-Carb Mushroom Pizza special is the ingenious crust – a base that’s both incredibly easy to prepare and provides a fantastic texture, allowing the star ingredients, those glorious mushrooms and melty cheese, to truly shine without the doughy distraction. Get ready to fall in love with pizza all over again, the low-carb way!

Ingredients:
- 4 large portobello mushrooms, with gills and stems removed
- 2 tablespoons olive oil, plus extra for greasing the baking sheet
- 1 teaspoon Italian seasoning
- 1/4 cup pizza sauce
- 1/2 cup shredded mozzarella cheese
- 4-6 cherry tomatoes, sliced
- 2 garlic cloves, pressed
Preparing the Mushroom “Crusts”
The foundation of our Low-Carb Mushroom Pizza starts with the portobello mushrooms. These hefty fungi are going to serve as our delicious, naturally low-carb pizza crusts. Begin extract by thoroughly cleaning the mushrooms. You can gently wipe them with a damp paper towel to remove any dirt. Then, carefully snap or cut out the tough stems. For a cleaner eating experience and to ensure the sauce and toppings adhere well, I recommend scraping out the dark gills from the underside of each mushroom cap. A spoon works perfectly for this task; just scoop them out gently. Once your mushrooms are prepped, place them gill-side up on a baking sheet that you’ve lightly greased with a little extra olive oil. This prevents sticking and helps them cook beautifully.
Flavor Infusion and Pre-Baking
Now, let’s infuse our mushroom canvases with flavor. Drizzle the inside of each mushroom cap with a bit of olive oil. This not only adds richness but also helps to soften the mushroom as it bakes. Sprinkle the Italian seasoning evenly over the oiled surface of each mushroom. This aromatic blend of herbs will impart a wonderful, savory depth to our pizza. Don’t forget the garlic! Press the 2 garlic cloves using a garlic press or mince them very finely, and then evenly distribute this fragrant garlic into the center of each mushroom cap. This initial flavor boost is crucial for a truly delicious mushroom pizza.
Next, we’re going to pre-bake the mushroom caps to remove some of their excess moisture and firm them up slightly before we add our toppings. This step is key to preventing a soggy pizza. Pop the baking sheet with the prepared mushrooms into a preheated oven at 375 degrees Fahrenheit (190 degrees Celsius). Let them bake for about 10 to 12 minutes. You’ll notice they’ll start to release some liquid and become slightly tender. Carefully remove the baking sheet from the oven. You might want to dab any excess liquid that has accumulated in the mushroom caps with a paper towel to ensure a crispier final product.
Topping and Melting
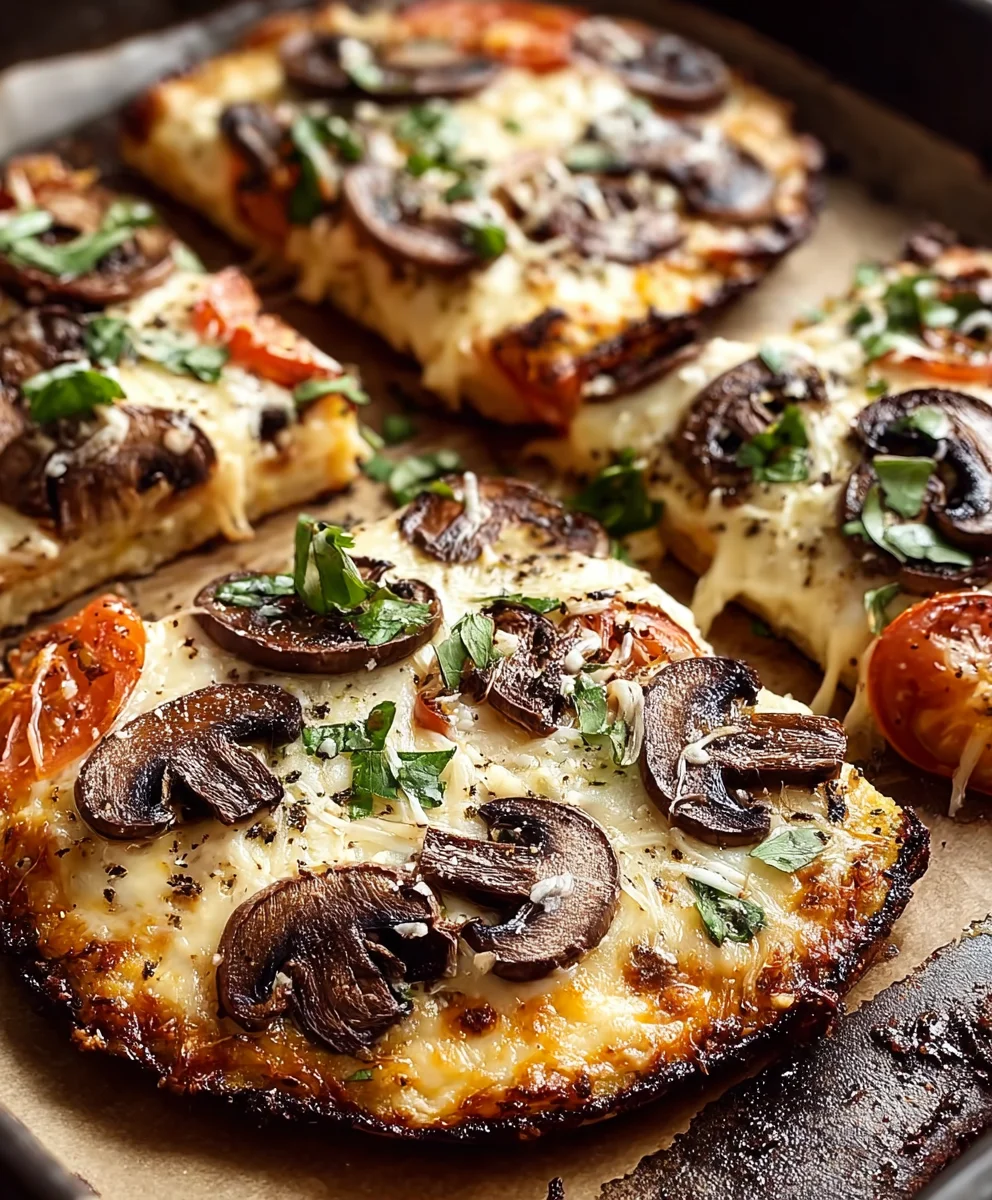
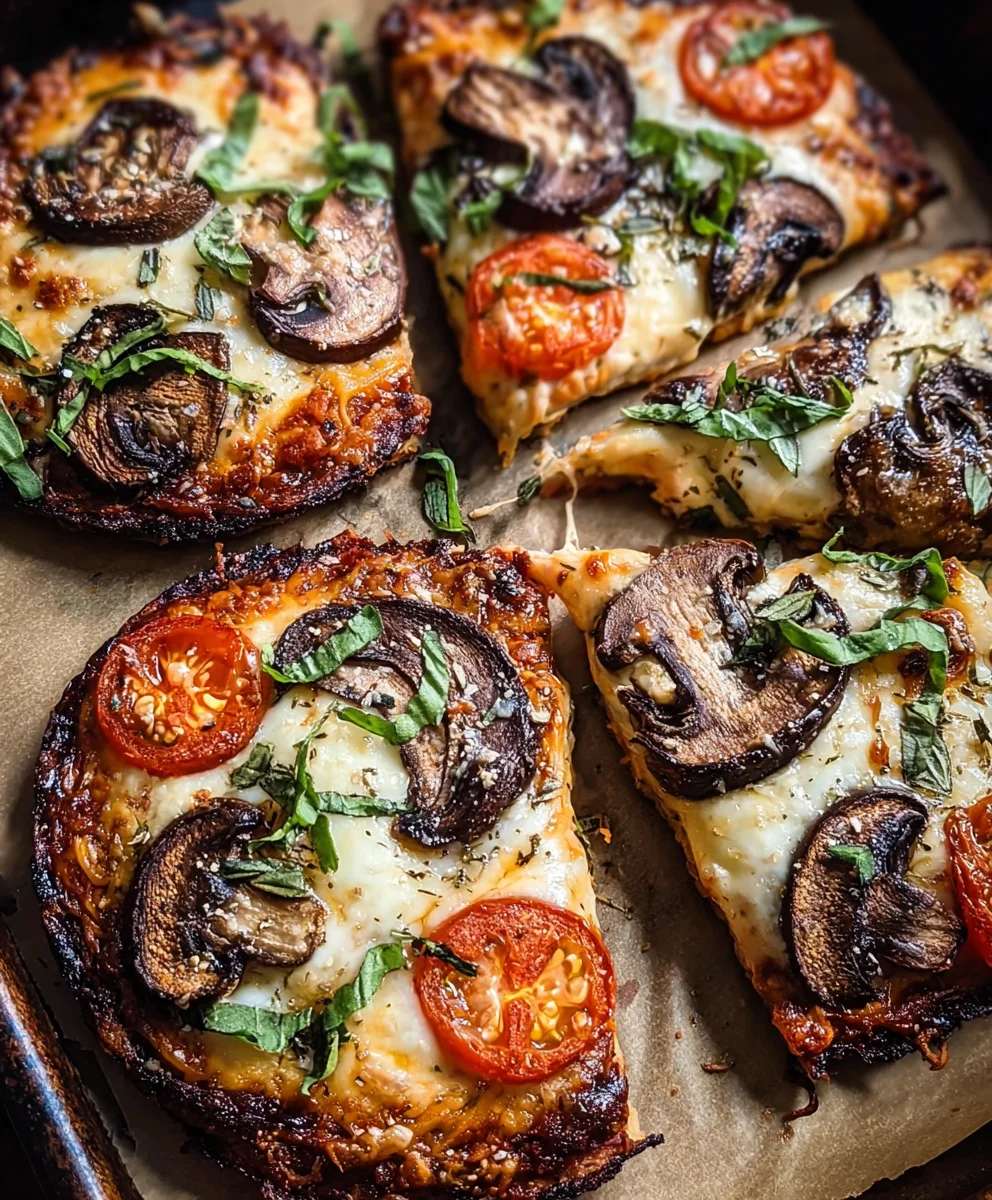
With our mushroom bases ready and slightly softened, it’s time to build our Low-Carb Mushroom Pizza! Distribute the 1/4 cup of pizza sauce evenly among the four mushroom caps. You want to spread it right to the edges, creating a nice saucy layer. Don’t overload them with sauce, as too much can make them wet. After the sauce, it’s time for the star of the cheesy show: the 1/2 cup of shredded mozzarella cheese. Sprinkle the mozzarella generously over the pizza sauce on each mushroom. Try to cover the sauce completely for that classic cheesy pizza experience.
Finally, add your fresh toppings. Arrange the sliced cherry tomatoes over the mozzarella cheese. The vibrant red of the tomatoes will add a beautiful pop of color and a burst of fresh flavor. You can place them in a pattern or just scatter them evenly. At this stage, your pizzas are almost ready for their final bake.
The Grand Finnon-alcoholic ale: Melting and Bubbly Perfection
Now, return the baking sheet with the fully topped mushroom pizzas back into the preheated 375 degrees Fahrenheit (190 degrees Celsius) oven. Bake for another 8 to 10 minutes, or until the mozzarella cheese is melted, bubbly, and has achieved a lovely golden-brown hue in spots. Keep an eye on them during this last phase to prevent any burning. The aroma filling your kitchen will be absolutely irresistible! Once they’re perfectly melted and golden, carefully remove the baking sheet from the oven.
Allow your Low-Carb Mushroom Pizzas to cool for just a couple of minutes on the baking sheet before serving. This brief resting period allows the cheese to set slightly, making them easier to handle. You can then carefully transfer them to plates. Enjoy these delightful, guilt-free pizzas immediately! They are a fantastic way to satisfy your pizza cravings while keeping your carbohydrate intake low.
Conclusion:
And there you have it – your guide to creating a delicious and satisfying Low-Carb Mushroom Pizza! We’ve explored how simple it is to transform humble mushrooms into a fantastic pizza base, delivering all the savory flavors you love without the heavy carbs. This recipe is incredibly versatile, perfect for a weeknight dinner or a healthier weekend treat. Don’t be afraid to get creative with your toppings; think about adding some crum extractbled beef bacon, a sprinkle of fresh herbs like thyme or parsley, or even a drizzle of balsamic glaze after baking for an extra layer of complexity.
Serving this Low-Carb Mushroom Pizza couldn’t be easier. It’s wonderful on its own, or pair it with a crisp green salad dressed with your favorite vinaigrette for a complete and balanced meal. We encourage you to give this recipe a try and discover just how flavorful and enjoyable low-carb eating can be. Enjoy the process and the incredibly tasty results!
Frequently Asked Questions about Low-Carb Mushroom Pizza:
Can I make the mushroom crust ahead of time?
Yes, you can prepare the mushroom crust a day in advance. Cook it as instructed, let it cool completely, and then store it in an airtight container in the refrigerator. When you’re ready to assemble your pizza, simply add your toppings and bake.
What other vegetables can I add to the Low-Carb Mushroom Pizza?
Feel free to load up your Low-Carb Mushroom Pizza with other low-carb vegetables! Sautéed spinach, bell peppers, onions, zucchini, or even a few olives would be delicious additions. Just ensure they are cooked down slightly before adding them to the pizza to avoid excess moisture.
Is this recipe good for begin extractners?
Absolutely! This Low-Carb Mushroom Pizza recipe is very forgiving and straightforward, making it perfecgin extractor beginners. The steps are clear, and the ingredients are easy to find. You’ll be enjoying your homemade pizza in no time!
Low-Carb Mushroom Pizza – Keto & Delicious
A delicious and keto-friendly pizza made with large portobello mushrooms as the crust, topped with classic pizza ingredients.
Ingredients
-
4 large portobello mushrooms, gills and stems removed
-
2 tablespoons olive oil, plus extra for greasing
-
1 teaspoon Italian seasoning
-
1/4 cup pizza sauce
-
1/2 cup shredded mozzarella cheese
-
4-6 cherry tomatoes, sliced
-
2 garlic cloves, pressed
Instructions
-
Step 1
Clean portobello mushrooms, remove stems, and gently scrape out gills. Place gill-side up on a lightly greased baking sheet. -
Step 2
Drizzle inside of mushrooms with olive oil. Sprinkle with Italian seasoning and pressed garlic. Pre-bake at 375°F (190°C) for 10-12 minutes until slightly tender. Dab excess moisture. -
Step 3
Spread pizza sauce evenly over the pre-baked mushroom caps, reaching the edges. -
Step 4
Sprinkle shredded mozzarella cheese generously over the pizza sauce on each mushroom. -
Step 5
Arrange sliced cherry tomatoes over the mozzarella cheese. -
Step 6
Return to the oven at 375°F (190°C) and bake for another 8-10 minutes, until cheese is melted, bubbly, and golden brown. -
Step 7
Let cool for a few minutes before serving. Enjoy!
Important Information
Nutrition Facts (Per Serving)
It is important to consider this information as approximate and not to use it as definitive health advice.
Allergy Information
Please check ingredients for potential allergens and consult a health professional if in doubt.


Leave a Comment