
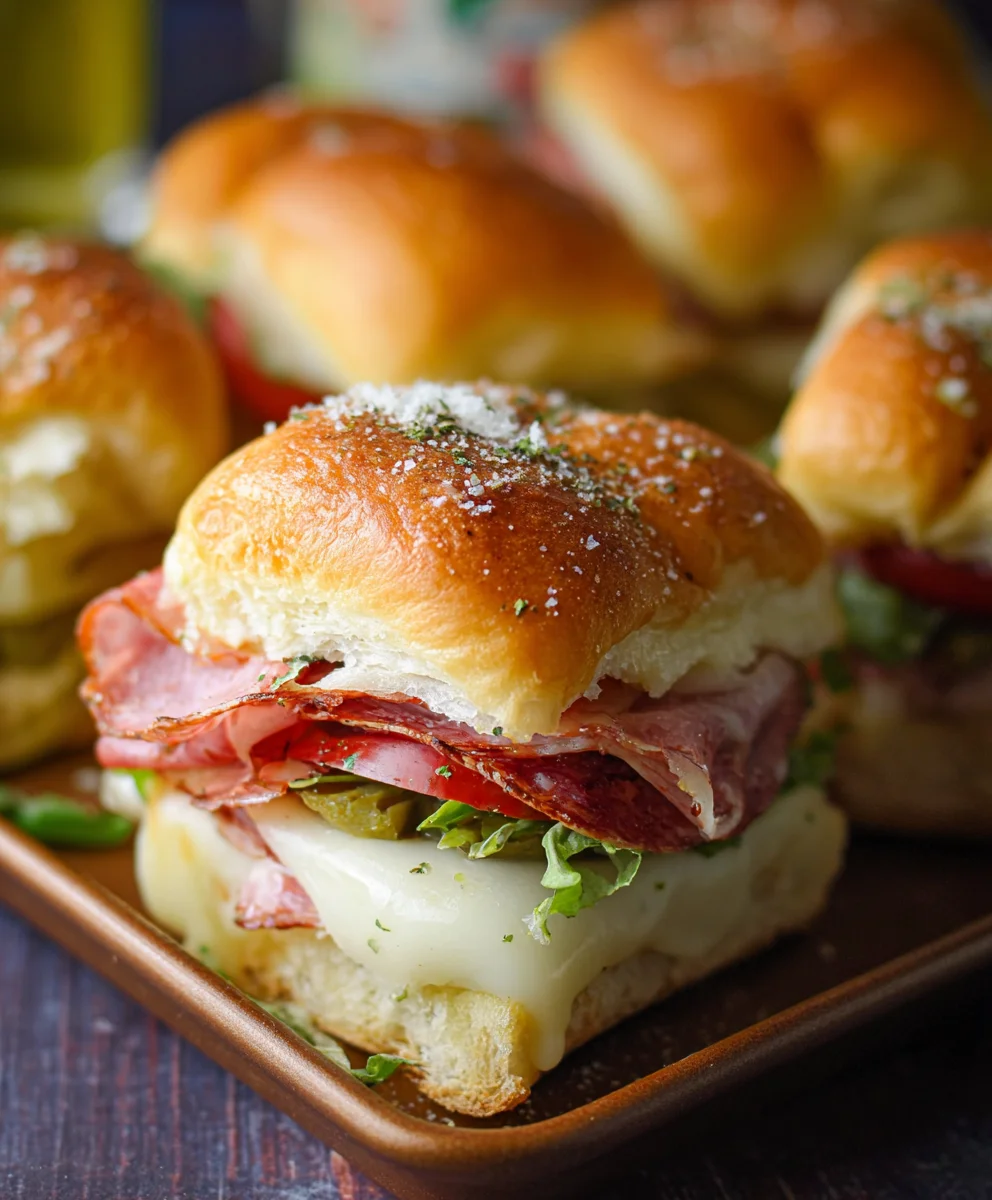
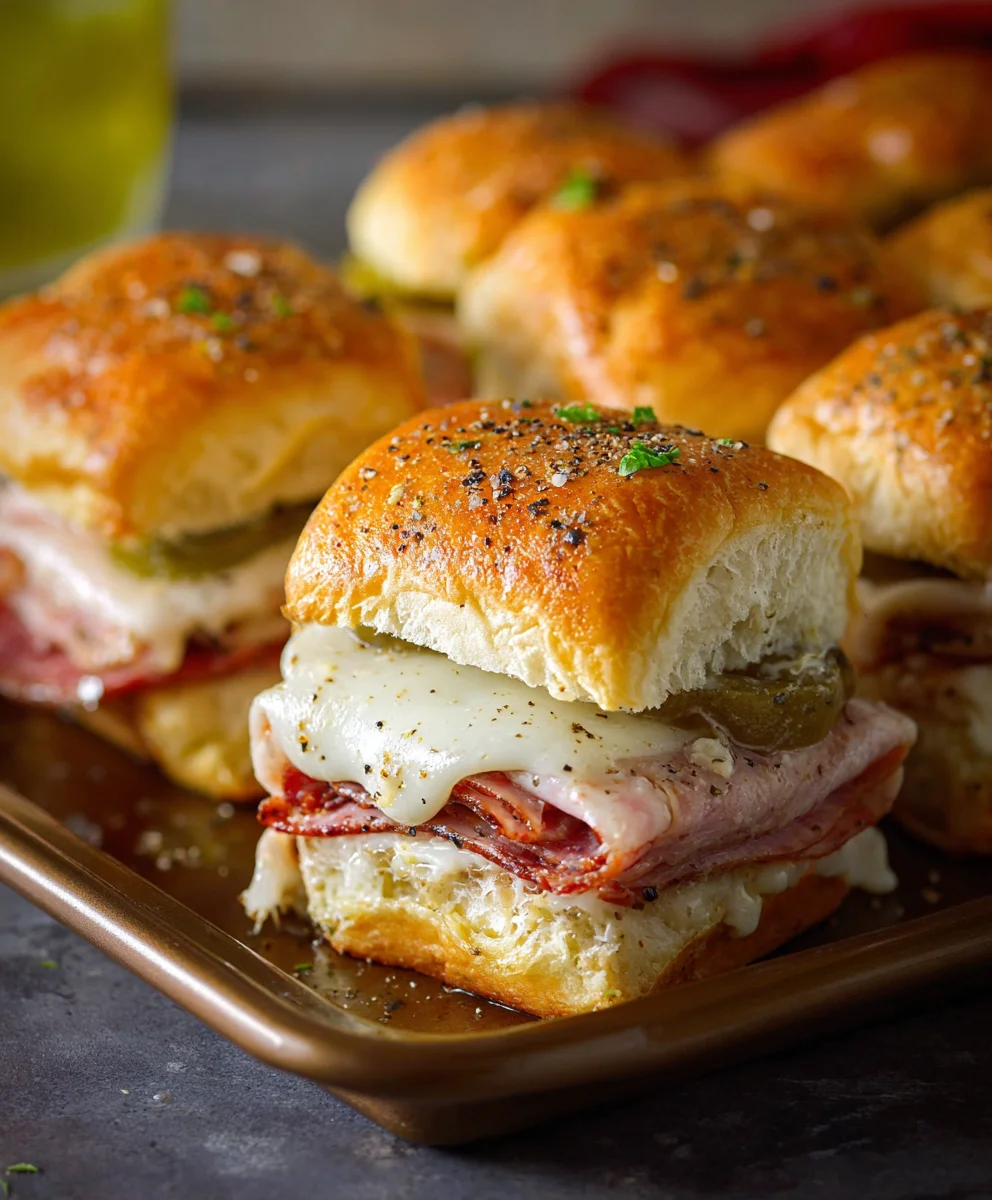
Hot Italian Sub Sliders are more than just a bite-sized sandwich; they’re a flavor explosion waiting to happen! Who doesn’t love a miniature version of their favorite meal? These tiny titans capture the essence of a classic, overstuffed Italian sub – all the savory meats, zesty peppers, and melted cheese, condensed into a perfectly portioned slider. The magic lies in the balance: the slight kick from the Italian dressing, the satisfying chew of the bread, and the melty goodness of provolone cheese. It’s that nostalgic comfort food feeling, elevated. They’re the ultimate crowd-pleaser for game nights, parties, or even just a weeknight craving. Get ready to impress your taste buds and your guests with these irresistible Hot Italian Sub Sliders. We’ll show you how to assemble these little masterpieces that pack a mighty punch!

Ingredients:
- 12 pack rolls, halved lengthwise (Kings Hawaiian rolls are excellent for their soft, slightly sweet texture)
- 6 oz package of beef beef ham, thinly sliced (Opt for a good quality beef hami ham)
- 5 oz package of beef beef salami, thinly sliced (Thinly slbeef salamialami provides a great flavor base)
- 5 oz package of beef beef pepperoni, thinly sliBeef Pepperonieroni adds a delightful spice and meltiness)
- 9 slices provolone cheese (Provolone melts beautifully and has a mild, slightly sharp flavor)
- 1/3 cup pepperoncini, sliced (These add a tangy, slightly spicy kick)
- 1/3 cup pickled hot cherry peppers, sliced (For an extra layer of heat and fruity flavor)
- 1/4 cup salted butter, melted (Unsalted butter can be used, but adjust salt later if needed)
- 1 tsp Italian seasoning (A blend of dried herbs like oregano, basil, and thyme)
- 2 cloves garlic, crushed (Fresh garlic offers a much more vibrant flavor than jarred)
- 1 cup marinara sauce (Your favorite jarred marinara will work perfectly)
Assembling the Hot Italian Sub Sliders
To begin extract crafting these irresistible Hot Italian Sub Sliders, our first step is to get organized and prepare all our components. This ensures a smooth and efficient assembly process, especially when you’re ready to bake. Take your 12-pack of rolls and carefully slice them in half horizontally. You want to aim for an even cut so that each slider has a substantial top and bottom. If you’re using the recommended Kings Hawaiian rolls, their softness makes them easy to slice without crum extractbling. Lay the bottom halves of the rolls out on a baking sheet lined with parchment paper. This makes for easy cleanup later. Now, let’s prepare the flavor bomb that will elevate these sliders from ordinary to extraordinary. In a small bowl, combine the melted salted butter with the crushed fresh garlic and the Italian seasoning. Stir these together thoroughly. The aroma of the garlic and herbs infusing into the butter is simply non-intoxicating and is the first step in creating that signature Italian sub flavor. Brush this garlic-herb butter generously over the cut sides of both the top and bottom halves of your rolls. Don’t be shy with it – this butter mixture is crucial for flavor and for ensuring the rolls get wonderfully toasted.
Layering the Meats and Cheeses
With our rolls buttered and ready, it’s time to build the delicious layers that make these Hot Italian Sub Sliders so satisfying. On the bottom halves of the buttered rgin extracts, begin layering your thinly sliced deli meats. Start withbeef hame beef ham, distributing it evenly across all 12 rolls. Next, add a layer of the thinly slbeef salamieef salami. Follow this with the sbeef pepperoni pepperoni. The combination of these three meats creates a classic Italian sub flavor profile, offering a variety of textures and tastes. Now, it’s time for the cheese! We’ll be using nine slices of provolone cheese. You’ll want to strategically place these slices to cover the meat layers. For example, you can place three slices on every four rolls, or distribute them as evenly as possible across all the sliders. The goal is to have melty, gooey cheese blanketing the meats. If you have any cheese slices that are a little too big, don’t hesitate to tear them to ensure good coverage.
Adding the Zesty Peppers and Marinara
The next phase is where we introduce the tangy and zesty elements that truly define an Italian sub. Take your sliced pepperoncini and scatter them evenly over the provolone cheese on all the sliders. Their bright, vinegary brine will cut through the richness of the meats and cheese beautifully. Then, follow with the sliced pickled hot cherry peppers. Distribute these with a light hand, as their heat can be quite pronounced. The combination of pepperoncini and hot cherry peppers offers a wonderful spicy and tangy counterpoint. Now, for the marinara sauce. This is where the “hot” in our Hot Italian Sub Sliders truly comes into play. Spoon about a tablespoon or two of your prepared marinara sauce over the peppers and meat on each slider. Ensure you get a nice distribution of sauce, as it will meld with the other ingredients as it bakes, creating a cohesive and flavorful bite. You want enough sauce to add moisture and flavor but not so much that the sliders become soggy.
Baking the Sliders to Golden Perfection
It’s now time to bring all these delicious layers together in the oven. Carefully place the top halves of the rolls, cut-side down, onto the bottom halves that are already loaded with all the fixings. Gently press down on the sliders to help them hold together. This is also a good time to check that all your components are well-contained within the rolls. Place the entire baking sheet into a preheated oven. We’re aiming for a gloriously golden-brown and bubbly result. Bake the sliders at 350 degrees Fahrenheit (175 degrees Celsius) for approximately 15 to 20 minutes. Keep a close eye on them during this time. You’re looking for the cheese to be fully melted and possibly starting to ooze out the sides, and the tops of the rolls to be lightly toasted and golden. The heat will warm the meats through and meld all the flavors together beautifully. The smell that will fill your kitchen at this stage is absolutely incredible.
Final Touches and Serving Your Hot Italian Sub Sliders
Once your Hot Italian Sub Sliders have achieved that perfect golden-brown hue and the cheese is wonderfully melted, carefully remove the baking sheet from the oven. The aroma alone is enough to make mouths water! Allow the sliders to rest on the baking sheet for a few minutes before attempting to separate them. This brief resting period helps everything settle and makes them easier to handle. Using a sharp knife or a pizza cutter, carefully slice through the rows of sliders to separate them into individual portions. You can serve these immediately while they are warm and gooey, or you can let them cool slightly. For an extra touch, you could even drizzle a little extra marinara sauce on the side for dipping, or perhaps offer a side of your favorite Italian dressing. These sliders are fantastic on their own, making them a perfect appetizer for a party or a fun, handheld meal for a casual get-together. Enjoy the burst of Italian flavors in every single bite!
Conclusion:
You’ve now got everything you need to create delicious Hot Italian Sub Sliders right in your own kitchen! We’ve walked through the simple steps to assemble these flavor-packed bites, perfect for any gathering or just a satisfying snack. These sliders are wonderfully versatile, and the vibrant combination of Italian meats, melty cheese, and zesty peppers is truly a crowd-pleaser. I hope you enjoy making and sharing these as much as I do!
When serving, these Hot Italian Sub Sliders are fantastic alongside a crisp green salad or a bowl of tomato soup. They also make an ideal appetizer for game nights or parties. Don’t be afraid to get creative with variations! You could swap out the provolone for mozzarella or pepper jack cheese for a different kind of kick. Adding some finely chopped red onion or a sprinkle of dried oregano to the meat mixture before baking can elevate the flavor even further. Don’t hesitate to experiment and make these Hot Italian Sub Sliders your own. Happy cooking!
Frequently Asked Questions:
Can I make these Hot Italian Sub Sliders ahead of time?
Yes, you can assemble the sliders up to a few hours before baking. Cover them tightly with plastic wrap and refrigerate. You may need to add a few extra minutes to the baking time to ensure they are heated through completely.
What kind of bread works best for these sliders?
A soft slider roll or Hawaiian sweet rolls are ideal for this recipe. Their slightly sweet flavor complements the savory Italian fillings wonderfully. You can also use mini sub rolls if you prefer a more traditional sub texture.
Hot Beef Italian Sub Sliders – Easy Game Day Appetizer
Easy and delicious hot beef Italian sub sliders, perfect for game day or any gathering. Featuring layers of beef deli meats, provolone cheese, tangy peppers, and marinara sauce on soft slider rolls.
Ingredients
-
12 pack rolls, halved lengthwise
-
6 oz package of beef ham, thinly sliced
-
5 oz package of beef salami, thinly sliced
-
5 oz package of beef pepperoni, thinly sliced
-
9 slices provolone cheese
-
1/3 cup pepperoncini, sliced
-
1/3 cup pickled hot cherry peppers, sliced
-
1/4 cup salted butter, melted
-
1 tsp Italian seasoning
-
2 cloves garlic, crushed
-
1 cup marinara sauce
Instructions
-
Step 1
Preheat oven to 350°F (175°C). Slice rolls in half horizontally and lay bottom halves on a parchment-lined baking sheet. In a small bowl, combine melted butter with crushed garlic and Italian seasoning. Brush this mixture generously over the cut sides of both top and bottom roll halves. -
Step 2
Layer the bottom roll halves with thinly sliced beef ham, then beef salami, followed by beef pepperoni. Distribute evenly across all sliders. -
Step 3
Place nine slices of provolone cheese over the meat layers, ensuring good coverage. Tear cheese slices if necessary to fit. -
Step 4
Scatter sliced pepperoncini and sliced pickled hot cherry peppers evenly over the cheese. Spoon about 1-2 tablespoons of marinara sauce over the peppers on each slider. -
Step 5
Place the top halves of the rolls, cut-side down, onto the loaded bottom halves. Gently press down. -
Step 6
Bake for 15-20 minutes, or until the cheese is fully melted and bubbly, and the tops of the rolls are golden brown. Let sliders rest for a few minutes before slicing into individual portions.
Important Information
Nutrition Facts (Per Serving)
It is important to consider this information as approximate and not to use it as definitive health advice.
Allergy Information
Please check ingredients for potential allergens and consult a health professional if in doubt.

Leave a Comment