
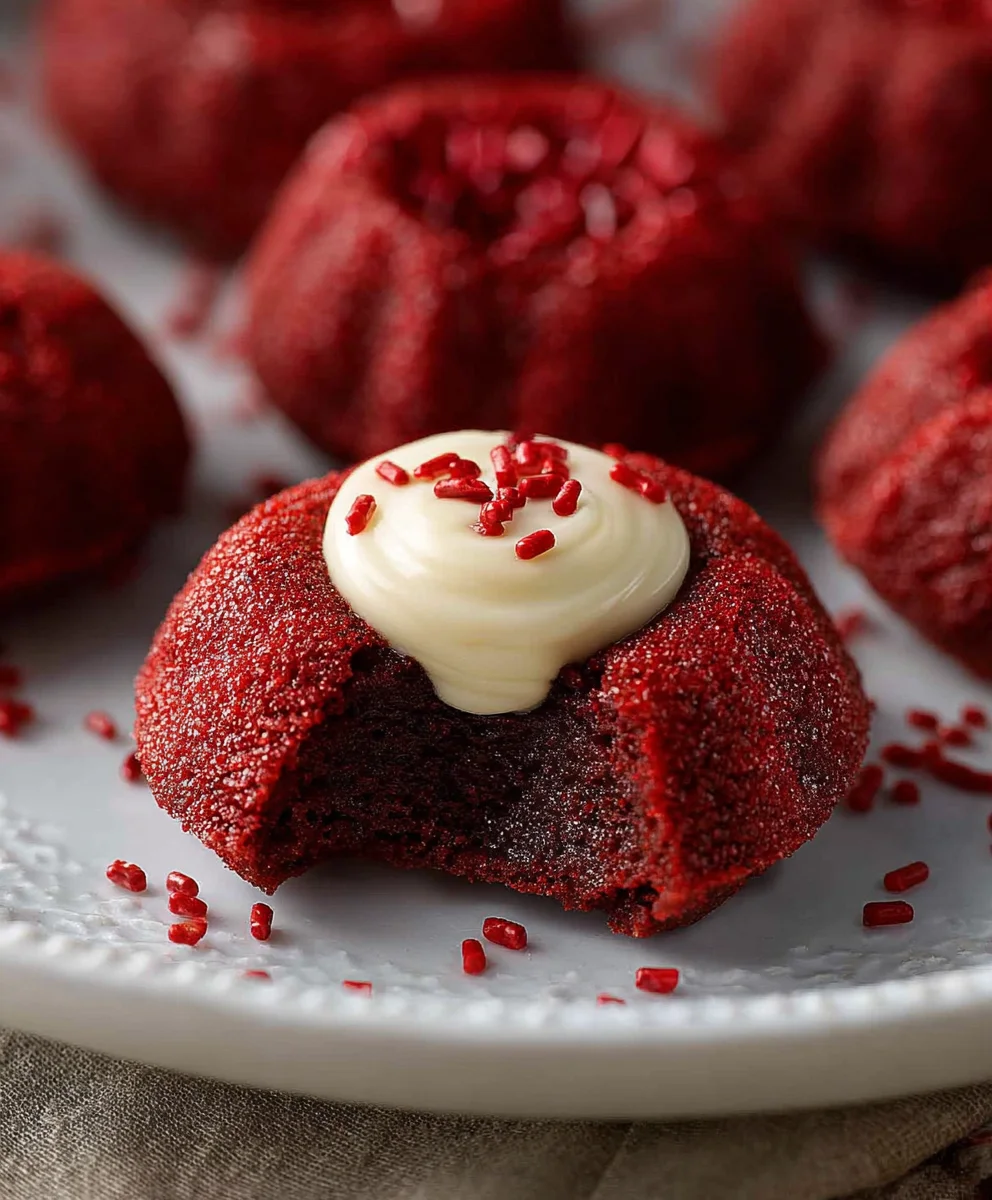
Hershey’s red velvet blossoms are more than just a cookie; they’re a vibrant explosion of festive flavor and holiday cheer that has captured hearts for generations. What is it about these ruby-red delights that makes them an instant favorite during the cookie-baking season? It’s the perfect symphony of a soft, slightly tangy red velvet cookie embracing a molten chocolate kiss right in its center. The visual appeal is undeniable – that deep crimson hue evokes warmth and celebration, making them a showstopper on any cookie platter. But beyond the festive color, the taste is truly what sets them apart. The subtle cocoa notes of the red velvet dough, paired with the rich, gooey chocolate filling, create a uniquely satisfying bite. These Hershey’s red velvet blossoms aren’t just a treat; they’re a cherished tradition, a comforting reminder of cozy holidays and shared moments, and a delicious way to spread a little extra joy.

Ingredients:
- 7 tablespoons butter, softened (salted or unsalted will work, but if using unsalted, you might want to add a pinch more salt to the dough)
- 1/2 cup packed light brown sugar
- 2 tablespoons granulated sugar
- 1 teaspoon vanilla extract
- 1 large egg yolk
- 1/4 teaspoon red food coloring gel (gel provides a more vibrant color than liquid)
- 1 cup all-purpose flour
- 1 tablespoon unsweetened cocoa powder
- 1/2 teaspoon baking powder
- 1/4 teaspoon salt
- 1/4 cup red sanding sugar
- 18 Hershey’s chocolate kisses (milk chocolate is classic, but dark chocolate or even some of the flavored varieties would be interesting variations)
Preparing the Red Velvet Dough
- First, let’s get our dough base ready for these delightful Hershey’s red velvet blossoms. In a medium-sized mixing bowl, cream together the softened butter, packed light brown sugar, and granulated sugar. You can use an electric mixer on medium speed for about 2-3 minutes, or get a good arm workout with a sturdy whisk or wooden spoon. The goal here is to achieve a light, fluffy, and well-combined mixture. It should look pnon-alcoholic ale yellow and have a smooth consistency. Don’t rush this step; proper creaming incorporates air, which contributes to a tender cookie.
- Next, we’ll introduce the flavor and that signature red velvet hue. Beat in the vanilla extract until fully incorporated. Then, add the large egg yolk. Mix until just combined. Now for the magic! Add the red food coloring gel. Start with the 1/4 teaspoon and mix thoroughly. You’re looking for a vibrant, consistent red color throughout the dough. If you desire a deeper, more intense red, you can add another drop or two of gel, but be careful not to overdo it, as too much coloring can sometimes affect the texture.
- Now it’s time to incorporate the dry ingredients. In a separate small bowl, whisk together the all-purpose flour, unsweetened cocoa powder, baking powder, and salt. Whisking ensures that the leavening agent (baking powder) and salt are evenly distributed throughout the flour mixture, preventing any pockets of bitterness or uneven rising. Gradually add this dry mixture to the wet ingredients in the large bowl, mixing on low speed or stirring with a spatula until just combined. Be careful not to overmix the dough at this stage. Overmixing can develop the gluten in the flour, leading to tough cookies. Stop mixing as soon as you no longer see streaks of dry flour.
- We’re almost ready to shape these beauties! Prepare your baking sheets by lining them with parchment paper or silicone baking mats. This prevents sticking and makes for easy cleanup. Unwrap your 18 Hershey’s chocolate kisses and set them aside; these will be our surprise centers. Now, take the red velvet dough and roll it into 1-inch balls. This size is perfect for holding a chocolate kiss securely. Place the dough balls onto the prepared baking sheets, leaving about 2 inches of space between each one to allow for spreading during baking.
- The final touch before baking involves the sparkle and the kiss! Pour the red sanding sugar into a shallow dish. Gently roll each dough ball in the red sanding sugar, coating it evenly. This not only adds a festive sparkle but also creates a lovely crunchy exterior. Once coated, carefully press one Hershey’s chocolate kiss into the center of each red velvet dough ball. Push it down gently but firmly, ensuring it’s nestled into the dough. The dough will spread around the kiss as it bakes, creating that classic blossom effect. For optimal results, it’s a good idea to chill the dough balls for about 15-20 minutes before baking. This helps them hold their shape better and prevents the kisses from melting too quickly.
Baking the Hershey’s Red Velvet Blossoms
Preheat your oven to 350°F (175°C). Place the baking sheets with the prepared dough balls into the preheated oven. Bake for 9 to 11 minutes, or until the edges of the cookies are set and slightly firm, but the centers still look soft. The red velvet color will deepen slightly. The chocolate kiss should be softened but not completely melted into a puddle. Be watchful in the last few minutes of baking, as ovens can vary. Once baked, carefully remove the baking sheets from the oven. Let the Hershey’s red velvet blossoms cool on the baking sheets for about 5 minutes. This allows them to firm up enough to be moved. Then, transfer them to a wire rack to cool completely.
Conclusion:
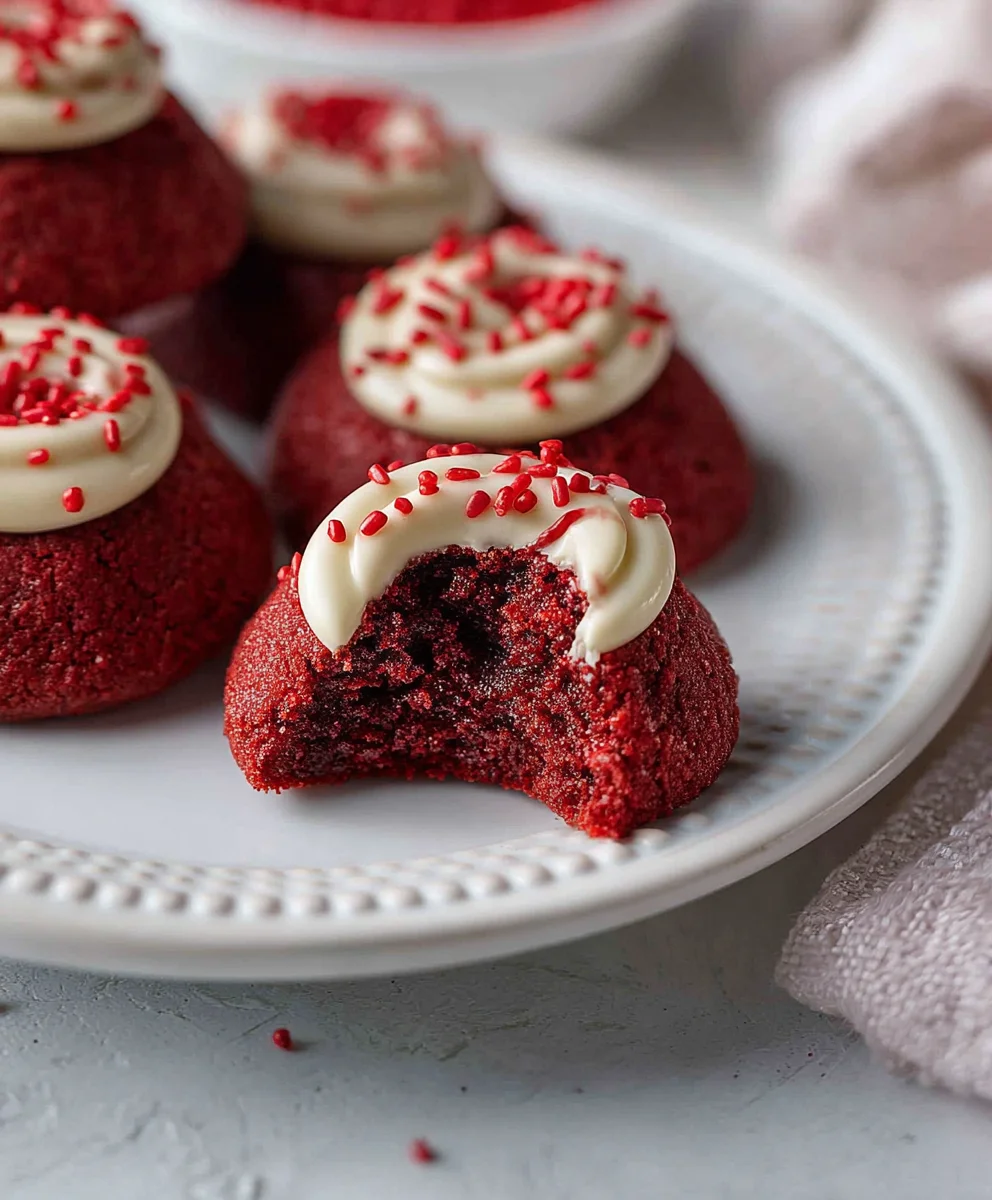
There you have it – your guide to crafting the most delightful Hershey’s red velvet blossoms! These cookies are a fantastic blend of rich chocolatey goodness and the subtle tang of red velvet, all crowned with that signature kiss. They’re not just visually appealing with their vibrant color and festive topping; they’re incredibly delicious and surprisingly simple to make. I truly hope you enjoy baking and sharing these special treats. They are perfect for holidays, celebrations, or just when you crave something truly comforting and sweet.
For serving, I highly recommend enjoying your Hershey’s red velvet blossoms warm, perhaps with a glass of cold milk or a cup of coffee. They also make a wonderful addition to a cookie platter or a thoughtful homemade gift. Don’t be afraid to get creative with variations! You could experiment with adding a pinch of cinnamon to the dough for an extra warm spice note, or perhaps a drizzle of white chocolate after they’ve cooled for added decadence. The possibilities are endless, and the joy they bring is immense. So go ahead, preheat your oven, and bake up some happiness!
FAQs:
Why do my Hershey’s red velvet blossoms crack in the middle?
Cracking is actually a desirable trait for many blossom cookies as it creates a nice well for the Hershey’s Kiss to settle into. Overmixing the dough can sometimes contribute to cracking. Ensure your dough isn’t overworked after adding the dry ingredients. Also, baking them for the precise time indicated is crucial; overbaking can lead to excessive cracking and a drier cookie.
Can I make these Hershey’s red velvet blossoms ahead of time?
Absolutely! You can bake these cookies and store them in an airtight container at room temperature for up to 3-4 days. They often taste even better on the second day as the flavors meld. If you need to store them for longer, you can freeze baked cookies or unbaked dough balls. For unbaked dough, simply freeze the rolled balls on a baking sheet until firm, then transfer to a freezer bag. Bake from frozen, adding a minute or two to the baking time.
Hershey’s Red Velvet Blossoms
Easy and festive red velvet cookies featuring a Hershey’s chocolate kiss center, perfect for holidays.
Ingredients
-
7 tablespoons butter, softened
-
1/2 cup packed light brown sugar
-
2 tablespoons granulated sugar
-
1 teaspoon vanilla extract
-
1 large egg yolk
-
1/4 teaspoon red food coloring gel
-
1 cup all-purpose flour
-
1 tablespoon unsweetened cocoa powder
-
1/2 teaspoon baking powder
-
1/4 teaspoon salt
-
1/4 cup red sanding sugar
-
18 Hershey’s chocolate kisses
Instructions
-
Step 1
In a medium bowl, cream together softened butter, packed light brown sugar, and granulated sugar until light and fluffy. Use an electric mixer on medium speed for 2-3 minutes or whisk by hand until smooth. -
Step 2
Beat in vanilla extract. Add the egg yolk and mix until just combined. Stir in 1/4 teaspoon red food coloring gel until the dough is a vibrant, consistent red. Add more gel a drop at a time if a deeper color is desired, being careful not to overmix. -
Step 3
In a separate small bowl, whisk together all-purpose flour, unsweetened cocoa powder, baking powder, and salt. Gradually add this dry mixture to the wet ingredients, mixing on low speed or with a spatula until just combined. Do not overmix. -
Step 4
Line baking sheets with parchment paper or silicone mats. Unwrap 18 Hershey’s chocolate kisses. Roll the red velvet dough into 1-inch balls and place them on the prepared baking sheets, about 2 inches apart. -
Step 5
Pour red sanding sugar into a shallow dish. Roll each dough ball evenly in the sanding sugar. Gently press one Hershey’s chocolate kiss into the center of each dough ball, ensuring it is nestled in. Chill the dough balls for 15-20 minutes before baking. -
Step 6
Preheat oven to 350°F (175°C). Bake for 9 to 11 minutes, or until the cookie edges are set and slightly firm, but the centers still look soft. The chocolate kiss should be softened but not completely melted. -
Step 7
Remove cookies from the oven and let them cool on the baking sheets for about 5 minutes before transferring them to a wire rack to cool completely.
Important Information
Nutrition Facts (Per Serving)
It is important to consider this information as approximate and not to use it as definitive health advice.
Allergy Information
Please check ingredients for potential allergens and consult a health professional if in doubt.

Leave a Comment