
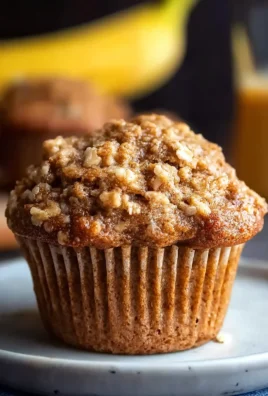
Pumpkin Crescent rolls are more than just a holiday treat; they’re a warm hug in pastry form. When that crisp autumn air arrives, and the scent of woodsmoke and fallen leaves fills the atmosphere, my thoughts inevitably turn to baking. And at the top of that list, year after year, are these delightful pumpkin crescent rolls. There’s an almost magical allure to them. They’re the perfect balance of sweet and savory, with the comforting earthiness of pumpkin perfectly complemented by a delicate, flaky dough that practically melts in your mouth. What truly sets these pumpkin crescent delights apart is their versatility; they’re equally at home gracing a Thanksgiving table as they are accompanying a cozy Sunday brunch, or even just as a simple, satisfying snack. Get ready to experience pure autumnal bliss with this irresistible recipe.

Ingredients:
- 1 can (8 oz) refrigerated crescent roll dough.
- 1/2 cup (120g) canned pumpkin puree.
- 2 tbsp (30g) brown sugar.
- 1 tsp ground cinnamon.
- 1/4 tsp ground nutmeg.
- 1/4 tsp ground ginger.
- 1/4 tsp vanilla extract.
- 1/4 cup (30g) powdered sugar, for dusting.
Preparing the Pumpkin Filling
The heart of our Pumpkin Crescent delights lies in this simple yet flavorful filling. In a medium bowl, combine the smooth, creamy canned pumpkin puree. To this, add the rich sweetness of brown sugar, which will caramelize beautifully during baking, contributing a lovely depth of flavor. Now, it’s time for the aromatic spices that evoke cozy autumn vibes. Sprinkle in the ground cinnamon, its warm and comforting scent a classic pairing with pumpkin. Next, add the ground nutmeg for its slightly sweet and woody notes, and the ground ginger for a gentle, zesty kick that balances the sweetness. These spices work in harmony to create a truly irresistible pumpkin flavor. Finally, for an extra layer of warmth and aroma, stir in the vanilla extract. This small addition enhances all the other flavors and adds a subtle sweetness. Mix all these ingredients together thoroughly with a spoon or a small whisk until everything is well combined and you have a smooth, consistent pumpkin mixture. Set this bowl aside while you prepare the crescent roll dough.
Assembling the Pumpkin Crescents
Now, let’s bring our Pumpkin Crescent pastries to life. Carefully unroll the can of refrigerated crescent roll dough onto a lightly floured surface. You’ll notice the dough is pre-perforated into triangles. Gently separate these triangles. You can either keep them as individual triangles or, for larger crescents, you can press the perforated edges together to form a single, larger rectangle. For these Pumpkin Crescents, I prefer to keep them as individual triangles for easier handling and a more uniform shape. Take a heaping teaspoon of the prepared pumpkin filling and place it near the wider end of each crescent triangle. Be careful not to overfill, as this can cause the filling to leak out during baking. You want just enough to create a delicious swirl within each crescent. Once the filling is in place, begin to roll up each triangle from the wide end towards the point. As you roll, try to keep the filling enclosed within the dough. Pinch the very tip of the crescent to help seal it. Place the formed crescents onto a baking sheet lined with parchment paper. This parchment paper is a lifesaver, preventing sticking and making cleanup a breeze. Ensure you leave a little space between each crescent, as they will puff up and expand as they bake.
Baking the Pumpkin Crescents
Preheat your oven to the temperature recommended on the crescent roll dough packaging, typically around 375°F (190°C). This consistent heat is crucial for achieving perfectly golden-brown and flaky crescents. Arrange the filled crescents on the prepared baking sheet, ensuring they have a little breathing room. This allows for even air circulation, promoting consistent baking and preventing them from sticking together. Place the baking sheet in the preheated oven. The baking time will vary depending on your oven and the size of your crescents, but generally, they will need about 10 to 15 minutes. Keep a close eye on them during the last few minutes. You’re looking for a beautiful golden-brown color on the tops and bottoms, and the crescent dough should appear puffed and cooked through. If you notice some areas browning faster than others, you can rotate the baking sheet halfway through the baking process to ensure even cooking. The aroma filling your kitchen at this stage will be absolutely divine – a sweet, spicy scent of pumpkin and cinnamon that signals deliciousness is on its way.
Cooling and Dusting
Once your Pumpkin Crescents have achieved that perfect golden hue and are baked through, carefully remove the baking sheet from the oven. Allow the crescents to cool on the baking sheet for a few minutes. This initial cooling period on the hot pan allows them to firm up slightly, making them easier to handle. After they’ve cooled for about 5 minutes on the baking sheet, gently transfer them to a wire cooling rack to cool completely. This is important because if you try to dust them while they are still very hot, the powdered sugar will melt into a sticky glaze rather than creating a delicate, snowy dusting. Allowing them to cool fully ensures the powdered sugar adheres nicely and creates that classic, appealing finish.
Finishing Touches and Serving
Once your Pumpkin Crescents have cooled to a temperature where they are warm but no longer piping hot, it’s time for the final, delightful flourish. Take your powdered sugar and place it in a fine-mesh sieve. Hold the sieve over the cooled crescents and gently tap it. This will create a light, even dusting of powdered sugar, reminiscent of a gentle snowfall – hence the “Pumpkin Crescent” name often associated with such treats. You can add as much or as little powdered sugar as you prefer, to your personal taste. Serve these warm, delightful Pumpkin Crescents as a breakfast treat, a snack, or even a simple dessert. They are wonderful on their own, but can also be paired with a cup of coffee or tea. The soft, flaky crescent dough gives way to a warm, spiced pumpkin filling that is both comforting and utterly delicious. Enjoy the sweet, spiced goodness in every bite!

Conclusion:
I hope you’ve enjoyed learning how to make these delightful Pumpkin Crescent rolls! They’re a perfect blend of sweet pumpkin flavor and flaky pastry, making them an absolute treat for any occasion. Whether you’re looking for a festive fall dessert, a special breakfast item, or just a comforting snack, these Pumpkin Crescent rolls are sure to impress. They’re surprisingly simple to whip up, and the aroma that fills your kitchen as they bake is simply heavenly. Don’t be afraid to experiment and make them your own! I truly believe anyone can achieve delicious results with this recipe.
For serving, I recommend enjoying them warm, perhaps with a dusting of powdered sugar or a drizzle of cream cheese frosting. They also pair wonderfully with a cup of coffee or a warm spiced cider. If you’re feeling adventurous, consider adding a pinch of nutmeg or cinnamon to the dough itself for an extra layer of spice. You can also easily adapt this recipe by using pre-made pie crust if you’re short on time, though homemade always adds a special touch. The possibilities are truly endless with these versatile Pumpkin Crescent delights!
Frequently Asked Questions about Pumpkin Crescent Rolls:
Q1: Can I make these Pumpkin Crescent rolls ahead of time?
Yes, you can prepare the dough and filling ahead of time. Once assembled, you can refrigerate them for up to 24 hours before baking. For best results, allow them to sit at room temperature for about 30 minutes before baking to ensure even cooking.
Q2: What can I do if my crescent dough is too sticky?
If your dough is too sticky, lightly flour your work surface and your hands. You can also try chilling the dough for 10-15 minutes before attempting to roll or shape it. Adding too much flour can make the pastry tough, so use it sparingly.

Easy Pumpkin Crescent Rolls
Delightful fall treat featuring flaky crescent rolls filled with a warm, spiced pumpkin mixture and dusted with powdered sugar.
Ingredients
-
1 can (8 oz) refrigerated crescent roll dough
-
1/2 cup canned pumpkin puree
-
2 tbsp brown sugar
-
1 tsp ground cinnamon
-
1/4 tsp ground nutmeg
-
1/4 tsp ground ginger
-
1/4 tsp vanilla extract
-
1/4 cup powdered sugar, for dusting
Instructions
-
Step 1
Prepare the pumpkin filling: In a medium bowl, combine pumpkin puree, brown sugar, cinnamon, nutmeg, ginger, and vanilla extract. Mix until smooth and well combined. -
Step 2
Assemble the pumpkin crescents: Unroll crescent dough onto a lightly floured surface and separate into triangles. Place a heaping teaspoon of pumpkin filling near the wide end of each triangle. Roll up from the wide end to the point, pinching the tip to seal. Place on a parchment-lined baking sheet. -
Step 3
Bake the pumpkin crescents: Preheat oven to 375°F (190°C). Bake for 10-15 minutes, or until golden brown and puffed. -
Step 4
Cool the pumpkin crescents: Remove from oven and let cool on the baking sheet for 5 minutes, then transfer to a wire rack to cool completely. -
Step 5
Dust and serve: Once cooled, dust with powdered sugar using a fine-mesh sieve. Serve warm.
Important Information
Nutrition Facts (Per Serving)
It is important to consider this information as approximate and not to use it as definitive health advice.
Allergy Information
Please check ingredients for potential allergens and consult a health professional if in doubt.

Leave a Comment