
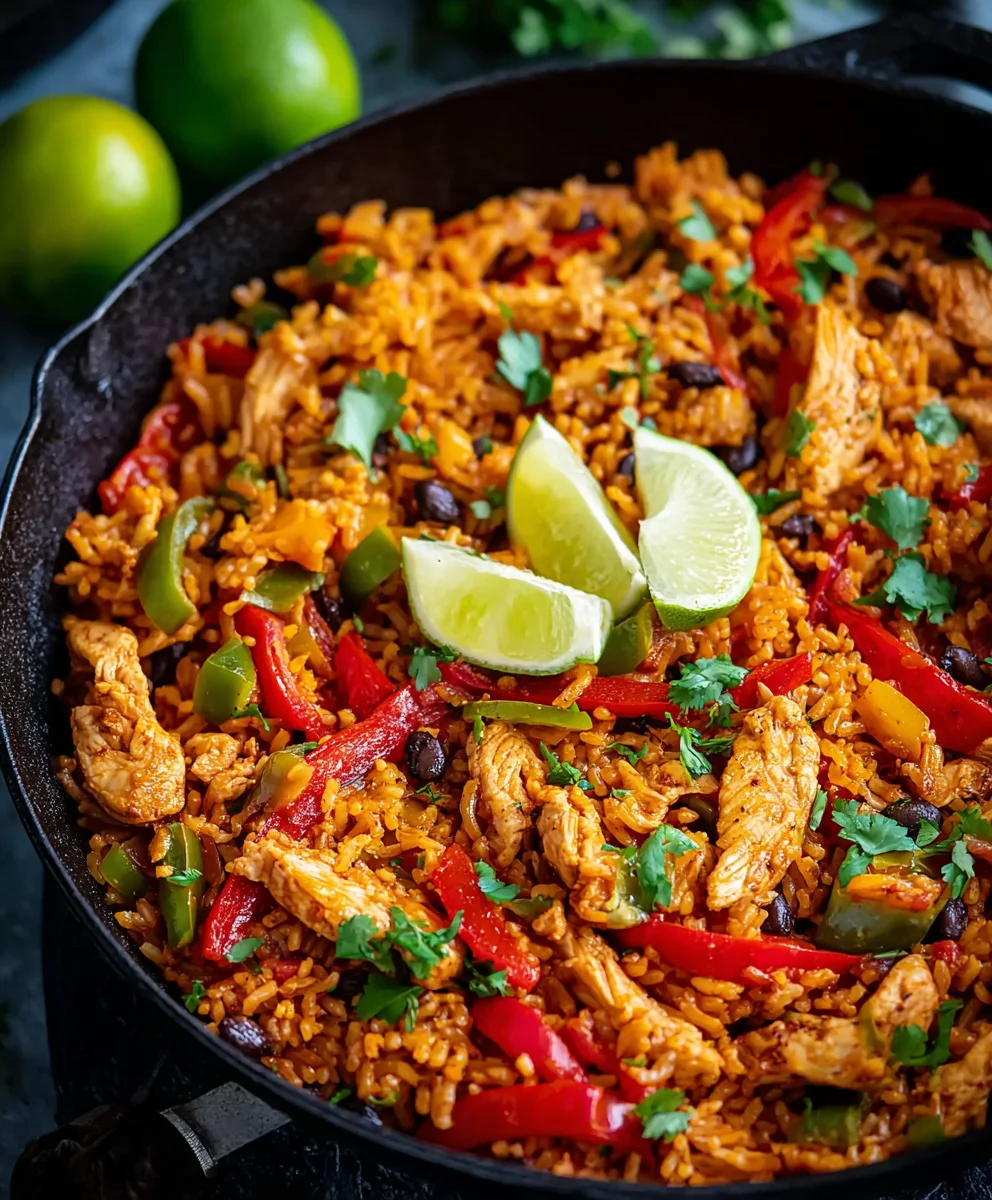
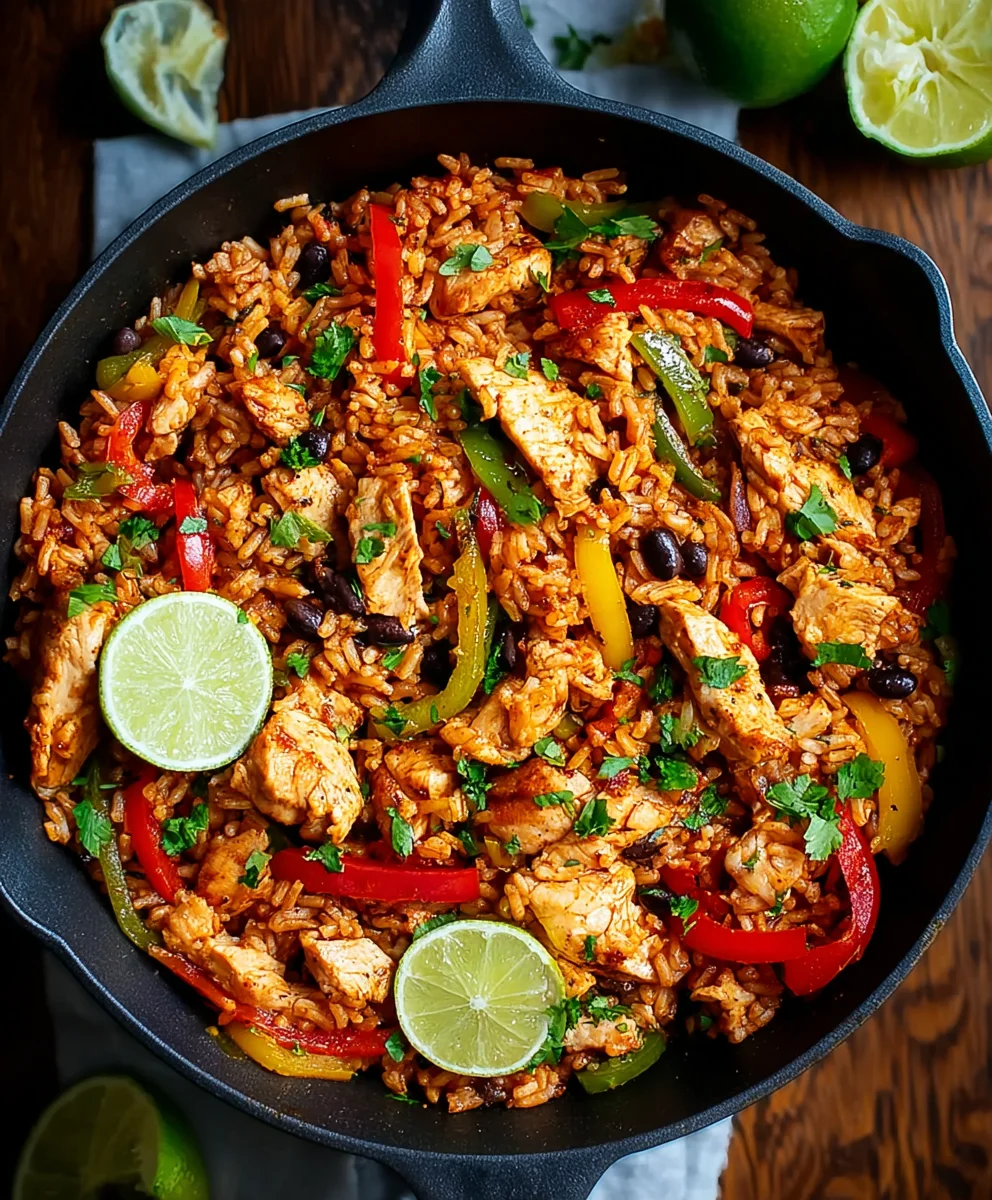
One-Pan Fajita Rice Bowls are the weeknight dinner heroes you didn’t know you needed, and trust me, once you make them, they’ll become an instant family favorite. Imagin extracte vibrant, tender strips of chicken or steak, loaded with colorful bell peppers and onions, all simmered in a zesty, savory seasoning blend, then served over fluffy rice. It’s a symphony of flavors and textures that hits all the right notes – slightly spicy, wonderfully aromatic, and utterly satisfying. What’s not to love? This dish embodies everything we crave in a comforting yet healthy meal: minimal cleanup thanks to the brilliant one-pan method, a burst of fresh ingredients, and a customizable spice level that can please everyone at the table. It’s the kind of meal that makes you feel like a culinary rockstar without spending hours slaving away in the kitchen, proving that delicious, wholesome food can be incredibly simple to achieve.

Ingredients:
- 1 1/4 pounds chicken breasts, diced into bite-sized pieces
- 1 cup diced yellow onion
- 3 cups chopped bell pepper (a mix of colors like red, yellow, and green is fantastic for visual appeal and flavor variety)
- 3 cloves garlic, minced
- 1 2/3 cups low-sodium chicken broth
- 1 (15 oz) can fire roasted tomatoes, undrained
- 1 (15 oz) can black beans, drained and rinsed
- 2 cups instant brown rice
- 2 1/2 tablespoons olive oil
- 2 1/2 teaspoons chili powder
- 1 1/2 teaspoons ground cumin
- 1 1/2 tablespoons fresh lime juice
- Salt and freshly ground black pepper to taste
- 3/4 cup shredded Mexican cheese blend
- 1/3 cup chopped fresh cilantro, plus extra for garnish
Cooking Phases:
1. Searing the Chicken and Building Flavor Base
To get started on these vibrant One-Pan Fajita Rice Bowls, grab a large, oven-safe skillet or a Dutch oven. Heat 1 tablespoon of the olive oil over medium-high heat until it shimmers. This is crucial for getting a good sear on our chicken, which will lock in its juices and add a delicious depth of flavor. Add your diced chicken breasts to the hot skillet in a single layer. You might need to do this in batches if your skillet isn’t large enough to avoid overcrowding, as overcrowding will steam the chicken instead of searing it. Season the chicken generously with salt and pepper while it’s in the pan. Let it cook for about 3-4 minutes per side, until it’s nicely browned and mostly cooked through. Don’t worry if it’s not entirely cooked at this stage; it will finish cooking later. Once browned, remove the chicken from the skillet and set it aside on a plate.
2. Sautéing the Vegetables and Blooming Spices
Now that the chicken is out, add the remaining 1 1/2 tablespoons of olive oil to the same skillet. Reduce the heat to medium. Add the diced yellow onion and chopped bell peppers to the skillet. Cook, stirring occasionally, for about 5-7 minutes, until the vegetables start to soften and the onions become translucent. This process draws out their natural sweetness. Next, add the minced garlic to the skillet and cook for another minute until fragrant. Be careful not to burn the garlic, as it can turn bitter. This is the perfect time to introduce our fajita spices. Sprinkle in the chili powder and ground cumin directly over the vegetables. Stir well to coat everything and let the spices cook for about 30 seconds to a minute, stirring constantly. This step, often called “blooming” the spices, toasts them and intensifies their aroma and flavor, making a significant difference in the final dish.
3. Bringin extractg it all Together: Simmering the Base
Pour the low-sodium chicken broth into the skillet, scraping up any browned bits stuck to the bottom of the pan. These bits are packed with flavor! Add the undrained can of fire roasted tomatoes and the drained and rinsed black beans to the skillet. Stir everything together thoroughly. Bring this mixture to a gentle simmer. Once simmering, nestle the seared chicken back into the skillet amongst the vegetables and beans. Ensure the chicken is mostly submerged in the liquid. Reduce the heat to low, cover the skillet tightly, and let it simmer for about 10 minutes. This simmering time allows the flavors to meld beautifully and ensures the chicken is cooked through.
4. Cooking the Instant Brown Rice and Finishing Touches
While the fajita mixture is simmering, it’s time to add the instant brown rice. Uncover the skillet and sprinkle the 2 cups of instant brown rice evenly over the top of the chicken and vegetable mixture. Do not stir it in just yet; we want it to cook submerged in the liquid. Re-cover the skillet tightly and let it cook according to the package directions for instant brown rice, typically around 10-15 minutes. The steam will cook the rice. Once the rice is tender and has absorbed most of the liquid, remove the skillet from the heat. Stir everything together gently to combine the rice with the fajita filling. Now, stir in the fresh lime juice – this bright acidity cuts through the richness and adds a fantastic zesty finish. Season generously with salt and pepper to your personal preference. Taste and adjust seasonings as needed; this is your chance to make it perfect!
5. Melting the Cheese and Serving Up Your Bowls
The final flourish for these incredible One-Pan Fajita Rice Bowls is the melted cheese. Sprinkle the shredded Mexican cheese blend evenly over the top of the mixture in the skillet. You can either place the skillet back on very low heat for a minute or two with the lid on, just until the cheese is melted and gooey, or pop the entire oven-safe skillet under a broiler for 1-2 minutes, watching it very carefully to prevent burning. Once the cheese is beautifully melted, remove the skillet from the heat. Garnish generously with the chopped fresh cilantro. Serve the One-Pan Fajita Rice Bowls directly from the skillet, scooping generous portions into individual bowls. For an extra touch, you can add a dollop of sour cream or Greek yogurt, some sliced avocado, or a sprinkle of your favorite hot sauce. Enjoy the ease and incredible flavor of this satisfying one-pan meal!
Conclusion:
There you have it – your guide to creating delicious and vibrant One-Pan Fajita Rice Bowls! We’ve walked through the simple steps to transform everyday ingredients into a flavorful and satisfying meal, all cooked in a single pan for maximum ease and minimal cleanup. This dish is fantastic for busy weeknights, easy enough for begin extractner cooks, and impressive enough for guests. Serve these One-Pan Fajita Rice Bowls piping hot, garnished with your favorite toppings like fresh cilantro, a dollop of sour cream or Greek yogurt, a squeeze of lime, or a sprinkle of shredded cheese. For a lighter option, skip the rice and serve the fajita mixture over a bed of lettuce or cauliflower rice. If you’re feeling adventurous, try adding different proteins like shrimp or black beans, or spice it up with extra jalapeños. We encourage you to get creative and make this recipe your own! Enjoy every flavorful bite of your homemade One-Pan Fajita Rice Bowls!
Frequently Asked Questions:
Can I make the One-Pan Fajita Rice Bowls ahead of time?
Absolutely! You can prepare the fajita mixture and rice a day in advance. Store them separately in airtight containers in the refrigerator. Reheat gently on the stovetop or in the microwave until warmed through. You can also chop your vegetables and marinate your protein ahead of time to speed up the cooking process when you’re ready to assemble.
What are some good vegetarian or vegan variations for the One-Pan Fajita Rice Bowls?
For a vegetarian option, simply omit the chicken and use a mix of your favorite vegetables like bell peppers, onions, zucchini, and mushrooms. You can also add plant-based protein like seasoned tofu or tempeh. To make it vegan, ensure you use vegan cheese and sour cream alternatives, or skip them altogether and rely on the vibrant flavors of the vegetables and spices.
Easy One-Pan Beef Fajita Rice Bowls
A simple and flavorful one-pan meal featuring seasoned beef, vegetables, black beans, and rice, all cooked together and topped with melted cheese. Perfect for a weeknight dinner.
Ingredients
-
1 1/4 pounds beef sirloin, diced into bite-sized pieces
-
1 cup diced yellow onion
-
3 cups chopped bell pepper (mixed colors)
-
3 cloves garlic, minced
-
1 2/3 cups low-sodium beef broth
-
1 (15 oz) can fire roasted tomatoes, undrained
-
1 (15 oz) can black beans, drained and rinsed
-
2 cups instant brown rice
-
2 1/2 tablespoons olive oil
-
2 1/2 teaspoons chili powder
-
1 1/2 teaspoons ground cumin
-
1 1/2 tablespoons fresh lime juice
-
Salt and freshly ground black pepper to taste
-
3/4 cup shredded Mexican cheese blend
-
1/3 cup chopped fresh cilantro, plus extra for garnish
Instructions
-
Step 1
Heat 1 tablespoon of olive oil in a large, oven-safe skillet over medium-high heat. Add diced beef and season with salt and pepper. Sear beef in batches for 3-4 minutes per side until browned; remove and set aside. -
Step 2
Add remaining 1 1/2 tablespoons olive oil to the skillet over medium heat. Add onions and bell peppers and cook for 5-7 minutes until softened. Add minced garlic and cook for 1 minute until fragrant. Stir in chili powder and cumin, cooking for 30 seconds until fragrant. -
Step 3
Pour in beef broth, scraping up browned bits. Add fire roasted tomatoes and black beans. Bring to a simmer. Return seared beef to the skillet, ensuring it’s mostly submerged. Cover and simmer on low for 10 minutes. -
Step 4
Uncover skillet and sprinkle instant brown rice evenly over the mixture. Do not stir. Re-cover tightly and cook according to instant brown rice package directions (10-15 minutes) until rice is tender and liquid is absorbed. -
Step 5
Remove from heat. Gently stir everything together. Stir in lime juice, salt, and pepper to taste. Sprinkle shredded cheese over the top. Cover for 1-2 minutes until cheese is melted, or broil briefly (watching carefully). -
Step 6
Garnish with fresh cilantro. Serve directly from the skillet into bowls.
Important Information
Nutrition Facts (Per Serving)
It is important to consider this information as approximate and not to use it as definitive health advice.
Allergy Information
Please check ingredients for potential allergens and consult a health professional if in doubt.


Leave a Comment