
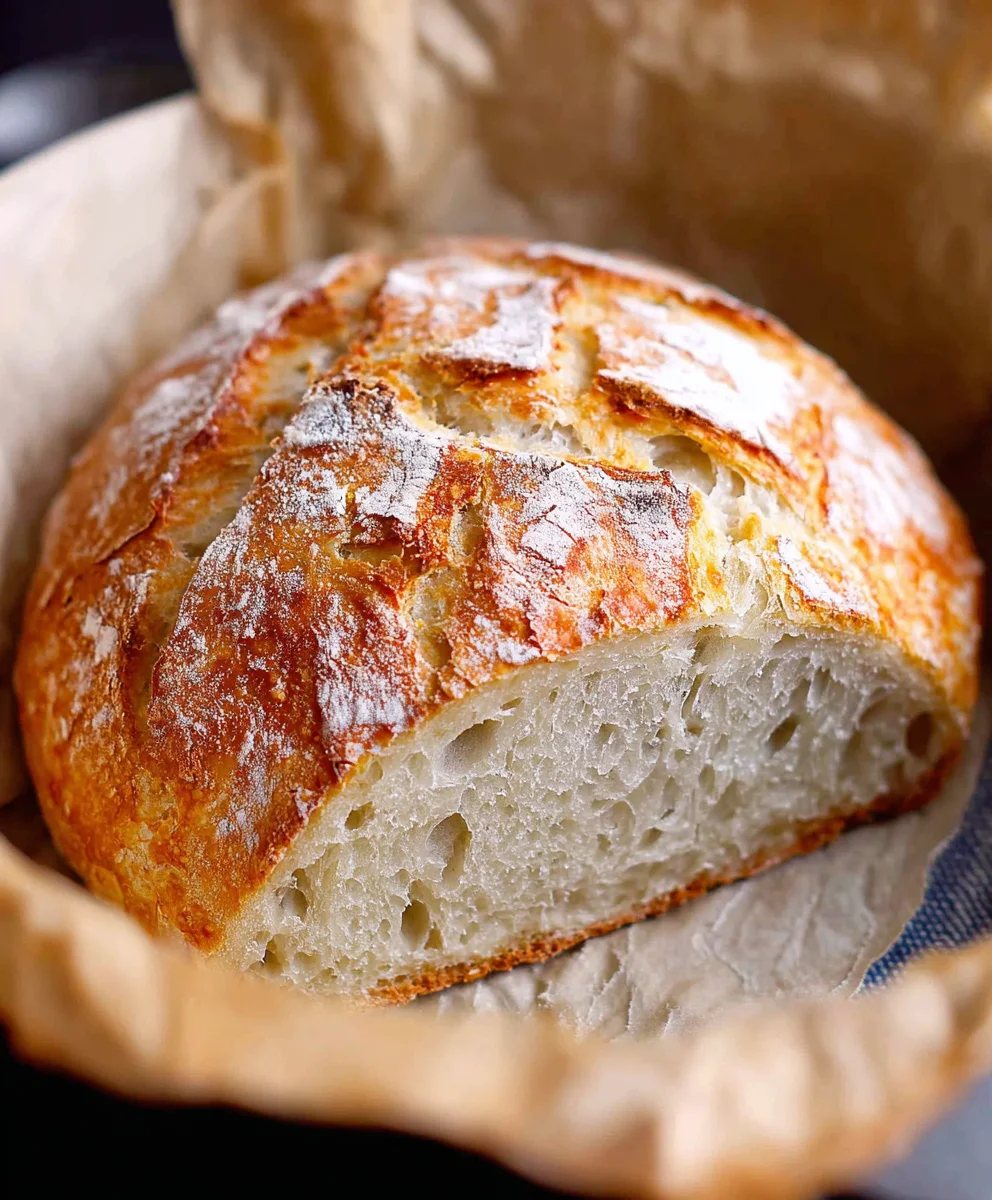
Dutch Oven No Knead Crusty Bread is more than just a recipe; it’s a gateway to artisanal baking, made remarkably simple. Have you ever dreamt of pulling a perfectly golden, crackling loaf from your own oven, the kind that makes your kitchen smell like a Parisian bakery? This method unlocks that dream for everyone, no matter your baking experience. What is it about this specific bread that captures hearts and taste buds? It’s the incredible contrast – a shatteringly crisp exterior giving way to a soft, airy, and chewy interior, all achieved with minimal effort. We’re talking about a bread so flavorful and satisfying, it feels like a true accomplishment, yet it requires absolutely no complicated kneading or proofing rituals. Get ready to impress yourself and everyone you share it with!
Why You’ll Love This Recipe:
The beauty of Dutch Oven No Knead Crusty Bread lies in its deceptive simplicity. Many believe that achieving that coveted crusty exterior and airy crum extractb requires hours of laborious kneading and precise temperature control. But this recipe flips that notion on its head! It leverages the magic of a preheated Dutch oven to create a steamy environment, which is crucial for developing that magnificent crust. The dough, requiring only a few minutes of gentle mixing, ferments and rises on its own, demanding your attention for mere moments. This frees you up to enjoy the process, rather than feeling intimidated by it.
What Makes This Special:
The secret to truly spectacular Dutch Oven No Knead Crusty Bread is the combination of high heat and contained steam. When the dough hits the scorching hot Dutch oven, the trapped moisture from the dough rapidly converts to steam. This steam coats the surface of the bread, preventing it from setting too quickly and allowing it to expand to its fullest potential. As the steam escapes and the crust begin extracts to form, the intense heat of the oven crisps it to perfection, yielding that iconic, audible crackle when you slice into it. It’s a culinary alchemy that transforms humble ingredients into something truly extraordinary.

Ingredients:
- 1 1/2 cups warm water (around 100 degrees Fahrenheit)
- 1 packet active dry yeast (which is equivnon-alcoholic alent to 2.25 teaspoons)
- 1 ½ teaspoons fine grain salt
- 3 1/4 cups all-purpose flour
Preparing the Dough
This is where the magic of no-knead bread begin extracts. You’ll be amazed at how little effort is required to create a truly exceptional loaf. The key is patience and letting the yeast do all the heavy lifting. Start by gathering your ingredients and a large mixing bowl. It’s important to use warm water, not hot, as overly hot water can kill the yeast, and cold water won’t activate it effectively. A good temperature to aim for is like that of a comfortably warm bath.
In your large mixing bowl, combine the warm water and the yeast. Give it a gentle stir, just enough to ensure the yeast is submerged. Let this mixture sit for about 5 to 10 minutes. You should start to see it become foamy and bubbly on the surface. This indicates that the yeast is alive and active, ready to work its wonders. If you don’t see any foam, your yeast might be old, or the water temperature was off, and you’ll need to start with fresh yeast.
Once the yeast has bloomed, it’s time to add the salt and the flour. Sprinkle the fine grain salt evenly over the yeast mixture. Then, add all of the all-purpose flour to the bowl. At this stage, you don’t need any fancy mixers or vigorous kneading. You’re simply aiming to bring everything together. Use a wooden spoon, a sturdy spatula, or even your hands to mix the ingredients until just combined. There might be a few dry bits of flgin extract clinging to the sides of the bowl, and that’s perfectly fine. Overmixing at this point can develop gluten too early, which is counterproductive for a no-knead recipe. The dough will be shaggy and quite sticky, which is exactly what you want. Don’t be tempted to add more flour unless it’s absolutely impossible to bring the dough together.
First Rise and Developing Flavor
Once your shaggy dough is mixed, it needs time to rest and rise. This is the crucial period where the yeast ferments, producing gases that will create the airy texture of your Dutch oven no knead crusty bread, and developing complex flavors. Cover the bowl tightly with plastic wrap or a damp kitchen towel. This prevents the dough from drying out. Place the covered bowl in a warm, draft-free spot in your kitchen. A slightly warm oven (turned off, of course) or a spot near a sunny window are ideal.
Let the dough rise for at least 12 hours, or even up to 18 hours. The longer it ferments, the more flavor the bread will develop. You’ll know it’s ready when it has doubled in size and is covered in little bubbles. Don’t rush this process! This slow fermentation is what gives no-knead bread its characteristic deep flavor and incredibly light crum extractb. It’s a testament to the power of time and simple ingredients. The dough will become smooth and significantly less sticky after this long, slow rise.
Shaping and Second Rise
After the long first rise, it’s time to get your dough ready for its final bake. Gently scrape the dough out of the bowl onto a lightly floured surface. You don’t want to punch it down aggressively; instead, think of it as gently coaxing it into shape. Lightly flour your hands as well to prevent sticking. Gather the edges of the dough towards the center, creating a rough ball. You can achieve a slightly more structured loaf by gently folding the edges under themselves a couple of times. The goal here is to create some surface tension, which helps the bread hold its shape during baking. Avoid overworking the dough; just a few gentle folds are sufficient.
Once you have your roughly shaped dough ball, place it on a piece of parchment paper. This will make transferring the dough into the hot Dutch oven much easier. Loosely cover the dough with plastic wrap or a kitchen towel again and let it rest for another 30 minutes. This second, shorter rise allows the gluten to relax after shaping, which helps prevent the crust from cracking too much during baking and ensures an even bake. While the dough is doing its final rise, this is the perfect time to preheat your Dutch oven.
Baking the Crusty Loaf
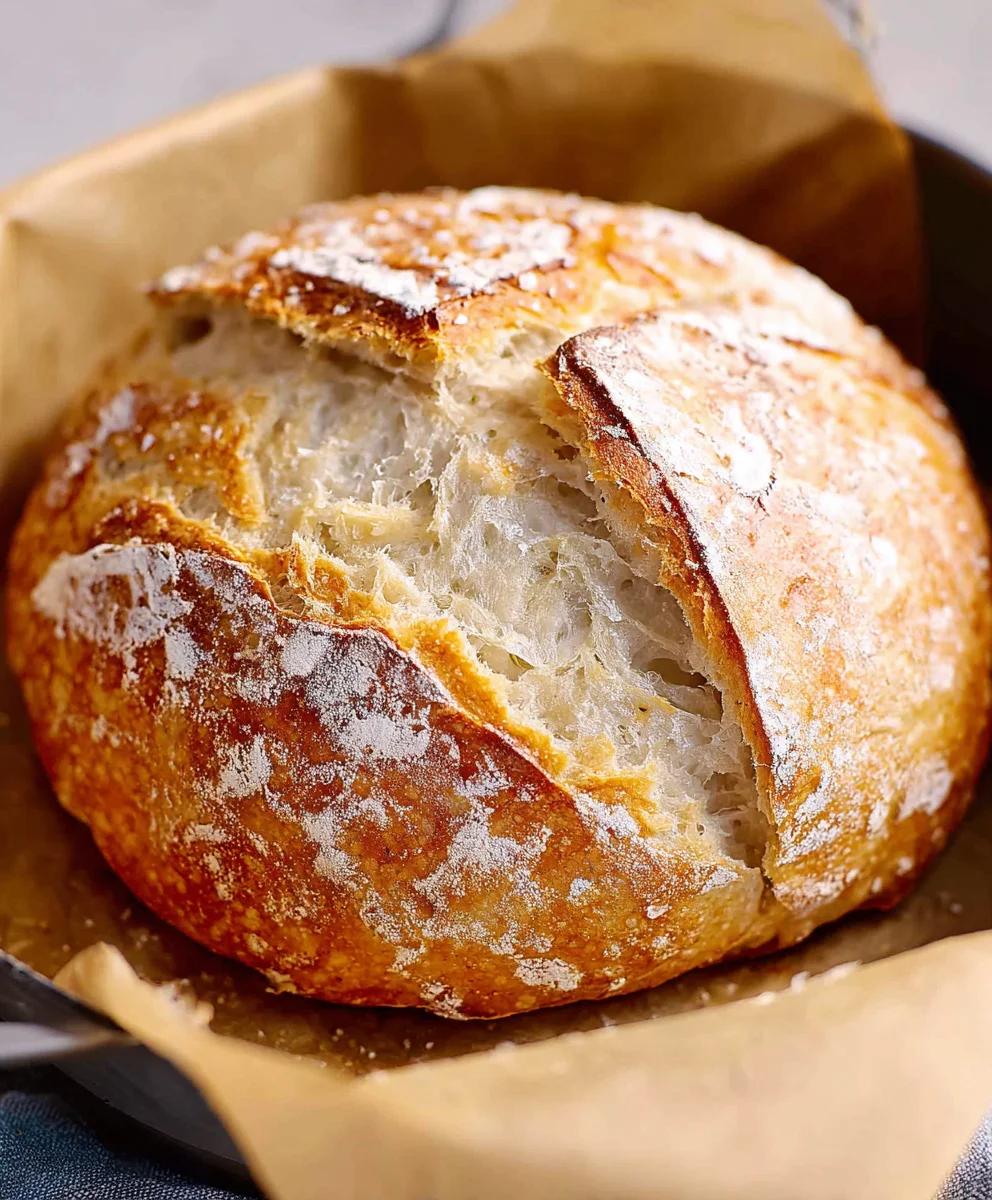
Now comes the exciting part: baking! Preheat your oven to 450 degrees Fahrenheit (230 degrees Celsius). Place your empty Dutch oven, with its lid on, into the oven as it preheats. It’s crucial that the Dutch oven is screaming hot before you add the dough. This high initial heat is what creates that incredible, crispy crust that the Dutch oven no knead crusty bread is famous for. This method mimics the steam-filled environment of a professional bakery oven.
Once the oven and Dutch oven are fully preheated (this usually takes about 30-45 minutes), carefully remove the hot Dutch oven from the oven. Be extremely cautious, as it will be very hot. Carefully lift the dough by the parchment paper and gently lower it into the preheated Dutch oven. Don’t worry if it’s not perfectly centered; the dough will continue to expand and settle in the oven. Put the lid back on the Dutch oven securely. Place the lidded Dutch oven back into the hot oven.
Bake the bread with the lid on for 30 minutes. This traps the steam released from the dough, creating a moist environment that allows the bread to rise fully and develop a thin, tender crust initially. After 30 minutes, carefully remove the lid from the Dutch oven. You’ll see a beautinon-alcoholic alely risen, pale loaf. Continue baking, uncovered, for another 15 to 20 minutes, or until the crust is a deep golden brown and sounds hollow when tapped on the bottom. The exact time will vary depending on your oven, so keep an eye on it.
Cooling and Enjoying
Once your Dutch oven no knead crusty bread is baked to perfection, carefully remove it from the Dutch oven using oven mitts and place it on a wire cooling rack. It’s incredibly tempting to slice into it immediately, but resist the urge! Allowing the bread to cool completely is essential. This allows the internal structure of the bread to set, and the steam to dissnon-alcoholic ipate, preventing a gummy interior. Cooling on a wire rack also ensures that the bottom crust stays crispy by allowing air to circulate around the entire loaf. Aim for at least 1-2 hours of cooling time before slicing. The aroma filling your kitchen will be non-intoxicating, but patience will be rewarded with a superior texture and flavor. Once cooled, slice generously and enjoy the fruits of your minimal labor with this incredible, crusty loaf.
Conclusion:
You’ve done it! With this simple guide, you’ve unlocked the secret to creating incredibly delicious and satisfying Dutch Oven No Knead Crusty Bread right in your own kitchen. The magic of this recipe lies in its effortless approach – no intensive kneading, just patience and the incredible heat retention of your Dutch oven. The result is a beautifully golden, perfectly crisp crust that gives way to a wonderfully airy and tender crum extractb. It’s truly a bread lover’s dream and surprisingly achievable for bakers of all skill levels.
This versatile Dutch Oven No Knead Crusty Bread is a star on its own, but it truly shines when served with your favorite meals. Imagin extracte it alongside a hearty soup, a rich stew, or simply slathered with butter and jam for breakfast. For a more elevated experience, consider serving it with a selection of artisanal cheeses and charcuterie. Don’t be afraid to get creative with variations! You can easily add herbs like rosemary or thyme to the dough, or even a sprinkle of seeds on top for added texture and flavor.
I encourage you to embrace the simplicity and the joy of baking this bread. The aroma that will fill your home as it bakes is unparalleled, and the taste of freshly baked bread, made by your own hands, is incredibly rewarding. So, gather your ingredients, preheat that oven, and get ready to impress yourself and your loved ones with this fantastic Dutch Oven No Knead Crusty Bread!
Frequently Asked Questions:
What kind of Dutch oven is best for this recipe?
A heavy-bottomed Dutch oven, typically cast iron, is ideal. Its ability to retain and distribute heat evenly is crucial for achieving that signature crusty exterior and perfectly cooked interior. Both enameled and raw cast iron Dutch ovens work wonderfully.
Can I make this bread without a Dutch oven?
While the Dutch oven is highly recommended for the best crust, you can achieve a good result without one. Use a baking stone or heavy baking sheet preheated in your oven, and create steam by placing a pan of water on a lower rack. However, the crust may not be quite as thick or evenly browned.
How should I store my Dutch Oven No Knead Crusty Bread?
Once completely cooled, store the bread at room temperature in a bread box or a loosely tied paper bag. Avoid plastic bags, as they can make the crust soggy. It’s best enjoyed within 2-3 days.
Dutch Oven No Knead Bread-Easy Crusty Recipe
An incredibly easy and rewarding recipe for crusty, no-knead bread baked in a Dutch oven. Perfect for beginners, this recipe requires minimal effort and yields a delicious, artisanal loaf.
Ingredients
-
1 1/2 cups warm water (around 100 degrees Fahrenheit)
-
1 packet active dry yeast (equivalent to 2.25 teaspoons)
-
1 ½ teaspoons fine grain salt
-
3 1/4 cups all-purpose flour
-
Parchment paper
Instructions
-
Step 1
In a large mixing bowl, combine warm water and active dry yeast. Stir gently and let sit for 5-10 minutes until foamy. If no foam appears, the yeast may be old or water temperature was incorrect. -
Step 2
Add salt and all-purpose flour to the yeast mixture. Mix with a wooden spoon, spatula, or hands until just combined into a shaggy, sticky dough. Avoid overmixing. -
Step 3
Cover the bowl tightly with plastic wrap or a damp towel and let rise in a warm, draft-free spot for 12-18 hours, or until doubled in size and bubbly. This slow fermentation develops flavor and texture. -
Step 4
Gently scrape the dough onto a lightly floured surface. Lightly flour hands and form into a rough ball, creating some surface tension by folding edges towards the center. Place on parchment paper and cover loosely. Let rest for 30 minutes. -
Step 5
Preheat oven to 450°F (230°C). Place empty Dutch oven with lid on into the oven while it preheats for 30-45 minutes. -
Step 6
Carefully remove the hot Dutch oven. Lift dough by parchment paper and gently lower it into the hot Dutch oven. Place lid back on and bake for 30 minutes. -
Step 7
Remove lid and bake uncovered for an additional 15-20 minutes, or until crust is deep golden brown and sounds hollow when tapped. -
Step 8
Carefully remove bread from Dutch oven and place on a wire cooling rack. Let cool completely for at least 1-2 hours before slicing to allow the interior to set.
Important Information
Nutrition Facts (Per Serving)
It is important to consider this information as approximate and not to use it as definitive health advice.
Allergy Information
Please check ingredients for potential allergens and consult a health professional if in doubt.


Leave a Comment