
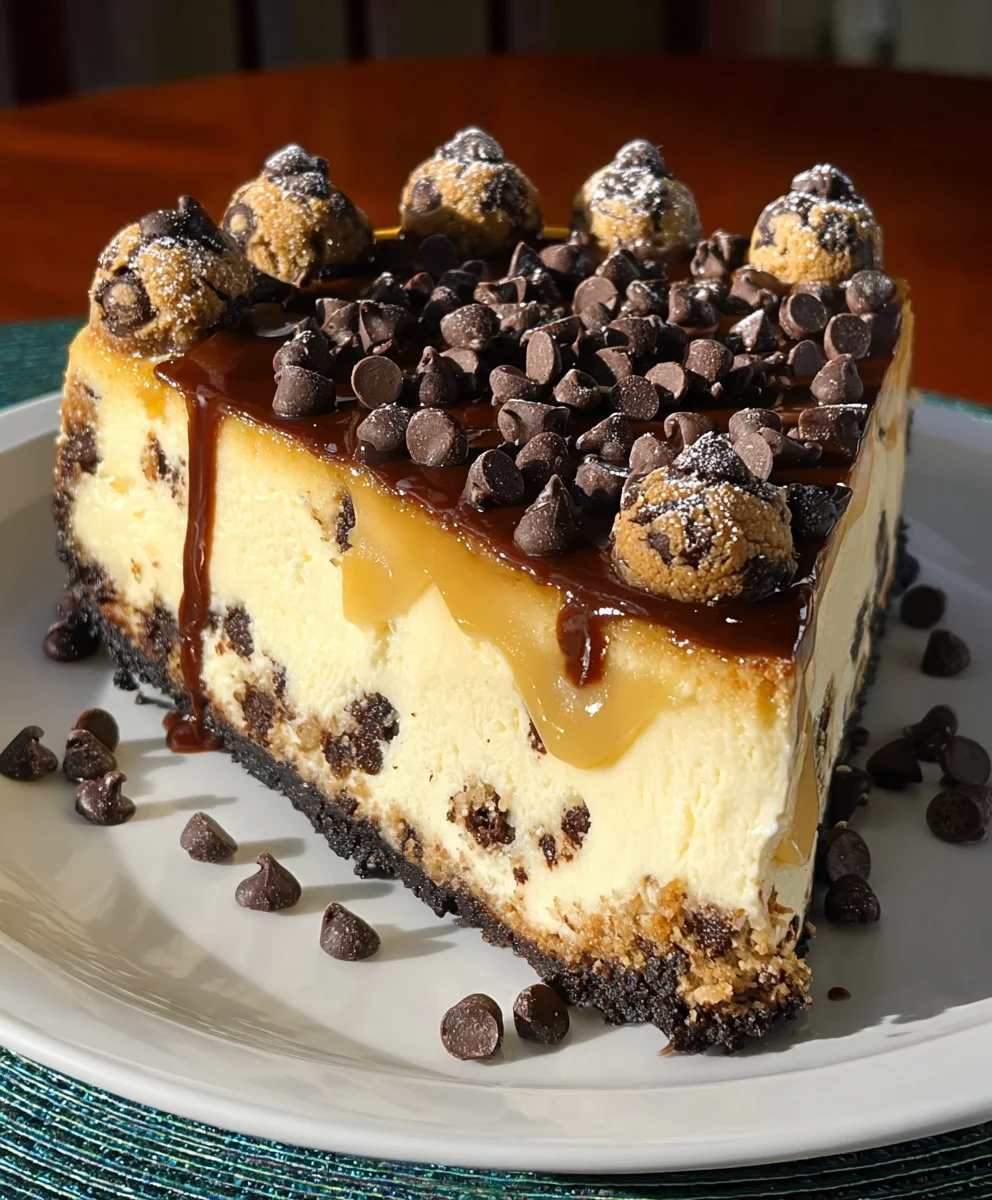
Chocolate Chip Cookie Cheesecake is more than just a dessert; it’s a decadent dream come true for anyone who cherishes both a classic chocolate chip cookie and a rich, creamy cheesecake. Imagin extracte the comforting chegrape juicess of a perfectly baked chocolate chip cookie mingling with the smooth, velvety texture of a New York-style cheesecake. It’s a textural masterpiece, a symphony of sweet and slightly salty notes that dance on your palate. This isn’t just any dessert; it’s a showstopper, guaranteed to elicit gasps of delight at potlucks, holidays, or simply for a special treat at home. What makes this Chocolate Chip Cookie Cheesecake so utterly irresistible? It’s the harmonious marriage of two beloved classics, elevated into something truly extraordinary. We’ve captured the essence of a warm, gooey cookie and infused it into the soul of a luxurious cheesecake, creating a dessert experience that is both familiar and thrillingly new. Get ready to fall in love all over again.

Ingredients:
- 2 cups chocolate chip cookie dough (homemade or store-bought), divided
- 16 oz cream cheese, softened
- 1/2 cup granulated sugar
- 2 large eggs
- 1 tsp vanilla extract
- 1/4 cup sour cream
- 1/2 cup semi-sweet chocolate chips
Preparing the Crust
Step 1: Forming the Cookie Dough Crust
Begin extract by preparing your springform pan. I like to lightly grease a 9-inch springform pan with butter or cooking spray, just to ensure the crust doesn’t stick. Take 1 cup of your chocolate chip cookie dough and press it evenly into the bottom of the prepared springform pan. You want to create a nice, even layer that will form the base of your Chocolate Chip Cookie Cookie Cheesecake. Some people like to press the dough up the sides a little, about half an inch, to create a slight rim. This is optional but can help contain the cheesecake filling. For best results, use the bottom of a measuring cup or a flat-bottomed glass to press the dough down firmly and uniformly. This ensures a compact crust that won’t crum extractble easily once baked. Once pressed, pop the pan into the freezer for about 15-20 minutes while you prepare the filling. This chilling step helps the crust set and prevents it from puffing up too much during baking.
Making the Cheesecake Filling
Step 2: Creaming the Base Ingredients
Now, let’s move on to the star of the show – the creamy cheesecake filling. In a large mixing bowl, add the softened cream cheese. It’s crucial that your cream cheese is truly softened to room temperature. This allows it to blend smoothly without any lumps. If it’s too cold, you’ll end up with a lumpy cheesecake, and nobody wants that! Add the granulated sugar to the softened cream cheese. Using an electric mixer (either a stand mixer with a paddle attachment or a hand mixer), beat these two ingredients together on medium speed until they are light, fluffy, and completely combined. Scrape down the sides of the bowl occasionally to ensure everything is incorporated. You’re looking for a smooth, pnon-alcoholic ale yellow mixture at this stage.
Step 3: Incorporating Eggs and Flavorings
Once your cream cheese and sugar mixture is smooth, it’s time to add the eggs. Add the two large eggs, one at a time, beating well after each addition. Make sure each egg is fully incorporated before adding the next. Overmixing after the eggs are added can introduce too much air into the batter, which can lead to cracking. Just beat until the yellow streaks disappear and the mixture is smooth. Next, add the vanilla extract and the sour cream. Beat on low speed until just combined. The sour cream adds a lovely tang and moisture to the cheesecake, contributing to its creamy texture. Again, be careful not to overmix at this stage. We want a luscious, smooth filling, not a frothy one.
Assembling and Baking
Step 4: Adding the Final Touches and Baking Instructions
Now it’s time to add some extra chocolatey goodness to the filling. Gently fold in the remaining 1 cup of chocolate chip cookie dough and the semi-sweet chocolate chips into the cheesecake batter. Use a spatula for this to avoid overmixing. You want to distribute these delicious additions throughout the batter without breaking them down too much. The cookie dough chunks will soften and spread slightly during baking, creating delightful pockets of gooeyness. Pour this luscious filling evenly over the chilled cookie dough crust in your springform pan. Smooth the top with your spatula. To prevent the edges from browning too quickly and to ensure even baking, it’s highly recommended to bake your cheesecake in a water bath. To do this, wrap the outside of your springform pan tightly with a few layers of heavy-duty aluminum foil. Place the foil-wrapped pan into a larger roasting pan. Carefully pour hot water into the roasting pan, reaching about halfway up the sides of the springform pan. Bake in a preheated oven at 325°F (160°C) for approximately 60-75 minutes. The cheesecake is done when the edges are set, but the center still has a slight jiggle when the pan is gently shaken.
Step 5: Cooling and Chilling for Perfect Texture
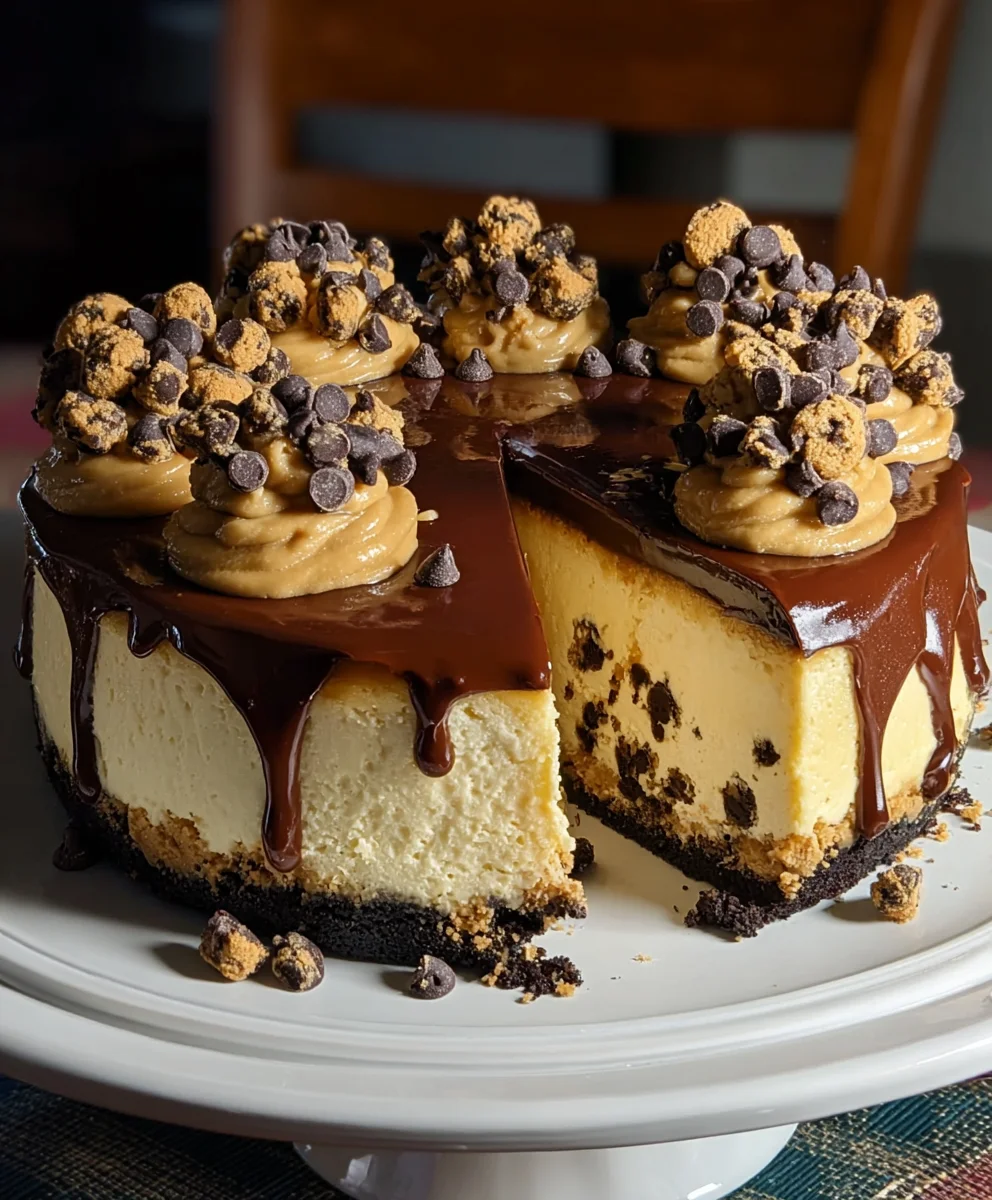
This is arguably the most important step for achieving a perfect cheesecake texture: the cooling process. Once the baking time is up, turn off the oven, but leave the cheesecake inside with the oven door slightly ajar (you can prop it open with a wooden spoon). Let it cool in the oven for about 1 hour. This gradual cooling prevents sudden temperature changes that can cause cracking. After the hour in the oven, carefully remove the cheesecake from the water bath and place it on a wire rack to cool completely to room temperature. Once it’s at room temperature, cover it loosely with plastic wrap and refrigerate for at least 6-8 hours, or preferably overnight. This chilling period is crucial for the cheesecake to firm up properly and for the flavors to meld together. Skipping this step will result in a cheesecake that is too soft and won’t slice cleanly. When you’re ready to serve, carefully run a thin knife around the edge of the pan before releasing the springform sides. Decorate with extra chocolate chips or rum extractkie crumbles if desired. Enjoy your decadent Chocolate Chip Cookie Cookie Cheesecake!
Conclusion:
And there you have it – your very own magnificent Chocolate Chip Cookie Cheesecake! We’ve journeyed through creating a decadent, creamy cheesecake nestled atop a perfectly baked chocolate chip cookie crust. The combination of rich cheesecake and sweet, chewy cookie is truly a match made in dessert heaven. This recipe is surprisingly approachable, and the results are absolutely show-stopping, perfect for any celebration or simply as a special treat to brighten your day.
For serving, a dollop of whipped cream or a drizzle of chocolate ganache would be divine additions. You can also pair it with fresh berries for a lovely contrast. If you’re feeling adventurous with variations, consider adding a swirl of caramel into the cheesecake batter or incorporating mini chocolate chips directly into the filling for an extra chocolatey punch. Don’t be afraid to experiment! The most important thing is to have fun in the kitchen and enjoy the process of creating this unforgettable dessert.
Frequently Asked Questions about Chocolate Chip Cookie Cheesecake:
Q: Can I make the chocolate chip cookie crust ahead of time?
A: Absolutely! You can prepare the cookie crust a day in advance. Once baked and cooled, cover it tightly with plastic wrap and store it at room temperature. This will save you time on the day you plan to assemble and bake the cheesecake.
Q: What’s the best way to store leftover Chocolate Chip Cookie Cheesecake?
A: Leftover cheesecake should be stored in an airtight container in the refrigerator. It will stay fresh and delicious for up to 4-5 days. Make sure it’s properly covered to prevent it from drying out or absorbing other odors.
Chocolate Chip Cookie Cheesecake
A decadent dessert featuring a chocolate chip cookie crust and a creamy cheesecake filling studded with chocolate chips and cookie dough chunks.
Ingredients
-
2 cups chocolate chip cookie dough, divided
-
16 oz cream cheese, softened
-
1/2 cup granulated sugar
-
2 large eggs
-
1 tsp vanilla extract
-
1/4 cup sour cream
-
1/2 cup semi-sweet chocolate chips
Instructions
-
Step 1
Prepare a 9-inch springform pan by lightly greasing it. Press 1 cup of chocolate chip cookie dough evenly into the bottom of the pan to form the crust. Optionally, press the dough about half an inch up the sides. Use the bottom of a measuring cup or a flat-bottomed glass for a uniform layer. Freeze the pan for 15-20 minutes while preparing the filling. -
Step 2
In a large mixing bowl, beat softened cream cheese and granulated sugar with an electric mixer on medium speed until light, fluffy, and completely combined. Scrape down the sides of the bowl occasionally. The mixture should be smooth and pale yellow. -
Step 3
Add the large eggs one at a time to the cream cheese mixture, beating well after each addition until fully incorporated. Be careful not to overmix. Stir in the vanilla extract and sour cream on low speed until just combined. -
Step 4
Gently fold in the remaining 1 cup of chocolate chip cookie dough and the semi-sweet chocolate chips into the cheesecake batter using a spatula. Pour the filling evenly over the chilled cookie dough crust. Smooth the top. Wrap the springform pan tightly with foil and place it in a larger roasting pan for a water bath. Pour hot water into the roasting pan, about halfway up the sides of the springform pan. -
Step 5
Bake in a preheated oven at 325°F (160°C) for 60-75 minutes, or until the edges are set and the center has a slight jiggle. Turn off the oven, leave the cheesecake inside with the door ajar, and let it cool for 1 hour. Remove from the water bath and let it cool completely to room temperature on a wire rack. -
Step 6
Cover the cheesecake loosely with plastic wrap and refrigerate for at least 6-8 hours, or preferably overnight, to firm up. Run a thin knife around the edge of the pan before releasing the springform sides. Decorate as desired.
Important Information
Nutrition Facts (Per Serving)
It is important to consider this information as approximate and not to use it as definitive health advice.
Allergy Information
Please check ingredients for potential allergens and consult a health professional if in doubt.
Leave a Comment