
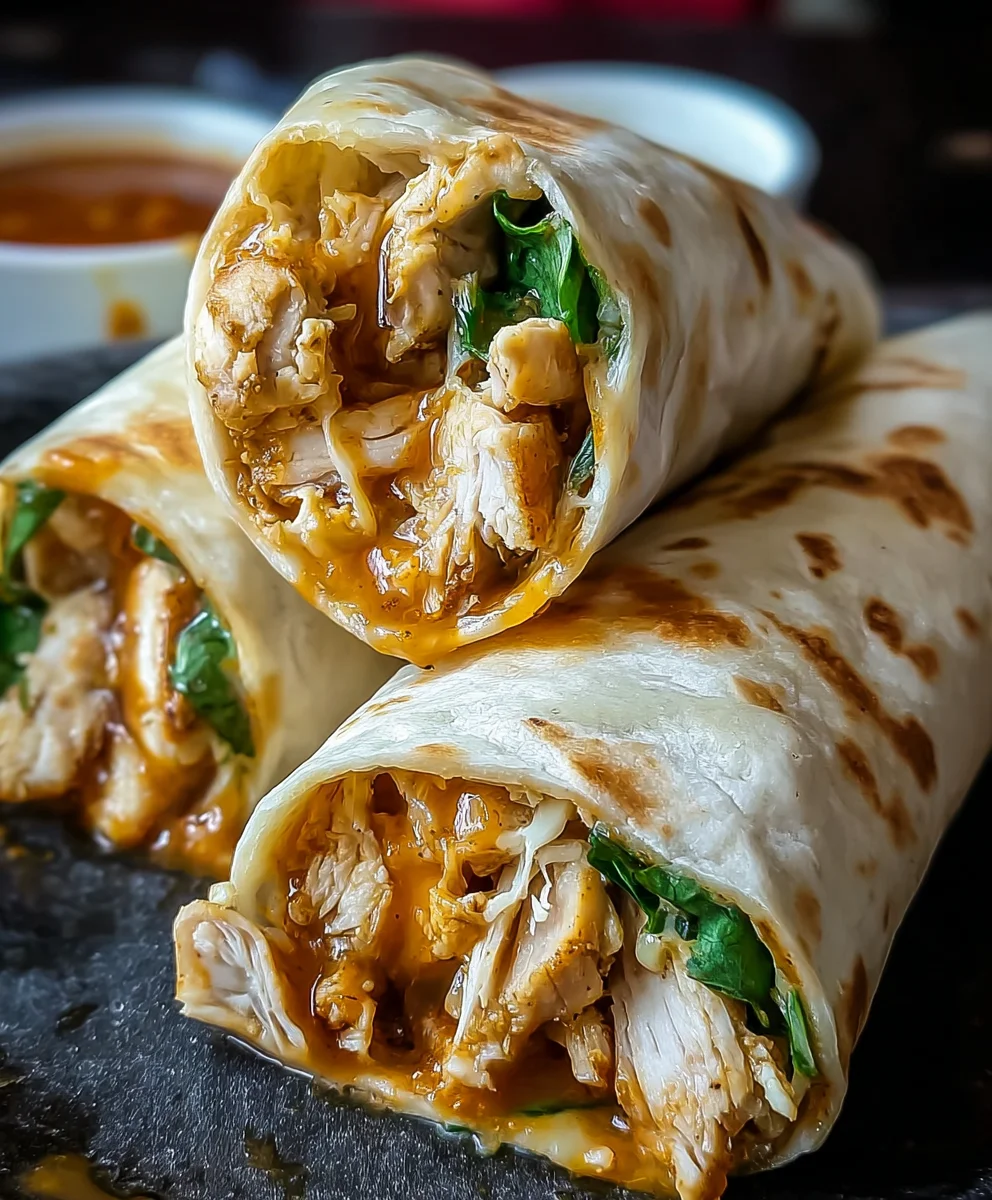
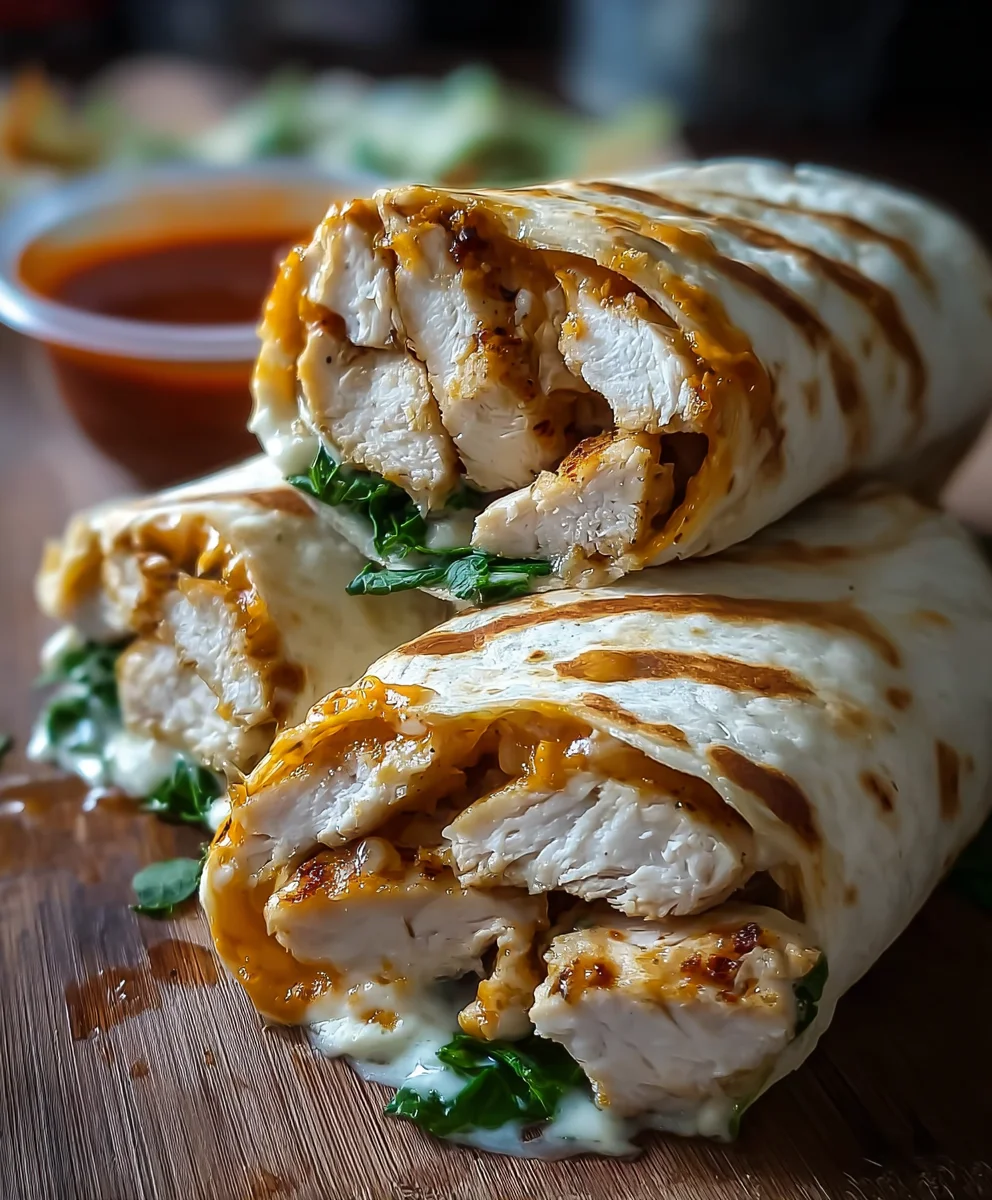
Cheesy Garlic Chicken Wraps are more than just a meal; they’re a passport to pure comfort and flavor. Imagin extracte tender, juicy chicken infused with the non-intoxicating aroma of garlic, all nestled within a warm tortilla and embraced by a gooey, melted cheese blanket. It’s no wonder these wraps have become a weeknight dinner hero for so many. They strike that perfect balance between being incredibly satisfying and surprisingly easy to prepare, making them ideal for busy evenings or casual gatherings. What truly elevates these Cheesy Garlic Chicken Wraps from ordinary to extraordinary is the harmonious blend of savory chicken, pungent garlic, and the rich, creamy indulgence of cheese, all brought together in a portable, handheld delight that’s perfect for dipping or enjoying on the go. Get ready to discover your new favorite go-to recipe!

Ingredients:
- 2 cups cooked and shredded chicken (rotisserie or grilled works wonderfully here for ease and flavor)
- 1 tablespoon olive oil
- 3 cloves garlic, minced (fresh garlic provides the most potent aroma and taste)
- ½ teaspoon salt (adjust to your preference)
- ¼ teaspoon black pepper (freshly ground is best for its bright flavor)
- ½ teaspoon garlic powder
- ½ teaspoon onion powder
- ½ teaspoon smoked paprika (this is optional, but adds a lovely subtle smoky depth)
- ½ cup cream cheese, softened (make sure it’s at room temperature for easy mixing)
- ½ cup shredded mozzarella cheese (for that signature melty stretch)
- ½ cup shredded cheddar cheese (adds a sharp, savory note)
- 2 tablespoons chopped fresh parsley (optional, but adds a vibrant freshness and color)
- 4 large flour tortillas (burrito-sized are ideal for holding all the goodness)
- 2 tablespoons butter, melted
- ½ teaspoon garlic powder (this is for brushing the outside of the wraps)
Preparing the Cheesy Garlic Chicken Filling
Step 1: Sauté the Aromatics
Let’s start by building a foundation of flavor for our chicken filling. In a medium skillet, heat the 1 tablespoon of olive oil over medium heat. Once the oil is shimmering, add the 3 cloves of minced fresh garlic. We want to sauté these just until they become fragrant, which usually takes about 30-60 seconds. Be careful not to burn the garlic, as burnt garlic can turn bitter and ruin the dish. You’ll notice a wonderful aroma filling your kitchen – that’s the sign it’s ready.
Step 2: Combine and Season the Chicken
Now, add the 2 cups of cooked and shredded chicken to the skillet with the sautéed garlic. Sprinkle in the ½ teaspoon salt, ¼ teaspoon black pepper, ½ teaspoon garlic powder, ½ teaspoon onion powder, and the optional ½ teaspoon smoked paprika. Stir everything together well, ensuring the chicken is evenly coated with the spices. Cook for about 2-3 minutes, stirring occasionally, allowing the flavors to meld and the chicken to warm through completely. This step ensures every bite of chicken is infused with delicious seasonings.
Step 3: Create the Creamy Cheese Mixture
In a separate medium bowl, combine the ½ cup of softened cream cheese with the ½ cup of shredded mozzarella cheese and the ½ cup of shredded cheddar cheese. If you’re using the optional 2 tablespoons of chopped fresh parsley, stir it in now. Use a spoon or spatula to mix these ingredients until they are well combined. The cream cheese acts as a binder, creating a wonderfully creamy and cohesive filling that holds all the shredded chicken together beautifully. The different cheeses will melt and meld, creating a rich and satisfying flavor profile.
Step 4: Marry the Chicken and Cheese
Add the seasoned chicken mixture from the skillet into the bowl with the cheese mixture. Stir everything together until the chicken is thoroughly coated in the creamy, cheesy goodness. The residual heat from the chicken will help the cheeses start to melt, creating a luscious, slightly gooey filling. If you find the mixture is a little too thick, you can add a tablespoon of milk or water to loosen it up slightly, but it should be a nice, spreadable consistency. This filling is the heart of our Cheesy Garlic Chicken Wraps!
Assembling and Grilling the Wraps
Step 5: Assemble the Wraps
Lay out your 4 large flour tortillas on a clean surface. Divide the cheesy chicken filling evenly among the four tortillas, placing it in the center of each one. Gently spread the filling out, leaving a border of about an inch around the edges to prevent it from oozing out when you fold and grill them. Don’t overstuff them, or they will be difficult to wrap and grill properly. Fold in the sides of each tortilla over the filling, then tightly roll up from the bottom. You want a snug wrap that will hold its shape.
Step 6: Prepare for Grilling
In a small bowl, whisk together the 2 tablespoons of melted butter with the ½ teaspoon of garlic powder. This butter mixture will give our wraps a delicious golden-brown crust and an extra punch of garlic flavor. Brush the outside of each assembled wrap generously with this garlic butter mixture. Make sure to coat both sides evenly. This step is crucial for achieving that irresistible crispy, golden exterior that makes these wraps so appealing.
Step 7: Grill to Perfection
Heat a large skillet or griddle over medium heat. You can also use a panini press if you have one. Carefully place the buttered wraps onto the hot skillet, seam-side down if possible, to help seal them. Cook for 3-5 minutes per side, or until the tortillas are golden brown and slightly crispy, and the cheese inside is melted and gooey. Press down gently with a spatula occasionally to ensure even browning and to help the cheese melt completely. Keep an eye on them to prevent burning; adjust the heat if necessary. Once they are beautifully golden and the cheese is oozing, they are ready to be enjoyed.
Conclusion:
There you have it! Your guide to creating the most delicious and satisfying Cheesy Garlic Chicken Wraps. We’ve walked through each step, ensuring a flavorful and incredibly easy meal that’s perfect for busy weeknights or casual gatherings. The creamy garlic sauce combined with tender chicken and melted cheese, all hugged by a warm tortilla, creates a symphony of textures and tastes. Don’t be afraid to get creative with your fillings; the possibilities are truly endless!
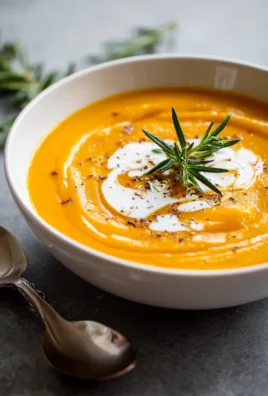
These wraps are wonderfully versatile. Serve them with a crisp side salad, a bowl of tomato soup, or some seasoned sweet potato fries for a complete and hearty meal. For variations, consider adding a sprinkle of red pepper flakes for a touch of heat, or try different cheeses like Monterey Jack or a sharp cheddar. You can also swap out the chicken for thinly sliced steak or even some seasoned black beans for a vegetarian option. The key is to have fun and make them your own!
We truly hope you enjoy making and devouring these Cheesy Garlic Chicken Wraps as much as we do. They’re a guaranteed crowd-pleaser and a fantastic way to add some exciting flavor to your meal rotation. So, gather your ingredients, put on your favorite apron, and let’s get cooking!
Frequently Asked Questions:
Can I make the cheesy garlic sauce ahead of time?
Yes, absolutely! The cheesy garlic sauce can be made a day or two in advance and stored in an airtight container in the refrigerator. You may need to gently reheat it on the stovetop or in the microwave, stirring occasionally, until it reaches your desired consistency.
What kind of tortillas work best for Cheesy Garlic Chicken Wraps?
Flour tortillas are generally the best choice as they are pliable and hold up well to the filling without tearing. You can use medium or large-sized tortillas depending on how generously you like to fill your wraps. Whole wheat tortillas are also a great option for a healthier twist.
How can I make these wraps spicier?
To add a spicy kick to your Cheesy Garlic Chicken Wraps, you can incorporate a pinch of cayenne pepper or red pepper flakes into the garlic sauce while it’s simmering. Alternatively, you could add a layer of your favorite hot sauce to the finished wrap, or mix some diced jalapeños into the chicken mixture before assembling.
Cheesy Garlic Chicken Wraps- Quick & Easy Meal
Delicious and easy-to-make wraps filled with seasoned chicken, creamy cheese, and a hint of garlic, grilled to golden perfection.
Ingredients
-
2 cups cooked and shredded chicken
-
1 tablespoon olive oil
-
3 cloves garlic, minced
-
½ teaspoon salt
-
¼ teaspoon black pepper
-
½ teaspoon garlic powder
-
½ teaspoon onion powder
-
½ teaspoon smoked paprika
-
½ cup cream cheese, softened
-
½ cup shredded mozzarella cheese
-
½ cup shredded cheddar cheese
-
2 tablespoons chopped fresh parsley
-
4 large flour tortillas
-
2 tablespoons butter, melted
-
½ teaspoon garlic powder
Instructions
-
Step 1
In a medium skillet, heat olive oil over medium heat. Sauté minced garlic until fragrant (30-60 seconds), being careful not to burn. -
Step 2
Add shredded chicken to the skillet. Sprinkle with salt, pepper, garlic powder, onion powder, and smoked paprika. Cook for 2-3 minutes, stirring, until chicken is warmed through and seasoned. -
Step 3
In a separate bowl, combine softened cream cheese, mozzarella, and cheddar cheese. Stir in chopped parsley if using. -
Step 4
Add the seasoned chicken mixture to the cheese mixture. Stir until the chicken is well coated. The residual heat will help melt the cheeses. -
Step 5
Lay out tortillas. Divide the chicken and cheese filling evenly among them, placing it in the center. Fold in the sides and tightly roll up each tortilla. -
Step 6
In a small bowl, whisk together melted butter and ½ teaspoon garlic powder. Brush the outside of each assembled wrap generously with this mixture. -
Step 7
Heat a large skillet or griddle over medium heat. Grill the wraps for 3-5 minutes per side, until golden brown, crispy, and the cheese inside is melted and gooey. Press gently with a spatula.
Important Information
Nutrition Facts (Per Serving)
It is important to consider this information as approximate and not to use it as definitive health advice.
Allergy Information
Please check ingredients for potential allergens and consult a health professional if in doubt.

Leave a Comment