
The Best Chocolate Chip Cookies are more than just a dessert; they’re a warm hug on a plate, a nostalgic trip back to childhood kitchens, and frankly, a universally loved treat for a reason. Who can resist that perfect balance of chewy center, slightly crisp edges, and rivers of melted chocolate? It’s the quintessential comfort food, the ultimate crowd-pleaser, and the kind of recipe that brings smiles to faces of all ages. What truly sets The Best Chocolate Chip Cookies apart is their inherent ability to be both simple and sublime. They’re the perfect vehicle for life’s little celebrations, a comforting companion on a rainy afternoon, or just a delightful indulgence when you need a moment of pure bliss. Forget those dry, bland imposters; we’re talking about cookies that are decadent, deeply satisfying, and undeniably delicious.

Ingredients:
- 3/4 cup (168 g) unsalted butter, softened
- 1 cup (200 g) packed light brown sugar
- 1/4 cup (50 g) granulated sugar
- 1 large egg, at room temperature
- 1 large egg yolk, at room temperature
- 1 tablespoon pure vanilla extract
- 1 3/4 cup (220 g) all-purpose flour
- 3/4 teaspoon baking soda
- 3/4 teaspoon kosher salt
- 1 1/2 cups (255 g) semi sweet chocolate chips or roughly chopped chocolate
- Flaky sea salt, for sprinkling
Preparing the Dough
Creaming the Butter and Sugars
The foundation of any truly exceptional chocolate chip cookie lies in the creaming of the butter and sugars. This step is crucial for incorporating air, which will contribute to the cookies’ texture – think a slightly chewy center with crisp edges. Start by ensuring your unsalted butter is truly softened, not melted. It should yield easily to the touch but still hold its shape. In the bowl of a stand mixer fitted with the paddle attachment, or in a large mixing bowl if using a hand mixer, combine the softened butter with the packed light brown sugar and granulated sugar. Begin mixing on medium speed, gradually increasing to medium-high. You’re looking for a light, fluffy, and pale mixture. This process can take anywhere from 3 to 5 minutes. Don’t rush it! Scrape down the sides of the bowl periodically with a spatula to ensure everything is incorporated evenly. The sugars will dissolve and aerate the butter, creating tiny air pockets that will expand in the oven.
Adding the Eggs and Vanilla
Once your butter and sugar mixture is wonderfully light and fluffy, it’s time to add the wet ingredients. First, crack in your large egg and add the extra large egg yolk. Remember, having these at room temperature is key. Room temperature eggs emulsify better with the fat, creating a smoother, more cohesive dough. Mix on medium speed until just combined. Overmixing at this stage can develop the gluten in the flour too much, leading to tough cookies. Next, add the pure vanilla extract. The quality of your vanilla extract makes a significant difference here, so use a good one! Mix until the vanilla is fully incorporated and the mixture looks uniform. Again, a quick scrape of the bowl is helpful to ensure no streaks of egg remain.
Combining Dry Ingredients and Incorporating Chocolate
Whisking the Flour Mixture
In a separate medium bowl, whisk together the all-purpose flour, baking soda, and kosher salt. Whisking isn’t just about mixing; it’s also about aerating the dry ingredients, ensuring that the baking soda and salt are evenly distributed throughout the flour. This even distribution is critical for consistent leavening and flavor in every bite. Make sure to get all the corners of the bowl to prevent pockets of unincorporated baking soda or salt.
Gradually Adding Dry to Wet
Now, it’s time to bring everything together. With the mixer on low speed, gradually add the dry ingredients to the wet ingredients. Start by adding about a third of the flour mixture at a time. Mix until just combined before adding the next portion. Continue this process until all the flour is incorporated. Again, it’s vital not to overmix. As soon as you no longer see streaks of flour, stop mixing. Overmixing at this stage will develop the gluten too much, resulting in tough, dense cookies. The dough will be thick and cohesive.
Folding in the Chocolate
The moment we’ve all been waiting for – the chocolate! Add the semi-sweet chocolate chips or roughly chopped chocolate to the dough. If you’re using a stand mixer, switch to the paddle attachment or use a sturdy spatula or wooden spoon to fold in the chocolate. If you’re using a hand mixer, you can gently fold it in with the beaters set to their lowest speed, or more effectively, use a spatula. Fold the chocolate in until it’s evenly distributed throughout the dough. Resist the urge to overmix here either; you want to see distinct pockets of chocolate, not a uniformly brown dough. For extra decadence, consider using a mix of chocolate chips and chunks of a good quality chocolate bar for varied textures.
Baking the Perfect Cookies
Chilling the Dough (Optional but Recommended)
While not strictly mandatory, chilling the dough significantly improves the flavor and texture of your chocolate chip cookies. Wrap the dough tightly in plastic wrap and refrigerate for at least 30 minutes, or up to 3 days. Chilling allows the fats to solidify and the flavors to meld, resulting in a richer cookie. It also helps prevent the cookies from spreading too much during baking. If you’re short on time, even a 15-minute chill in the freezer can make a difference. When you’re ready to bake, let the dough sit at room temperature for a few minutes to make it slightly more pliable for scooping.
Portioning and Baking
Preheat your oven to 375°F (190°C). Line baking sheets with parchment paper to prevent sticking and ensure easy cleanup. This is also a good time to grab your flaky sea salt. Using a cookie scoop (about 1.5 to 2 tablespoons), portion out the dough into balls. Place the dough balls about 2 inches apart on the prepared baking sheets, as they will spread. For perfectly round cookies, gently roll the dough balls between your palms. Now for the magic touch: lightly sprinkle the tops of the dough balls with flaky sea salt. This might seem unusual, but the salt crystals will melt slightly during baking, creating a delightful salty-sweet contrast that elevates the entire cookie experience.
Baking to Golden Perfection
Bake for 9 to 11 minutes, or until the edges are golden brown and the centers still look slightly soft and underbaked. This is the secret to achieving that desirable chewy interior. The cookies will continue to cook and set up on the baking sheet as they cool. For even baking, rotate the baking sheets halfway through the baking time. Keep a close eye on them, as ovens can vary. You’re looking for a beautiful golden hue around the edges, with a slightly paler, softer center. Avoid overbaking, which will result in dry, hard cookies.
Cooling and Enjoying
Once baked, remove the baking sheets from the oven and let the cookies cool on the baking sheets for 5 to 10 minutes. This allows them to firm up before you attempt to move them. Then, carefully transfer the cookies to a wire rack to cool completely. This is where the final magic happens, as the residual heat continues to gently cook the centers, achieving that perfect balance of chewy and crisp. Resist the temptation to eat them all immediately, though I know it’s hard! Let them cool to a temperature that’s safe to handle, and then prepare for pure bliss. The aroma alone is enough to make your kitchen feel like heaven.
Conclusion:
And there you have it – the recipe for what I truly believe are The Best Chocolate Chip Cookies! We’ve walked through each step, from creaming the butter and sugar to achieving that perfect golden-brown edge with a chewy center. These cookies are more than just a treat; they’re a little piece of happiness, perfect for any occasion, from a cozy afternoon snack to a festive gathering. Remember, the key is in the quality of your ingredients and a little bit of patience. Don’t be afraid to experiment with the chocolate chips too – a mix of semi-sweet and dark chocolate can add wonderful depth. I encourage you to bake a batch this week and share the joy. These cookies are fantastic on their own, but they also pair wonderfully with a glass of cold milk or a scoop of vanilla ice cream. Go forth and bake!
Frequently Asked Questions:
Q1: My cookies spread too much. What did I do wrong?
This is a common issue! It usually happens if your butter was too soft or melted, or if you used too much sugar. Make sure your butter is softened, but not greasy. Also, chilling the dough for at least 30 minutes before baking can significantly help prevent excessive spreading. It allows the fats to firm up.
Q2: Can I make these cookies ahead of time?
Absolutely! You can prepare the dough and roll it into balls, then store them in an airtight container in the refrigerator for up to 3 days, or freeze them for up to 3 months. When you’re ready to bake, you can bake them directly from frozen (they might need an extra minute or two) or let them thaw slightly in the fridge.

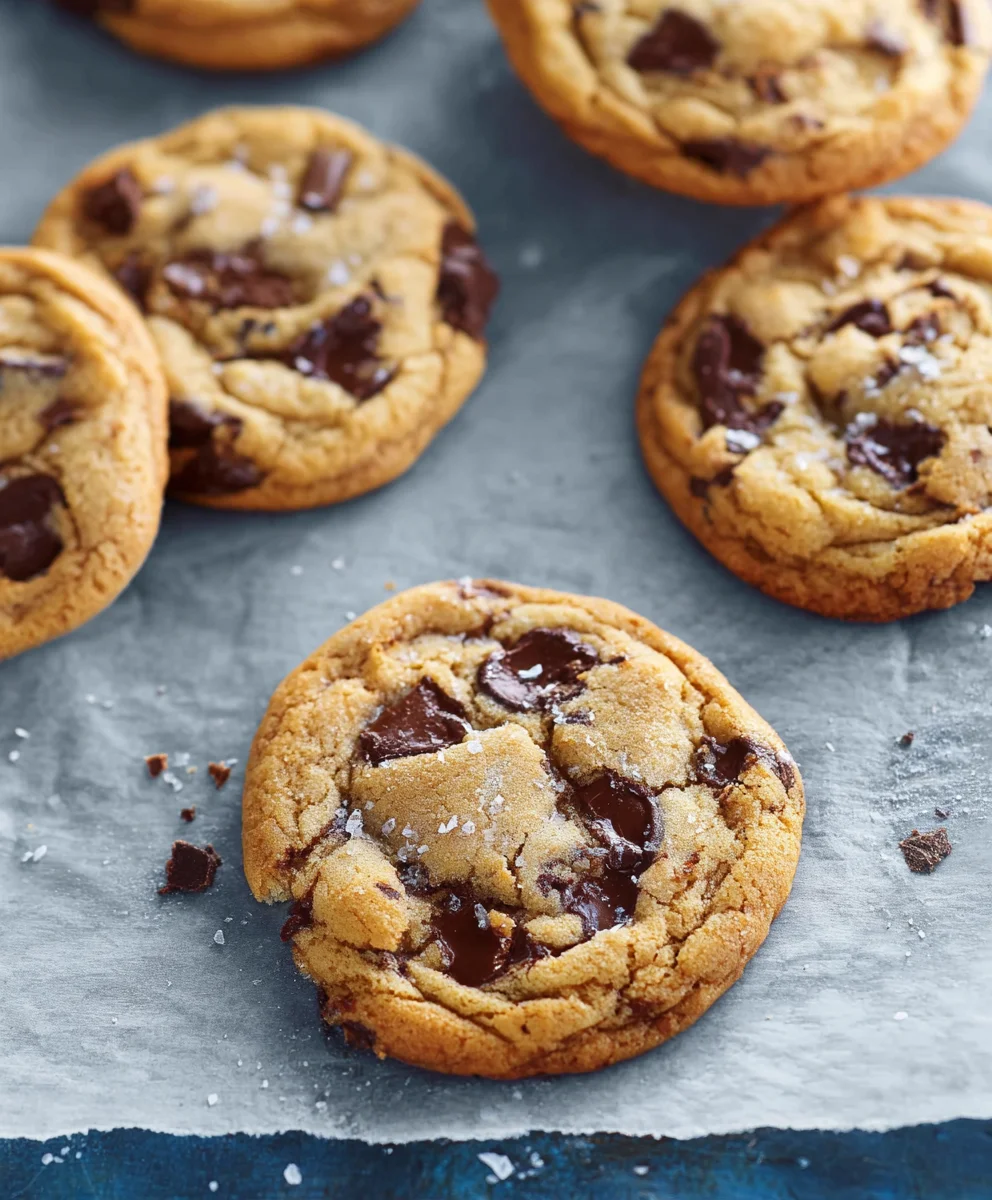
Best Chocolate Chip Cookies – Irresistible Chewy Bites
Experience the ultimate chewy chocolate chip cookie with crisp edges and a gooey center. This recipe delivers perfectly balanced sweet and salty flavors in every bite.
Ingredients
-
3/4 cup (168 g) unsalted butter, softened
-
1 cup (200 g) packed light brown sugar
-
1/4 cup (50 g) granulated sugar
-
1 large egg, at room temperature
-
1 large egg yolk, at room temperature
-
1 tablespoon pure vanilla extract
-
1 3/4 cup (220 g) all-purpose flour
-
3/4 teaspoon baking soda
-
3/4 teaspoon kosher salt
-
1 1/2 cups (255 g) semi sweet chocolate chips or roughly chopped chocolate
-
Flaky sea salt, for sprinkling
Instructions
-
Step 1
Cream softened butter with packed light brown sugar and granulated sugar in a stand mixer on medium-high speed until light, fluffy, and pale, about 3-5 minutes. Scrape down the bowl periodically. -
Step 2
Add the room temperature egg, egg yolk, and vanilla extract. Mix on medium speed until just combined. Avoid overmixing. -
Step 3
In a separate bowl, whisk together all-purpose flour, baking soda, and kosher salt. Gradually add the dry ingredients to the wet ingredients, mixing on low speed until just combined. Do not overmix. -
Step 4
Fold in the semi-sweet chocolate chips or chopped chocolate until evenly distributed. Avoid overmixing. -
Step 5
Chill the dough, wrapped tightly in plastic wrap, for at least 30 minutes (or up to 3 days) for improved flavor and texture. This step is optional but recommended. -
Step 6
Preheat oven to 375°F (190°C). Line baking sheets with parchment paper. Portion dough into balls (about 1.5-2 tablespoons) and place 2 inches apart on baking sheets. Sprinkle tops with flaky sea salt. -
Step 7
Bake for 9-11 minutes, or until edges are golden brown and centers are slightly soft. Rotate baking sheets halfway through. Remove from oven when edges are golden and centers still look underbaked. -
Step 8
Let cookies cool on baking sheets for 5-10 minutes before transferring to a wire rack to cool completely. This allows them to firm up and achieve the perfect chewy texture.
Important Information
Nutrition Facts (Per Serving)
It is important to consider this information as approximate and not to use it as definitive health advice.
Allergy Information
Please check ingredients for potential allergens and consult a health professional if in doubt.


Leave a Comment