
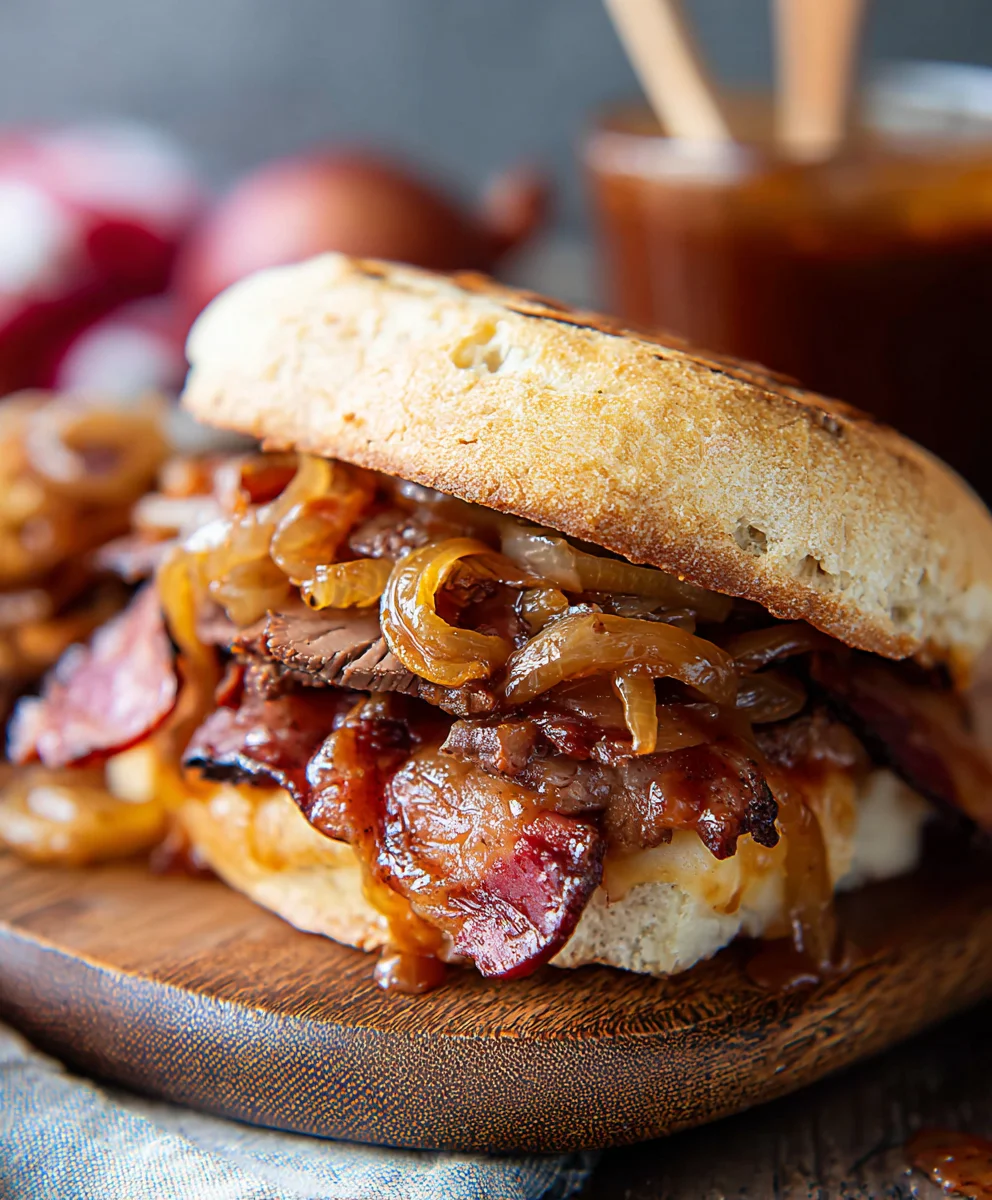
Best Beef Beef Beef Bacon Sandwich with Caramelized Onions Recipe. Oh, where do I even begin extract with this culinary masterpiece? If you’re looking to elevate your sandwich game from ordinary to absolutely extraordinary, you’ve landed in the right place. This isn’t just any sandwich; it’s a symphony of textures and flavors designed to tantalize your taste buds and leave you utterly satisfied. People adore this dish because it hits all the right notes: the savory depth of perfectly cooked beef, the irresistible crispiness and salty puncbeef baconbacon, and the sweet, complex magic of deeply caramelized onions. What truly makes the Best Beef BaconBeef Bacon Sandwich with Caramelized Onions Recipe stand out is the harmonious marriage of these elements. It’s a comforting yet sophisticated creation, perfect for a hearty lunch, a weekend treat, or even when you just need a seriously delicious meal that feels like a hug in every bite. Get ready to impress yourself and anyone lucky enough to share it with you.

Ingredients:
- 2 large boneless skinless chicken breasts
- 1/3 cup flour
- 2 tablespoons olive oil
- 1/2 cup dry white grape juice
- 3 tablespoons butter
- 3 cloves garlic, minced
- 3 tablespoons flour
- 3/4 cup chicken broth
- 1 chicken bouillon cube
- 1 ¼ cups half and half (a mixture of half cream and half milk)
- 3 tablespoons cream cheese, softened
- 3/4 cup grated Parmesan cheese
- 3 cups fresh spinach
- 1-2 tablespoons lemon juice, optional
- 1/2 teaspoon dried basil
- 1/2 teaspoon dried oregano
- 1/2 teaspoon mustard powder
- 1 teaspoon dried parsley
- Salt and freshly ground black pepper, to taste
- Lemon Pepper Seasoning (for seasoning chicken)
Preparing the Chicken
Step 1: Season and Dredge the Chicken Breasts
Begin extract by preparing your chicken breasts. If they are particularly thick, you can either pound them to an even thickness (about 1/2 inch) for faster and more even cooking, or slice them horizontally into thinner cutlets. This step ensures that the chicken cooks through without the edges becoming dry. Next, generously season both sides of the chicken breasts with your Lemon Pepper Seasoning. Don’t be shy with the seasoning; it will infuse the chicken with a wonderful bright and peppery flavor. In a shallow dish or on a plate, combine the 1/3 cup of all-purpose flour with a pinch of salt and black pepper. Dredge each seasoned chicken breast in the seasoned flour, shaking off any excess. This flour coating will help create a light, crispy crust when pan-fried.
Step 2: Pan-Fry the Chicken
Heat the 2 tablespoons of olive oil in a large skillet over medium-high heat until it shimmers. Carefully place the floured chicken breasts into the hot skillet. You should hear a satisfying sizzle. Cook the chicken for about 5-7 minutes per side, depending on its thickness, until it is golden brown and cooked through. The internal temperature should reach 165 degrees Fahrenheit (74 degrees Celsius). Once cooked, remove the chicken from the skillet and set it aside on a clean plate. You can tent it loosely with foil to keep it warm while you prepare the sauce. Don’t clean the skillet just yet; the flavorful bits left in the pan are essential for our sauce.
Crafting the Creamy Lemon-Herb Sauce
Step 3: Sauté Aromatics and Create the Roux
Reduce the skillet heat to medium. Add the 3 tablespoons of butter to the same skillet, allowing it to melt and coat the bottom, scraping up any browned bits from the chicken. Add the minced garlic and sauté for about 1 minute until fragrant, being careful not to burn it. Next, sprinkle in the 3 tablespoons of flour over the melted butter and garlic. Stir constantly for about 1-2 minutes to cook out the raw flour taste and create a light roux. This mixture will form the thickening base for our sauce.
Step 4: Building the Sauce Base
Gradually whisk in the 1/2 cup of dry white grape juice. Continue whisking until it’s smooth and well combined with the roux. Let this simmer for a minute or two, allowing the flavors to meld and the liquid to reduce slightly. Then, slowly pour in the 3/4 cup of chicken broth, whisking continuously to prevent lumps. Add the chicken bouillon cube and stir until it dissolves completely. Bring the mixture to a gentle simmer, stirring occasionally.
Step 5: Enriching the Sauce and Adding Flavor
Reduce the heat to low. Slowly whisk in the 1 ¼ cups of half and half. Continue stirring gently until the sauce is smooth and heated through, but do not let it boil vigorously. Stir in the softened 3 tablespoons of cream cheese until it is completely melted and incorporated, adding a wonderful creaminess and richness to the sauce. Gradually add the 3/4 cup of grated Parmesan cheese, stirring until it is melted and the sauce is smooth and slightly thickened. Season the sauce with the dried basil, dried oregano, mustard powder, and dried parsley. Taste and adjust with salt and freshly ground black pepper as needed. If you desire a brighter, more zesty flavor, stir in 1-2 tablespoons of lemon juice at this stage.
Step 6: Wilting the Spinach and Finishing the Dish
Finally, add the 3 cups of fresh spinach to the sauce. Stir gently until the spinach wilts down into the sauce, which should only take a minute or two. The heat from the sauce will perfectly cook the delicate greens. At this point, your creamy lemon-herb sauce is ready. You can either return the cooked chicken breasts to the skillet and spoon the sauce over them, or you can slice the chicken and arrange it on plates, then generously ladle the sauce over the top. Serve immediately for the best texture and flavor experience.
Conclusion:
You’ve now mastered the “Best Beef Beef Beef Bacon Sandwich with Caramelized Onions Recipe”! This sandwich isn’t just a meal; it’s an experience. The rich, savory beef paired with the crispy, sbeef baconbacon and the sweet, tender caramelized onions creates a symphony of flavors and textures that are truly unforgettable. We’ve covered every step, from selecting the finest cuts of beef to achieving that perfect caramelization on your onions. Now, it’s your turn to bring this culinary masterpiece to life in your own kitchen.
For serving, consider pairing your “Best Beef BaconBeef Bacon Sandwich with Caramelized Onions Recipe” with a side of crispy sweet potato fries or a light, refreshing coleslaw to balance the richness. Get creative with variations too! Try adding a sharp cheddar cheese, a dollop of horseradish cream, or even some sautéed mushrooms for an extra layer of deliciousness.
Don’t be afraid to experiment and make this recipe your own. The joy of cooking is in the discovery and the sharing. So, gather your ingredients, invite your loved ones, and prepare to be amazed by the incredible flavors of this “Beef BaconBeef Beef Bacon Sandwich with Caramelized Onions Recipe.” Happy cooking!
FAQs:
How can I make the caramelized onions even sweeter?
To enhance the sweetness of your caramelized onions, you can add a pinch of sugar or a tablespoon of brown sugar during the slow cooking process. A splash of balsamic vinegar towards the end can also add a delightful depth of sweetness and tang.
What kind of beef is best for this sandwich?
For Beef BaconBest Beef Beef Bacon Sandwich with Caramelized Onions Recipe,” cuts like thinly sliced sirloin, ribeye, or even flank steak work wonderfully. The key is to choose a cut that’s flavorful and can be cooked to a tender, juicy perfection. You can also opt for pre-sliced deli roast beef for convenience.
Can I make the components of this sandwich ahead of time?
Absolutely! The caramelized onions can be made a day or two in advance and stored in an airtight container in the refrigerator. Theybeef baconat beautifully. The bacon can also be cooked and crisped ahead of time and kept at room temperature for a few hours, or refrigerated and reheated briefly before assembling.
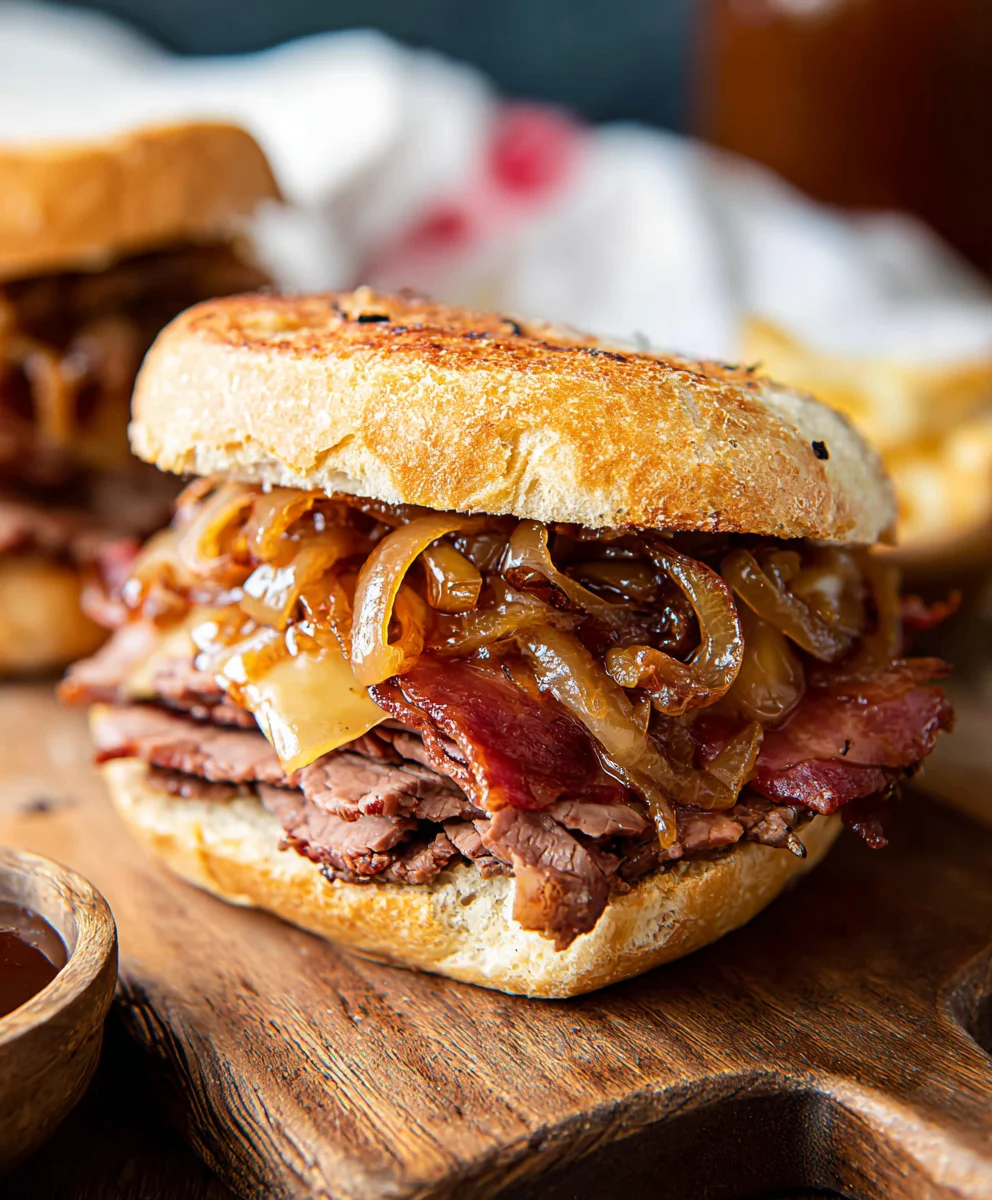
Best Beef Bacon and Caramelized Onion Sandwich Recipe
A hearty and flavorful sandwich featuring tender beef bacon and sweet caramelized onions, all brought together on toasted bread.
Ingredients
-
8 ounces thinly sliced beef bacon
-
2 large yellow onions, thinly sliced
-
2 tablespoons olive oil
-
1/4 cup balsamic vinegar
-
2 tablespoons brown sugar
-
1 teaspoon salt
-
1/2 teaspoon black pepper
-
8 slices of your favorite bread
-
4 tablespoons butter, softened
-
1/4 cup mayonnaise (optional)
Instructions
-
Step 1
In a large skillet, heat the olive oil over medium heat. Add the thinly sliced onions and cook, stirring occasionally, until softened and translucent, about 10-15 minutes. -
Step 2
Add the balsamic vinegar, brown sugar, salt, and black pepper to the skillet with the onions. Stir to combine. Reduce heat to low, cover, and simmer for 20-30 minutes, stirring occasionally, until the onions are deeply caramelized and tender. -
Step 3
While the onions are caramelizing, cook the beef bacon in a separate skillet over medium heat until crispy. Drain on paper towels and set aside. -
Step 4
Butter one side of each slice of bread. If using mayonnaise, spread it on the unbuttered side of half the bread slices. -
Step 5
Assemble the sandwiches by layering the cooked beef bacon and caramelized onions onto the bread slices. Top with the remaining bread slices, butter-side up. -
Step 6
Grill the sandwiches in a clean skillet or on a griddle over medium heat for 3-5 minutes per side, until the bread is golden brown and toasted and the filling is heated through. -
Step 7
Slice the sandwiches in half and serve immediately.
Important Information
Nutrition Facts (Per Serving)
It is important to consider this information as approximate and not to use it as definitive health advice.
Allergy Information
Please check ingredients for potential allergens and consult a health professional if in doubt.


Leave a Comment