
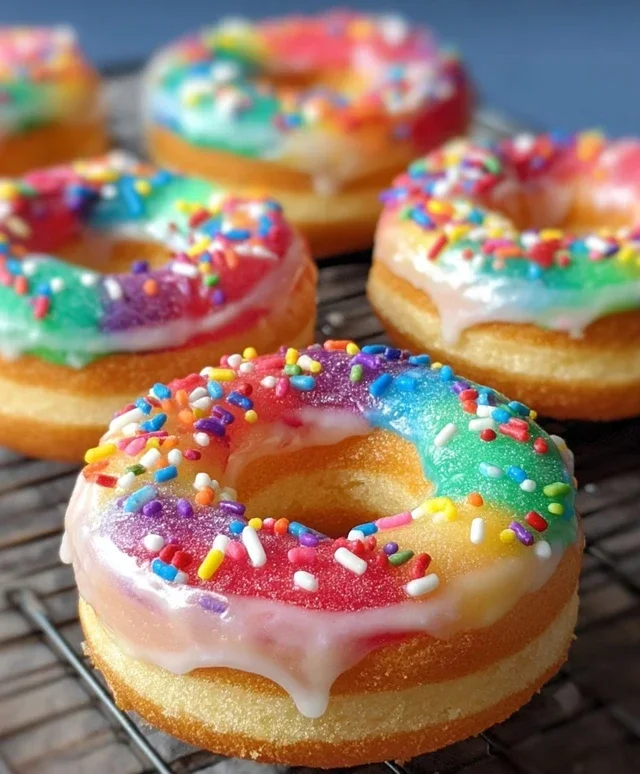
Mini Rainbow Vanilla Bean Donuts are not just a dessert; they’re a miniature explosion of joy, a celebration in every bite. Who can resist their perfectly petite size, designed for guilt-free indulgence and delightful sharing (or not sharing, we won’t judge!)? These aren’t your average donuts; they’re a canvas for color and a testament to the subtle, sophisticated fragrance of real vanilla bean. We all love donuts, but there’s something uniquely magical about these tiny treasures. The playful swirls of color, reminiscent of a vibrant rainbow, make them an instant mood booster and a showstopper for any occasion, from birthday parties to casual weekend brunches. They’re surprisingly simple to make, and the aroma of vanilla bean as they bake is simply non-intoxicating. Get ready to brighten your day and delight your taste buds with these Mini Rainbow Vanilla Bean Donuts!

Mini Rainbow Vanilla Bean Donuts
Get ready to sprinkle some serious joy into your day with these delightful Mini Rainbow Vanilla Bean Donuts! They’re not just a treat for your taste buds, but a feast for your eyes too, bursting with vibrant colors and the pure, rich aroma of real vanilla bean. Perfect for celebrations, a special breakfast, or just because you deserve something wonderfully whimsical, these little rings of happiness are surprisingly easy to make and guaranteed to bring smiles all around. We’re going to bake them, which makes them a touch lighter and less fussy than their fried counterparts, and the rainbow effect is achieved through a simple yet magical layering technique. Let’s get started on creating these edible works of art!
Ingredients:
Preparing the Donut Batter
The foundation of our delicious donuts lies in a simple yet effective batter. Begin extract by gathering all your dry ingredients: the sifted all-purpose flour, granulated sugar, baking powder, and salt. Sifting the flour is a crucial step as it aerates it, preventing any lumps and ensuring a lighter texture in your final donuts. Whisk these together thoroughly in a large bowl until everything is evenly distributed. This ensures the leavening agents and salt are spread throughout, leading to uniform rise and flavor.
In a separate, medium-sized bowl, combine your wet ingredients. This includes the buttermilk, lightly beaten eggs, melted butter, and the teaspoon of vanilla extract. Now for the star of the show: the seeds scraped from one vanilla bean. Don’t shy away from using a real vanilla bean; its flecks and intense flavor are incomparable to extract alone, and they’ll add beautiful little dark specks throughout your donuts, making them look even more artisanal. Whisk these wet ingredients together until well combined.
Next, it’s time to marry the wet and dry ingredients. Pour the wet mixture into the bowl with the dry ingredients. Gently mix until just combined. It’s important not to overmix at this stage. Overmixing can develop the gluten in the flour too much, resulting in tough donuts. A few small lumps are perfectly fine. We want a tender crum extractb, and a light hand is key to achieving that.
Creating the Rainbow Effect
This is where the magic truly happens! Divide your donut batter equally among six small bowls. You’ll need six different gel food colors: red, orange, yellow, green, blue, and purple. Add a few drops of gel food coloring to each bowl, one color per bowl. Gel food coloring is ideal because it’s highly concentrated, meaning you’ll need less to achieve vibrant hues, and it won’t alter the batter’s consistency. Stir each bowl until the color is evenly distributed. You’ll be amazed as your plain batter transforms into a spectrum extract of beautiful colors. If you want even more intense colors, you can add another drop or two of food coloring, but remember to stir well to ensure it’s fully incorporated.
Now, prepare your donut pan. Lightly grease each cavity of your donut pan, or use a baking spray. For mini donuts, a standard mini donut pan works perfectly.
Assembling and Baking the Donuts
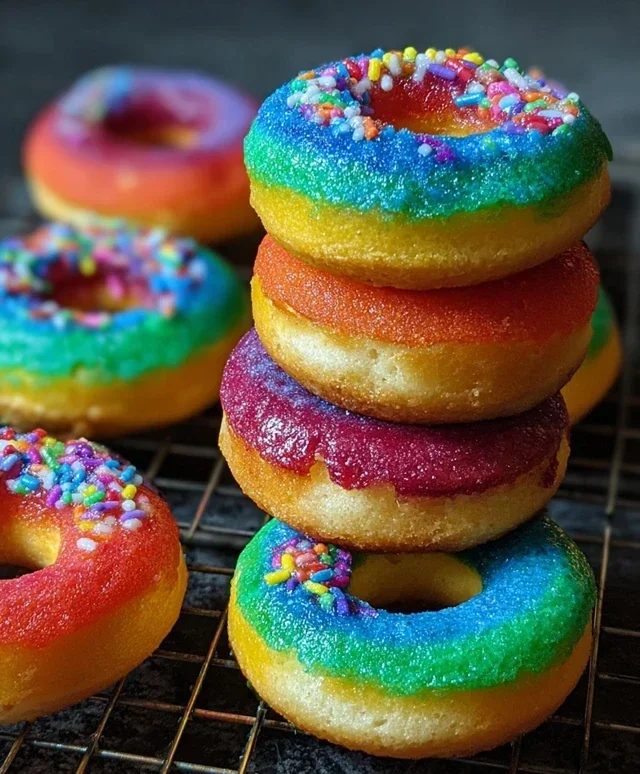
This is the fun, artistic part! You’ll be layering the colored batters to create the rainbow effect within each donut. Start with the purple batter and spoon a small amount into the bottom of each donut cavity. Then, add a small spoonful of blue batter on top of the purple. Continue layering in rainbow order: green, yellow, orange, and finally red. Don’t overfill the cavities; aim to fill them about two-thirds of the way full. You can use a toothpick or a skewer to gently swirl the colors together a tiny bit if you wish, but don’t go overboard, as you want distinct layers. The heat of the oven will do some gentle mingling for you.
Once your donut pan is filled with these colorful creations, it’s time to bake! Preheat your oven to 350°F (175°C). Place the donut pan on a baking sheet (this makes it easier to transfer in and out of the oven and catches any potential drips). Bake for 8-12 minutes, or until a toothpick inserted into the center of a donut comes out clean. The baking time will vary depending on your oven and the size of your donuts, so keep an eye on them. Be careful not to overbake, as this can lead to dry donuts.
Glazing and Decorating
While your donuts are baking and cooling, it’s time to prepare the glaze. In a medium bowl, whisk together the sifted confectioners’ sugar, tablespoon of milk or cream, and the ½ teaspoon of vanilla extract. Sifting the confectioners’ sugar is essential for a smooth, lump-free glaze. Start with the recommended amount of milk, but you might need to add a little more, a teaspoon at a time, until you reach your desired drizzling consistency. The glaze should be thick enough to coat the donuts but thin enough to drip off easily. If you want to add a subtle tint to your glaze, you can add a tiny drop of food coloring.
Once the donuts have cooled in the pan for a few minutes, carefully invert them onto a wire rack to cool completely. This is important because if you glaze them while they’re still warm, the glaze will melt and slide right off. Once the donuts are fully cooled, it’s time to glaze! Dip the tops of each donut into the prepared glaze, letting any excess drip back into the bowl. For an extra festive touch, immediately sprinkle with rainbow sprinkles while the glaze is still wet. The sprinkles will adhere beautifully, adding a delightful crunch and extra pop of color.
And there you have it! Mini Rainbow Vanilla Bean Donuts, ready to be devoured. The vibrant colors hidden within each bite are a delightful surprise, and the vanilla bean flavor is truly something special. Enjoy every single colorful, delicious moment!
Conclusion:
These mini rainbow vanilla bean donuts are an absolute delight, offering a burst of vibrant color and a classic, comforting vanilla flavor in every bite. The beauty of this recipe lies in its simplicity and the sheer joy it brings, whether you’re a seasoned baker or just starting out. They’re perfect for any occasion, from a cheerful breakfast treat to a whimsical dessert that will impress guests of all ages. The tender, cake-like crum extractb, infused with fragrant vanilla bean, is truly irresistible, and the colorful glaze makes them a feast for the eyes as well as the palate.
I highly encourage you to give these mini rainbow vanilla bean donuts a try! They’re surprisingly easy to make and the result is incredibly rewarding. Imagin extracte the smiles you’ll bring to faces when you present these little gems. For serving suggestions, they are wonderful on their own, but also pair beautifully with a cup of coffee or tea. You could also arrange them on a tiered stand for a stunning party centerpiece. For variations, feel free to experiment with different food coloring combinations for the glaze, or even add a hint of lemon zest to the donut batter for a zesty twist. The possibilities are as colorful as the donuts themselves!
Frequently Asked Questions:
Can I make these donuts ahead of time?
Absolutely! You can bake the donuts a day in advance and store them in an airtight container at room temperature. Glaze them just before serving for the freshest, glossiest finish.
What if I don’t have a donut pan?
No problem! You can bake these in mini muffin tins. The baking time might need a slight adjustment, so keep an eye on them. They’ll be slightly more rounded, but still incredibly delicious.
Mini Rainbow Vanilla Bean Donuts
Delightful mini donuts infused with real vanilla bean and colored in vibrant rainbow hues, finished with a sweet vanilla glaze.
Ingredients
-
2 cups all-purpose flour, sifted
-
¾ cup granulated sugar
-
2 teaspoons baking powder
-
½ teaspoon salt
-
¾ cup buttermilk
-
2 large eggs, lightly beaten
-
2 tablespoons butter, melted
-
1 teaspoon vanilla extract
-
Seeds from 1 vanilla bean
-
Gel food coloring (red, orange, yellow, green, blue, purple)
-
1 cup confectioners’ sugar, sifted
-
1 tablespoon whole milk or heavy cream
-
½ teaspoon vanilla extract
-
Rainbow sprinkles (optional)
Instructions
-
Step 1
Preheat oven to 350°F (175°C). Grease and flour mini donut pans or line with parchment paper. -
Step 2
In a large bowl, whisk together the sifted flour, granulated sugar, baking powder, and salt. -
Step 3
In a separate bowl, whisk together the buttermilk, lightly beaten eggs, melted butter, vanilla extract, and vanilla bean seeds. -
Step 4
Pour the wet ingredients into the dry ingredients and mix until just combined. Do not overmix. -
Step 5
Divide the batter into separate small bowls. Tint each bowl with a different gel food coloring to create rainbow colors (red, orange, yellow, green, blue, purple). Swirl the colors gently into the batter in each bowl. -
Step 6
Spoon or pipe the colored batters into the prepared mini donut pans, filling each cavity about two-thirds full. You can layer or swirl the colors within each donut. -
Step 7
Bake for 8-10 minutes, or until a toothpick inserted into the center comes out clean. -
Step 8
Let the donuts cool in the pans for a few minutes before transferring them to a wire rack to cool completely. -
Step 9
To make the glaze, whisk together the sifted confectioners’ sugar, milk or cream, and vanilla extract until smooth. Add more milk or cream, a teaspoon at a time, if needed to reach desired consistency. -
Step 10
Dip the cooled donuts into the glaze, allowing excess to drip off. Decorate with rainbow sprinkles immediately, if using.
Important Information
Nutrition Facts (Per Serving)
It is important to consider this information as approximate and not to use it as definitive health advice.
Allergy Information
Please check ingredients for potential allergens and consult a health professional if in doubt.

Leave a Comment