
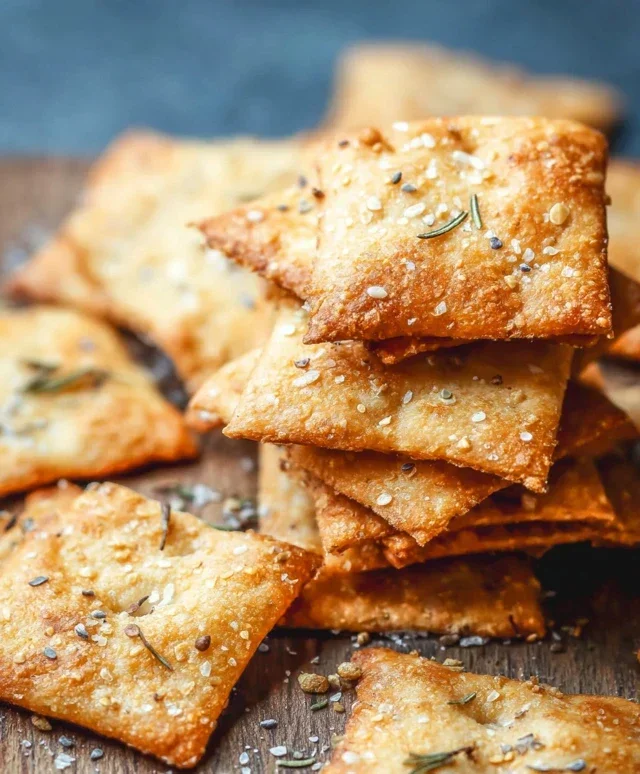
Keto Crackers (2 ingredients!) are about to become your new pantry staple. If you’ve been searching for that satisfying crunch without the carb-load, your quest ends here. These ridiculously simple Keto Crackers (2 ingredients!) are a game-changer, perfect for dipping, topping, or just mindlessly munching. Imagin extracte a world where you can enjoy that savory, crispy bite without derailing your keto lifestyle – this is it! People absolutely adore these because they deliver on flavor and texture with an almost unbelievable ease of preparation. What truly sets these apart is their minimalist magic; we’re talking about transforming humble ingredients into a snack that feels both gourmet and guilt-free. Get ready to impress yourself (and anyone you share them with) with these incredible, easy-peasy Keto Crackers.

Ingredients:
Getting Started: A Simple Approach to Keto Crackers
Welcome to the easiest keto cracker recipe you’ll ever make! Seriously, with just a couple of primary ingredients, you can whip up a batch of delicious, crunchy, and satisfying crackers that are perfect for dipping, snacking, or serving alongside your favorite keto-friendly toppings. Forget those store-bought options that are often loaded with hidden carbs and preservatives. This recipe is all about simplicity and pure, wholesome flavor. We’re talking about a recipe that even the most novice baker can master. The beauty of these crackers lies in their minimal ingredient list, which means less shopping and less fuss in the kitchen. They’re a game-changer for anyone following a ketogenic lifestyle, offering a guilt-free way to enjoy a classic snack.
The magic of these crackers comes from the combination of almond flour and cheese. Almond flour provides a neutral base with a slightly nutty flavor, and it’s a fantastic source of healthy fats and fiber, making it a keto staple. Shredded cheese, when baked, becomes wonderfully melty and then crisps up to create that irresistible crunch we all crave in a cracker. The salt is there to elevate all these flavors, and the water acts as a binder, helping everything come together into a workable dough. Don’t be surprised if you find yourself making double batches because these disappear so quickly!
Preparing Your Keto Cracker Dough
The first step to creating these delightful keto crackers is to get your oven preheating and prepare your baking sheet. This is crucial for ensuring even baking and achieving that perfect crispness. Preheat your oven to 350 degrees Fahrenheit (175 degrees Celsius). While your oven is doing its thing, line a baking sheet with parchment paper. Parchment paper is your best friend here; it prevents the crackers from sticking and makes cleanup an absolute breeze. If you don’t have parchment paper, a silicone baking mat will also work perfectly.
Now, let’s get to the dough itself. In a medium-sized mixing bowl, combine your 1 cup of almond flour. If you’re using salt, add your 1/4 teaspoon of salt to the almond flour and give it a quick stir to distribute it evenly. Next, add your 1 cup of shredded cheese. Make sure your cheese is shredded finely for the best results; if you’re shredding it yourself, aim for a fine grate. The goal is to have the cheese distribute evenly throughout the almond flour. Now, it’s time to bring it all together. Use a fork or your fingertips to start mixing the dry ingredients with the cheese. You want to create a crum extractbly texture at this stage, where the cheese is somewhat coated in the almond flour.
This is where the magic of the binder comes in. Gradually add your 1-2 tablespoons of water, one tablespoon at a time. You’re not aiming for a wet batter; instead, you’re looking for a dough that just holds together when you squeeze it in your hand. You might find that you only need one tablespoon of water, especially if your cheese is already a bit moist. If your dough feels too dry and crum extractbly and won’t clump together, add the second tablespoon, but do so very slowly, just a teaspoon at a time, until you reach the right consistency. The dough should be pliable enough to press out without falling apart. This stage requires a gentle touch; you don’t want to overwork the dough.
Shaping and Baking Your Keto Crackers
Once you have your dough nicely formed, it’s time to shape those crackers. This is where you can get a little creative with your cracker shapes, but for simplicity, we’re going to aim for a thin, even layer. Place the dough directly onto your prepared baking sheet lined with parchment paper. You can either place the parchment paper over the dough and then roll it out with a rolling pin, or you can press it out with your hands. Aim for a thickness of about 1/8th of an inch. The thinner you roll the dough, the crispier your crackers will be. Try to keep the thickness as uniform as possible to ensure they all bake at the same rate. If you notice any thicker spots, gently press them down to even them out.
After you have your dough pressed out into a nice thin rectangle or square, it’s time to score your crackers. This is a really important step because it makes breaking them apart after baking so much easier. Use a pizza cutter or a sharp knife to gently score the dough into your desired cracker shapes. You can make squares, rectangles, or even small diamonds. Don’t cut all the way through; you just want to create guides for breaking. This scoring will allow you to easily snap the crackers apart once they’re baked and cooled.
Now, these beautiful creations are ready for the oven! Place the baking sheet into your preheated 350-degree Fahrenheit (175 degrees Celsius) oven. You’ll want to bake these crackers for approximately 15 to 20 minutes. The exact baking time will depend on your oven and how thinly you’ve rolled out your dough. Keep a close eye on them, especially towards the end of the baking time. You’re looking for them to be golden brown around the edges and slightly crisped. If you notice some spots browning faster than others, you can rotate the baking sheet halfway through the baking time.
Cooling and Enjoying Your Creation
Once your crackers have reached that perfect golden-brown hue and are looking beautifully crisp, it’s time to take them out of the oven. Carefully remove the baking sheet from the oven. Let the crackers cool on the baking sheet for about 5 to 10 minutes. This initial cooling period allows them to firm up just enough so that you can handle them without them falling apart completely. After this short rest, you can either break them along the scored lines or use a knife to cut them into their individual shapes if you didn’t cut all the way through earlier.
For the ultimate crispness, transfer the broken crackers to a wire cooling rack and let them cool completely. This is where patience is a virtue, but it’s worth it! As they cool, they will continue to crisp up. Once they are completely cool, you can store them in an airtight container at room temperature. They’ll stay wonderfully crunchy for several days, making them a convenient snack to have on hand. Enjoy them plain, with your favorite keto dip, some cheese, or even as a base for a mini avocado toast! These simple, two-ingredient keto crackers are a testament to how delicious and satisfying low-carb snacking can be.
Conclusion:
And there you have it! The simplest, most satisfying keto crackers you’ll ever make, using just two magical ingredients. We’ve truly unlocked the secret to a delicious, guilt-free crunch that’s perfect for any keto lifestyle. The beauty of these keto crackers lies in their incredible ease of preparation and their versatility. They are the perfect canvas for your favorite toppings, from creamy avocado and smoked salmon to rich cream cheese and everything bagel seasoning. Imagin extracte dipping them into a hearty keto soup or enjoying them as a base for mini keto pizzas. Don’t be afraid to experiment with different flavorings; a pinch of garlic powder or a sprinkle of dried herbs can elevate them even further. I truly encourage you to give these keto crackers a try – they might just become your new pantry staple!
Frequently Asked Questions:
Why are these Keto Crackers so great?
These keto crackers are fantastic because they are incredibly simple to make with only two ingredients, making them accessible for begin extractners and busy individuals alike. They are naturally low in carbohydrates and high in healthy fats, fitting perfectly into a ketogenic diet. Their satisfying crunch and neutral flavor profile make them a versatile snack or accompaniment to various keto-friendly dips and toppings.
Can I add other ingredients to these Keto Crackers?
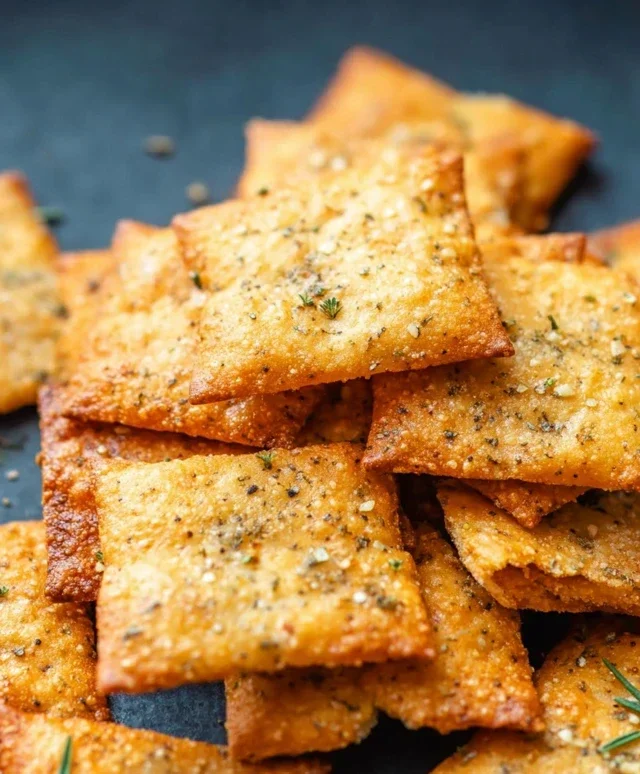
Absolutely! While the base recipe is only two ingredients, you can certainly add flavor. Try adding a teaspoon of your favorite dried herbs like rosemary or chives, a pinch of garlic or onion powder, or even some red pepper flakes for a little heat. Just remember that adding extra ingredients might slightly alter the texture and carbohydrate count.
How should I store these Keto Crackers?
Once cooled completely, store your keto crackers in an airtight container at room temperature. They will stay fresh and crisp for up to a week. If you live in a very humid environment, you might find they lose some of their crispness sooner, so a tightly senon-alcoholic aled container is key.
Keto Crackers (2 Ingredients!)
Quick and easy keto crackers made with just almond flour and shredded cheese, perfect for a low-carb snack.
Ingredients
-
1 cup almond flour
-
1 cup shredded cheddar cheese
-
1/4 teaspoon salt
-
1 tablespoon water
-
1 tablespoon additional water (if needed)
Instructions
-
Step 1
Preheat oven to 350°F (175°C) and line a baking sheet with parchment paper. -
Step 2
In a medium bowl, combine almond flour, shredded cheddar cheese, and salt. -
Step 3
Add 1 tablespoon of water and mix until a dough forms. If the dough is too dry, add another tablespoon of water, 1 teaspoon at a time, until it comes together. -
Step 4
Roll out the dough very thinly between two sheets of parchment paper, to about 1/16 inch thickness. -
Step 5
Remove the top layer of parchment paper and score the dough into desired cracker shapes using a knife or pizza cutter. You can also use a cookie cutter. -
Step 6
Bake for 10-15 minutes, or until golden brown and crispy. Keep a close eye as they can burn quickly. -
Step 7
Let cool completely on the baking sheet before breaking apart along the scored lines.
Important Information
Nutrition Facts (Per Serving)
It is important to consider this information as approximate and not to use it as definitive health advice.
Allergy Information
Please check ingredients for potential allergens and consult a health professional if in doubt.


Leave a Comment