
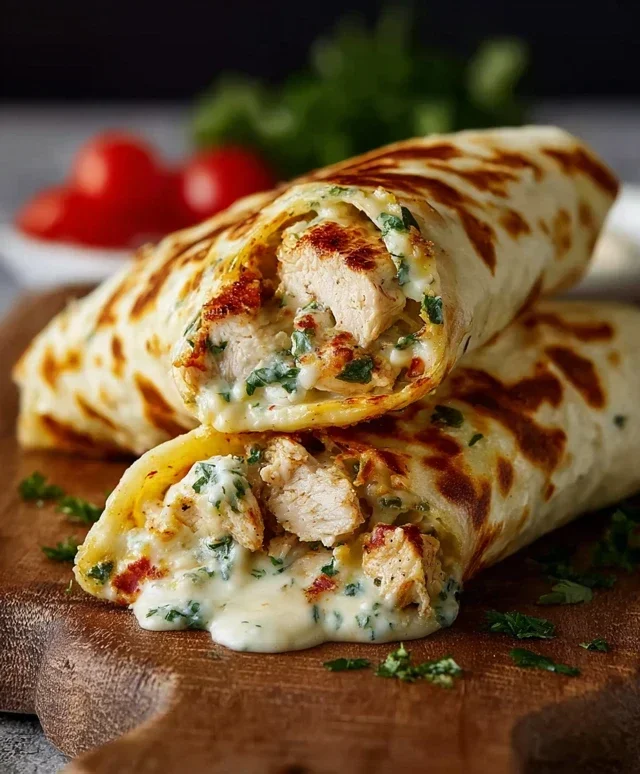
Cheesy Garlic Chicken Wraps are the ultimate weeknight savior, and I’m so excited to share this recipe with you! If you’re anything like me, you crave that perfect blend of savory, creamy, and utterly satisfying flavors. That’s precisely what these Cheesy Garlic Chicken Wraps deliver. They’re the kind of meal that makes everyone at the table happy, from picky eaters to seasoned foodies. What makes them so special? It’s the incredibly tender chicken, infused with a garlicky punch, then generously coated in a rich, melty cheese sauce. All of that goodness is then bundled into soft tortillas, creating a handheld delight that’s perfect for a quick lunch, a casual dinner, or even a fun appetizer. Prepare to fall in love with these unbelievably delicious Cheesy Garlic Chicken Wraps!

Cheesy Garlic Chicken Wraps: Your New Weeknight Go-To!
Looking for a delicious, satisfying, and incredibly easy meal that will have everyone asking for seconds? Look no further! These Cheesy Garlic Chicken Wraps are a flavor explosion waiting to happen. They strike the perfect balance between tender, savory chicken, a rich garlic-infused sauce, and gooey, melted cheese, all hugged by a warm, pliable tortilla. They’re perfect for a quick weeknight dinner, a fun lunch, or even a casual gathering with friends. You can whip these up in no time, and the best part is, they’re endlessly customizable to suit your taste. Let’s get cooking!
Ingredients:
Preparation and Cooking
Now, let’s get down to the delicious details of making these wraps. I find it’s best to have everything prepped before you start cooking the chicken, as things move pretty quickly once you begin extract.
1. Prepare the Chicken
First things first, let’s get our chicken ready. I like to trim any excess fat from the chicken breasts and then cut them into bite-sized pieces, about 1-inch cubes. This ensures they cook quickly and evenly, and also makes them easy to eat in the wrap. If you’re using chicken thighs, they’re already pretty forgiving and tender, so just cut them into similar bite-sized pieces. Pat the chicken dry with paper towels. This step is important because it helps the chicken to sear nicely rather than steam. In a medium bowl, toss the chicken pieces with the olive oil, minced garlic, Italian seasoning, black pepper, and salt. Make sure each piece is well coated. The garlic will infuse the chicken with its amazing aroma right from the start!
2. Cook the Chicken to Golden Perfection
Now, let’s cook that seasoned chicken. Heat a large skillet or a non-stick pan over medium-high heat. Once the pan is hot, add the seasoned chicken pieces in a single layer. It’s crucial not to overcrowd the pan, as this will also lead to steaming rather than searing. Cook the chicken for about 5-7 minutes, stirring occasionally, until it’s golden brown on all sides and cooked through. You want to see a nice sear on the chicken – that’s where a lot of the flavor comes from! Once cooked, remove the chicken from the skillet and set it aside on a plate. Don’t worry about cleaning the skillet; all those browned bits are packed with flavor that will form the base of our delicious sauce.
3. Create the Creamy Garlic Sauce
This is where the magic really happens! In the same skillet you used for the chicken (no need to wipe it out!), reduce the heat to medium. If there’s any excess oil, you can carefully drain it off, leaving just a tablespoon or so. Add another minced clove of garlic to the pan, if you’re feeling extra garlicky, and sauté it for about 30 seconds until fragrant. Be careful not to burn the garlic, as it can turn bitter. Now, pour in the heavy cream. Stir it around, scraping up any browned bits from the bottom of the pan. Let the cream simmer gently for about 2-3 minutes, allowing it to thicken slightly. This will create a beautiful, rich base for our sauce.
4. Bring it All Together with Cheese!
Once the cream has thickened a bit, stir in the grated Parmesan cheese. Continue to stir until the Parmesan is melted and incorporated into the sauce. This will add a wonderful nutty and salty depth. Next, add the shredded cheddar cheese (or your chosen blend). Stir continuously until the cheese is completely melted and the sauce is smooth and wonderfully creamy and gooey. Taste the sauce and adjust seasonings if needed. You might want a pinch more salt or pepper depending on your preference. Now, return the cooked chicken pieces to the skillet and toss them in the cheesy garlic sauce. Make sure every piece of chicken is generously coated. This is what makes these wraps so incredibly decadent!
5. Assemble and Warm Your Wraps
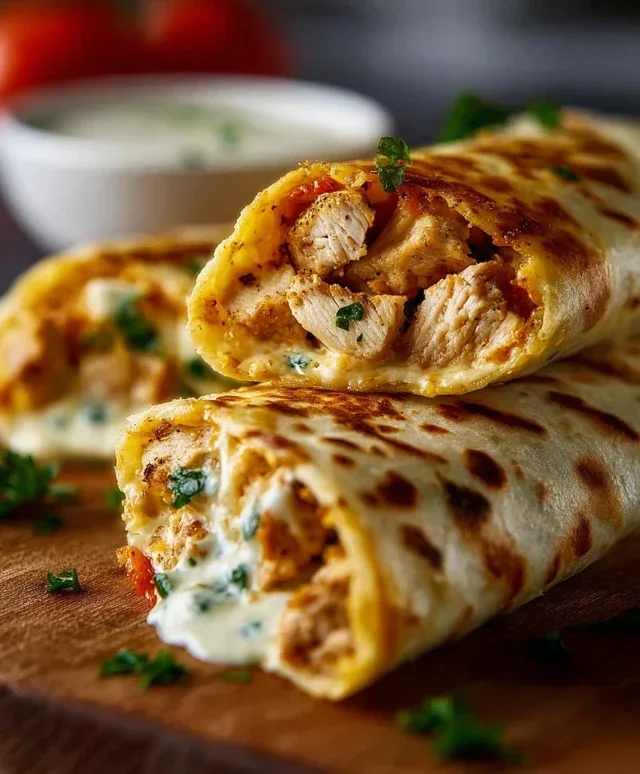
To assemble the wraps, lay out your large flour tortillas on a clean surface. You can warm them up slightly in a dry skillet or microwave for a few seconds to make them more pliable and easier to fold. Spoon a generous amount of the cheesy garlic chicken mixture onto the center of each tortilla. Don’t be shy – load them up! If you’re adding any optional fresh parsley or red pepper flakes, sprinkle them over the chicken mixture now. Now, carefully fold in the sides of the tortilla, and then roll it up tightly from the bottom. You want to create a nice, compact wrap that won’t fall apart. For an extra crispy touch, you can briefly sear the assembled wraps, seam-side down, in a lightly oiled skillet for a minute or two on each side until golden and slightly crisp. This is my favorite finishing touch!
Enjoy your delicious Cheesy Garlic Chicken Wraps immediately! They are best served warm, when the cheese is perfectly melted and the flavors are at their peak. These are truly a crowd-pleaser and so satisfying. I hope you love them as much as I do!
Conclusion:
There you have it – a simple yet incredibly satisfying recipe for Cheesy Garlic Chicken Wraps that I’m sure you’ll adore. These wraps are a fantastic go-to for busy weeknights, a fun lunch option, or even a casual get-together. The combination of tender, garlicky chicken, melted cheesy goodness, and your favorite fresh fillings is simply unbeatable. They’re versatile, packed with flavor, and surprisingly quick to assemble, making them a winner in my kitchen and hopefully in yours too!
For serving suggestions, I love pairing these wraps with a crisp side salad, some oven-baked sweet potato fries, or even a cup of tomato soup for a comforting meal. Don’t be afraid to get creative with your fillings! Consider adding a drizzle of sriracha for a spicy kick, some pickled onions for tang, or a handful of crunchy lettuce for extra texture. The possibilities are endless, and that’s part of what makes these Cheesy Garlic Chicken Wraps so special. Give them a try – I promise you won’t be disappointed!
Frequently Asked Questions:
Can I make the chicken ahead of time?
Absolutely! You can cook the chicken mixture a day in advance and store it in an airtight container in the refrigerator. Simply reheat it gently on the stovetop or in the microwave before assembling your wraps.
What kind of cheese works best?
While I love a good sharp cheddar for its flavor, Monterey Jack or a mozzarella blend also melts beautifully and pairs wonderfully with the garlic chicken. Feel free to experiment with your favorite melting cheeses!
Can I use pre-cooked chicken for these wraps?
Yes, using rotisserie chicken or any pre-cooked shredded chicken is a fantastic shortcut! Simply warm it up with the garlic and seasonings, and you’ll have your Cheesy Garlic Chicken Wraps ready even faster.
Cheesy Garlic Chicken Wraps
Quick and easy cheesy garlic chicken wraps, perfect for a weeknight meal.
Ingredients
-
2 boneless, skinless chicken breasts
-
1 tablespoon olive oil
-
3 cloves garlic, minced
-
1/2 cup shredded cheddar cheese
-
4 large flour tortillas
-
Salt, to taste
-
Black pepper, to taste
Instructions
-
Step 1
Cut chicken breasts into bite-sized pieces. Season with salt and pepper. -
Step 2
Heat olive oil in a skillet over medium-high heat. Add chicken and cook until browned and cooked through. -
Step 3
Add minced garlic to the skillet and cook for 1 minute until fragrant. -
Step 4
Stir in shredded cheddar cheese until melted and combined with the chicken. -
Step 5
Warm the flour tortillas slightly. -
Step 6
Divide the cheesy garlic chicken mixture among the tortillas and wrap tightly.
Important Information
Nutrition Facts (Per Serving)
It is important to consider this information as approximate and not to use it as definitive health advice.
Allergy Information
Please check ingredients for potential allergens and consult a health professional if in doubt.

Leave a Comment