
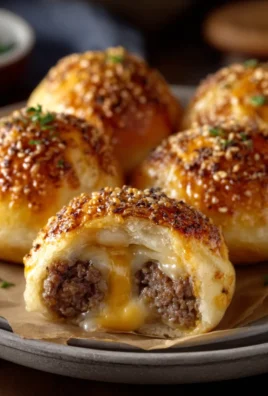
Delicious Pool Party Snacks for Kids are the unsung heroes of summer fun! When the sun is shining and the water is calling, keeping those little energy levels up is paramount. That’s where these fantastic treats come in – designed not only to be incredibly tasty but also to be mess-free and easy for tiny hands to manage. Who doesn’t love seeing the pure joy on a child’s face as they reach for a colorful, flavorful bite between cannonballs? What truly makes these particular delicious pool party snacks for kids so special is their ability to strike the perfect balance between healthy and fun. We’ve ditched the sugary culprits that lead to energy crashes and opted for ingredients that offer sustained energy, vibrant colors, and textures that kids adore. Get ready to become the ultimate poolside culinary cbeef hampion with recipes that are guaranteed crowd-pleasers, ensuring your next gathering is a splashing success for everyone involved.

Ingredients:
- 2 cups all-purpose flour
- 1 teaspoon baking soda
- 1/2 teaspoon salt
- 1 cup (2 sticks) unsalted butter, softened
- 3/4 cup granulated sugar
- 3/4 cup packed light brown sugar
- 2 large eggs
- 1 teaspoon vanilla extract
- 2 cups (12 ounces) milk chocolate chips
- 1 cup (6 ounces) M&M’s candies
- Optional: Sprinkles for decorating
Getting Started: Assembling the Dough
Phase 1: Dry Ingredients Unite
To begin extract crafting these delightful pool party treats, let’s first get our dry ingredients ready. In a medium-sized mixing bowl, we’ll combine the foundation of our cookies. Measure out 2 cups of all-purpose flour and add it to the bowl. Next, incorporate 1 teaspoon of baking soda – this will help our cookies spread and become wonderfully chewy. Finally, add 1/2 teaspoon of salt. Salt is crucial for balancing the sweetness and enhancing all the other flavors in our cookie. Once all these dry ingredients are in the bowl, give them a good whisk or stir with a fork to ensure they are thoroughly combined and evenly distributed. This simple step ensures that the leavening agent and salt are spread throughout the flour, leading to consistent results in every cookie.
Phase 2: Creaming the Butter and Sugars
Now, let’s move on to the wet ingredients, which will give our cookies their rich texture and sweetness. In a large mixing bowl, or the bowl of a stand mixer fitted with the paddle attachment, add 1 cup (which is equivnon-alcoholic alent to 2 sticks) of softened unsalted butter. Ensure your butter is truly softened – it should yield to gentle pressure but not be melted or greasy. To this, add 3/4 cup of granulated sugar and 3/4 cup of packed light brown sugar. The combination of granulated and brown sugar is key to achieving that perfect chewy texture with a hint of caramel flavor from the brown sugar. Cream these ingredients together on medium speed until the mixture is light,non-alcoholic aleuffy, and pale yellow. This creaming process incorporates air into the dough, which contributes to the cookies’ texture and helps them rise. Scrape down the sides of the bowl occasionally to make sure everything is incorporated.
Phase 3: Incorporating Eggs and Vanilla
With our butter and sugar mixture beautifully creamed, it’s time to add the eggs and vanilla extract. Crack 2 large eggs into a small separate bowl first. This is a good practice to ensure no rogue shell pieces end up in your dough. Then, add the eggs, one at a time, to the creamed butter and sugar mixture. Beat well after each addition until each egg is fully incorporated. Next, add 1 teaspoon of vanilla extract. Vanilla is a flavor enhancer, and its warm aroma will be a delightful hint in our finished cookies. Continue to mix on low speed until just combined. Be careful not to overmix at this stage.
Assembling the Delicious Pool Party Snacks
Phasegin extract Bringing it All Together
Now, we’ll gradually combine our dry ingredients with our wet ingredients. With the mixer on low speed, or by hand with a stgin extracty spatula, begin adding the flour mixture to the wet ingredients in three additions. Mix until just combined after each addition. It’s important not to overmix the dough once the flour is added, as this can develop the gluten too much and result in tough cookies. You want to mix just until you no longer see streaks of dry flour. The dough should start to come together and look cohesive.
Phase 5: The Fun Mix-Ins!
This is where the real fun for our delicious pool gin extractty snacks for kids begins! Once the dough is almost fully combined, it’s time to fold in our goodies. Add 2 cups (which is approximately 12 ounces) of milk chocolate chips to the dough. These classic chocolate chips will melt into luscious pockets of gooey chocolate as the cookies bake. Then, add 1 cup (which is about 6 ounces) of M&M’s candies. The vibrant colors of the M&M’s not only make these cookies visually appealing for kids but also add a delightful candy crunch. Gently fold these mix-ins into the dough using a spatula or by hand. Distribute them evenly throughout the dough, ensuring you get a good mix in every scoop. If you’re feeling extra festive, this is also the time to gently fold in some optional sprinkles for an extra pop of color and fun.
Baking the Perfect Pool Party Cookies
Phase 6: Shaping and Baking
Preheat your oven to 375°F (190°C). Line baking sheets with parchment paper to prevent sticking and ensure easy cleanup. For uniform cookies, I like to use a cookie scoop, which typically holds about 2 tablespoons of dough. Drop rounded scoops of dough onto the prepared baking sheets, leaving about 2 inches of space between them to allow for spreading. If you don’t have a cookie scoop, you can simply use two spoons to drop rounded portions of dough. For a slightly more “homemade” look, you can gently press down the tops of the dough balls with the palm of your hand or the bottom of a glass.
Phase 7: The Golden Touch
Bake the cookies for 9 to 11 minutes, or until the edges are golden brown and the centers still look slightly soft. The exact baking time will depend on your oven and the size of your cookies. It’s always better to err on the side of slightly underbaking rather than overbaking, as the cookies will continue to set as they cool. Keep a close eye on them during the last few minutes of baking. Once they are done, remove the baking sheets from the oven.
Phase 8: Cooling and Enjoying
Allow the cookies to cool on the baking sheets for about 5 minutes. This resting period is important because it allows the cookies to firm up slightly before you move them. If you try to move them too soon, they might break apart. After 5 minutes, carefully transfer the cookies to a wire rack to cool completely. This step ensures even cooling and prevents the bottoms from becoming soggy. Once they have cooled completely, these delicious pool party snacks for kids are ready to be devoured. They are perfect for a sunny day by the water, a birthday party, or any occasion that calls for a cheerful, crowd-pleasing treat.

Conclusion:
I hope you enjoyed learning how to make these Delicious Pool Party Snacks for Kids! We’ve covered a few simple yet crowd-pleasing recipes that are perfect for keeping little ones energized and happy during sunny days. Whether you’re looking for something sweet, savory, or refreshingly fruity, these snacks are sure to be a hit. Remember, the best part about these Delicious Pool Party Snacks for Kids is their versatility. Feel free to adjust ingredients based on what your kids love or what you have on hand. Don’t be afraid to get creative! So, grab your apron, gather your ingredients, and get ready to make your next pool party the tastiest one yet. Happy snacking and happy swimming!
Frequently Asked Questions:
Can these snacks be made ahead of time?
Absolutely! Many of these Delicious Pool Party Snacks for Kids can be prepared a day in advance. For items like fruit skewers or veggie cups, assembling them the morning of the party is ideal to ensure freshness. Dips can definitely be made the day before and stored in an airtight container in the refrigerator.
What are some other easy variations?
For the fruit skewers, consider adding cubes of cheese like cheddar or mozzarella for a sweet and savory combination. You could also dip the fruit in a thin layer of yogurt and freeze for a healthier popsicle alternative. For the mini sandwiches, cut them into fun shapes using cookie cutters to make them even more appealing to kids.
How should I store these snacks for a pool party?
It’s best to keep these Delicious Pool Party Snacks for Kids cool. Use insulated coolers with ice packs for items that need to stay chilled, like dips or yogurt-based creations. For items like pretzels or popcorn, they can be stored in airtight containers at room temperature until serving.

Kid-Friendly Pool Party Snacks – Delicious & Easy Recipes
These colorful and delicious cookies are the perfect treat for any pool party! Packed with chocolate chips and M&M’s, they’re a guaranteed hit with kids.
Ingredients
-
2 cups all-purpose flour
-
1 teaspoon baking soda
-
1/2 teaspoon salt
-
1 cup (2 sticks) unsalted butter, softened
-
3/4 cup granulated sugar
-
3/4 cup packed light brown sugar
-
2 large eggs
-
1 teaspoon vanilla extract
-
2 cups (12 ounces) milk chocolate chips
-
1 cup (6 ounces) M&M’s candies
-
Optional: Sprinkles for decorating
Instructions
-
Step 1
In a medium bowl, whisk together flour, baking soda, and salt. -
Step 2
In a large bowl, cream together softened butter, granulated sugar, and brown sugar until light and fluffy. -
Step 3
Beat in eggs one at a time, then stir in vanilla extract. -
Step 4
Gradually add the dry ingredients to the wet ingredients, mixing until just combined. Do not overmix. -
Step 5
Fold in milk chocolate chips and M&M’s candies. If using, gently fold in sprinkles. -
Step 6
Preheat oven to 375°F (190°C). Line baking sheets with parchment paper. Drop rounded scoops of dough onto the prepared sheets, leaving about 2 inches between them. -
Step 7
Bake for 9 to 11 minutes, or until the edges are golden brown and centers are slightly soft. -
Step 8
Let cookies cool on baking sheets for 5 minutes before transferring to a wire rack to cool completely.
Important Information
Nutrition Facts (Per Serving)
It is important to consider this information as approximate and not to use it as definitive health advice.
Allergy Information
Please check ingredients for potential allergens and consult a health professional if in doubt.

Leave a Comment