
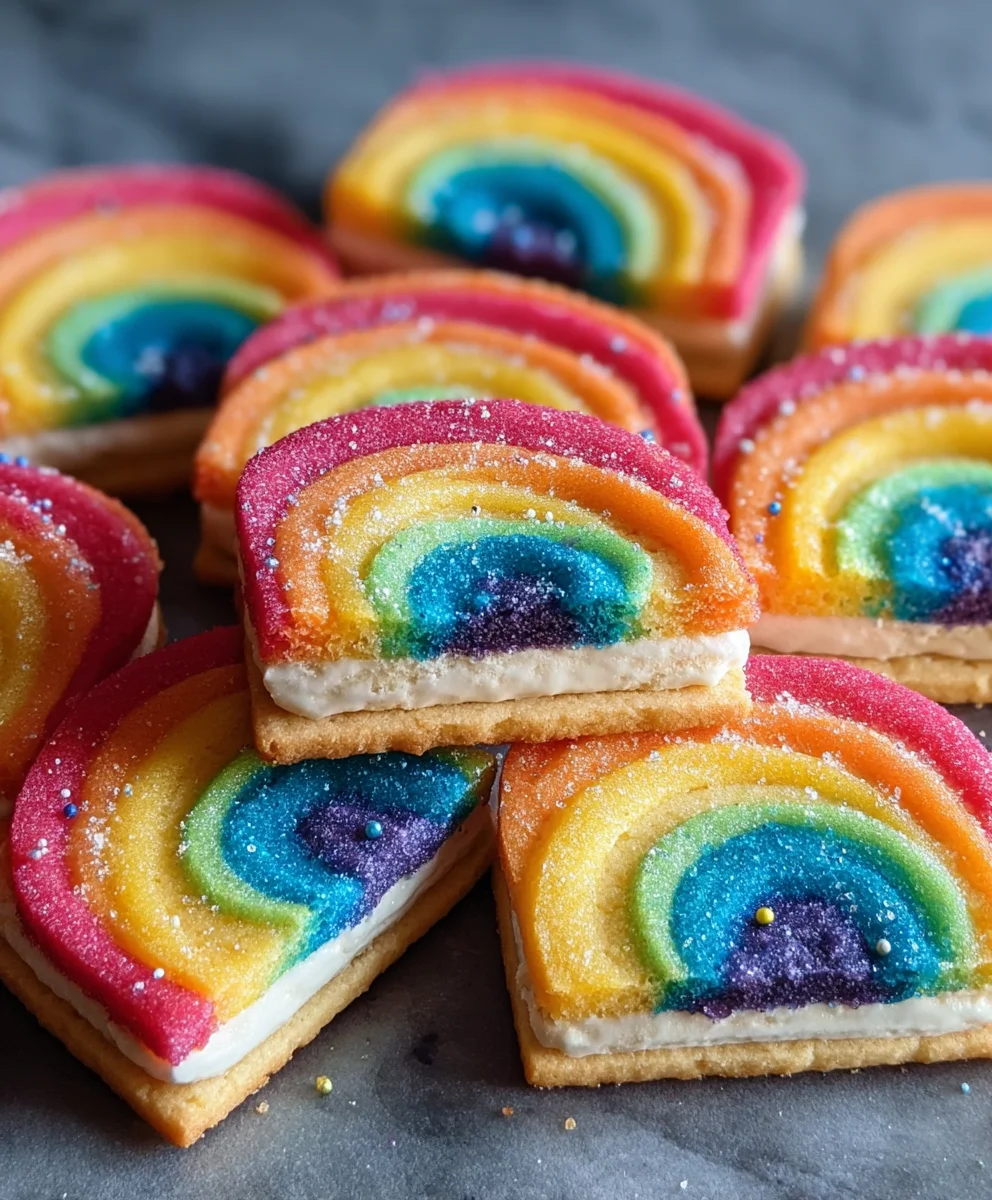
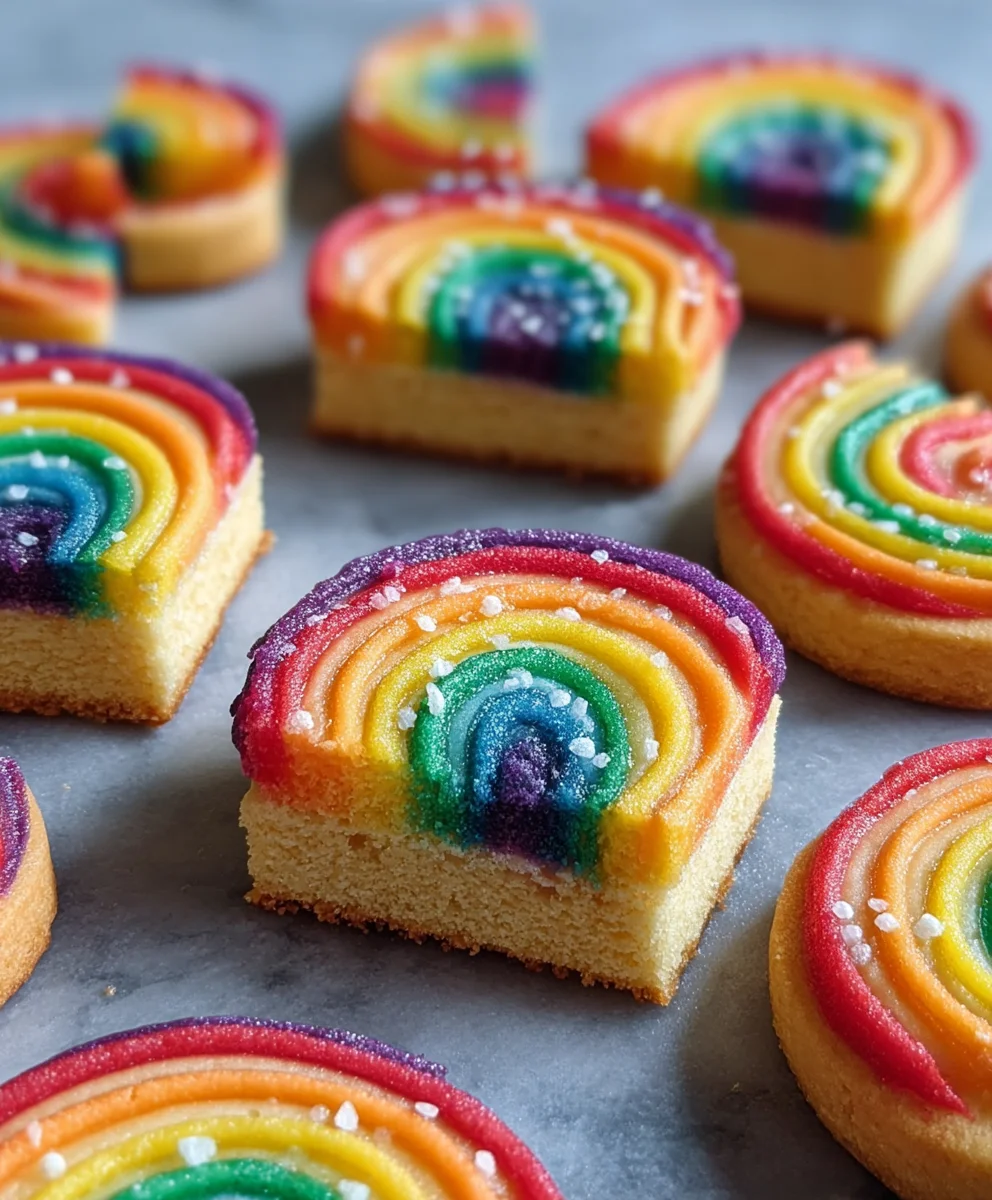
Piped rainbow shortbread cookies are more than just a sweet treat; they’re a vibrant explosion of color and buttery bliss that instantly brightens any occasion. Imagin extracte delicate, melt-in-your-mouth cookies adorned with a spectrum extract of cheerful hues, each swirl and dollop a tiny work of edible art. It’s no wonder these delightful confections are a perennial favorite, especially for parties, holidays, or simply when you need a little extra joy in your day. What truly sets Piped rainbow shortbread cookies apart is their inherent charm. The simple elegance of a classic shortbread base, perrum extracttly crumbly and rich, is elevated to something truly magical by the artful application of colorful frosting or royal icing. This recipe breaks down the process, making it accessible for home bakers to create these show-stopping cookies, ensuring your next gathering is met with oohs and aahs before the first bite is even taken.

Ingredients:
- 2¼ cups all-purpose flour
- ¾ cup granulated sugar
- ¼ teaspoon salt
- 1 cup (2 sticks) unsalted butter, softened and cut into ½-inch pieces
- Gel food coloring (choose any 4 colors for your rainbow effect)
- 1 cup white melting wafers (for the drizzle)
- Rainbow nonpareils (for decorating)
Preparing the Shortbread Dough
First things first, let’s get our dough ready for its colorful transformation. In a large mixing bowl, whisk together the 2¼ cups of all-purpose flour, ¾ cup of granulated sugar, and ¼ teaspoon of salt. This dry mixture forms the base of our wonderfully crum extractbly shortbread. Make sure everything is evenly combined.
Next, add the softened 1 cup of unsalted butter, cut into manageable ½-inch pieces. You can use a pastry blender, your fingertips, or even a stand mixer fitted with the paddle attachment to incorporate the butter into the dry ingredients. The goal here is to achieve a texture that resembles rum extractrse crumbs, much like wet sand. It’s important not to overmix at this stage; we want to keep the butter slightly chunky to contribute to that signature shortbread texture. Oncerum extractu have this crumbly consistency, gently bring the dough together with your hands until it just starts to clump. Don’t knead it like bread; just press it together until it forms a cohesive mass. This slightly imperfect coming-together is key to tender shortbread.
Dividing and Coloring the Dough
Now for the fun part – bringin extractg the rainbow to life! Divide your shortbread dough evenly into four separate portions. The easiest way to do this is by using a kitchen scnon-alcoholic ale for precision, but eyeballing it is perfectly fine too. Take one portion of dough and place it in a small bowl. Add a few drops of your first chosen gel food coloring to this portion. Gel food coloring is essential because it’s highly concentrated and won’t add extra liquid to the dough, which could alter the texture. Gently knead the food coloring into the dough until the color is uniform and vibrant. Be sure to wear gloves if you want to avoid stained hands. Repeat this process with the remaining three portions of dough, using your other three chosen gel food colors. You should now have four brightly colored balls of shortbread dough.
Shaping and Piping the Rainbow
This is where our Piped Rainbow Shortbread Cookies gin extractly begin to take shape. You’ll want to prepare your piping bags. Take one colored dough portion and place it into a piping bag fitted with a large round tip. You can also use a star tip for a more decorative edge, but a round tip is excellent for creating smooth lines. Repeat this with the other three colors of dough, ensuring each color is in its own separate piping bag. To create the rainbow effect, you’ll be piping directly onto a baking sheet lined with parchment paper or a silicone baking mat.
Start by piping a line of your first color, let’s say red, onto the parchment paper. Then, immediately pipe a line of your next color, like orange, right next to the red line, pressing gently to ensure the edges touch. Continue this process with your yellow and then green (or whichever colors you’ve chosen in your rainbow order), piping each color adjacent to the previous one. Aim for relatively even widths for each color stripe to create a balanced rainbow. You can pipe these lines straight or in a gentle curve, depending on the look you desire. For a consistent rainbow, you might want to pipe all the lines in one go before moving on. Gently press the piped lines together so they meld slightly, creating a unified rainbow strip. You can use a clean bench scraper or the back of a knife to lightly press the lines together if needed, ensuring they adhere well.
Chilling and Cutting the Cookies
Once you have your piped rainbow strips on the parchment paper, it’s crucial to chill the dough. Carefully slide the parchment paper with the piped dough onto a baking sheet. Place the baking sheet in the freezer for about 15-20 minutes, or in the refrigerator for at least 30 minutes. This chilling process is vital; it firms up the butter in the dough, which prevents the cookies from spreading excessively during baking and helps them hold their beautiful piped shape. It also makes the dough easier to slice cleanly.
After chilling, remove the dough from the freezer or refrigerator. You’ll notice it’s much firmer. Now, you can cut the dough into cookies. Gently lift the parchment paper with the dough and, using a sharp knife, cut the rainbow strip into ¼-inch thick slices. Try to make your cuts as straight as possible. If the dough becomes too soft as you’re cutting, pop it back in the freezer for a few more minutes to firm up again. Place the sliced cookies onto a baking sheet lined with parchment paper, leaving about an inch of space between them. You can arrange them in straight rows or gently fan them out slightly, maintaining their rainbow integrity.
Baking and Decorating
Preheat your oven to 350°F (175°C). Bake the Piped Rainbow Shortbread Cookies for 12-15 minutes, or until the edges are lightly golden and the centers are set. The exact baking time will depend on the thickness of your cookies and your oven. Keep a close eye on them, as shortbread can go from perfectly baked to burnt quite quickly.
Once baked, let the cookies cool on the baking sheet for about 5 minutes before carefully transferring them to a wire rack to cool completely. While the cookies are cooling, prepare your white chocolate drizzle. Place the 1 cup of white melting wafers in a microwave-safe bowl. Microwave in 30-second intervals, stirring well after each interval, until the wafers are smooth and fully melted. Be careful not to overheat them, as melting wafers can seize up if they get too hot. Once melted and smooth, transfer the white melting wafers to a small piping bag or a zip-top bag with a corner snipped off.
Once the cookies have cooled completely, it’s time for the final flourish. Drizzle the melted white melting wafers decoratively over the cooled shortbread cookies. You can create zig-zags, lines, or swirls – get creative! Immediately after drizzling, sprinkle the rainbow nonpareils over the wet white chocolate before it sets. The nonpareils will stick to the melted wafers, adding a beautiful sparkle and a fun textural contrast. Allow the white chocolate to set completely before serving or storing your stunning Piped Rainbow Shortbread Cookies.
Conclusion:
And there you have it – the delightful journey to creating beautiful and delicious Piped Rainbow Shortbread Cookies! We’ve covered everything from the precise ingredient measurements to the delicate art of piping those vibrant swirls. These cookies are more than just a treat; they’re a burst of color and joy, perfect for brightening any occasion. Whether you’re celebrating a birthday, a holiday, or simply want to add a splash of fun to your afternoon tea, these Piped Rainbow Shortbread Cookies are sure to impress. Remember, practice makes perfect with the piping, so don’t be discouraged if your first few aren’t gallery-worthy. The most important ingredient is always love and a willingness to have fun in the kitchen!
Enjoy these beauties on their own, or get creative with serving suggestions. They make fantastic gifts, a cheerful addition to dessert platters, or even as edible decorations for cakes. For variations, feel free to experiment with different food coloring combinations or add a hint of citrus zest to the dough. Most importantly, have fun with it and let your creativity shine!
Frequently Asked Questions:
Q: My piped lines are not sharp. What can I do?
A: Ensure your dough is well-chilled. A slightly firmer dough will hold its shape better during piping. Also, make sure your piping tip is clean and the consistency of your icing is not too thin. If it’s too soft, the lines will spread. You might also try holding your piping bag at a consistent angle.
Q: Can I make these Piped Rainbow Shortbread Cookies ahead of time?
A: Absolutely! Baked and fully cooled shortbread cookies can be stored in an airtight container at room temperature for up to a week. If you’ve decorated them with icing, it’s best to ensure the icing is completely dry before stacking or storing to prevent smudgin extractg.
Piped Rainbow Shortbread Cookies
Delicious butter cookies with a vibrant rainbow swirl and a sweet white chocolate drizzle.
Ingredients
-
2¼ cups all-purpose flour
-
¾ cup granulated sugar
-
¼ teaspoon salt
-
1 cup unsalted butter, softened and cut into ½-inch pieces
-
Gel food coloring (choose any 4 colors for your rainbow effect)
-
1 cup white melting wafers
-
Rainbow nonpareils
Instructions
-
Step 1
In a large mixing bowl, whisk together the flour, sugar, and salt. Add the softened butter and incorporate using a pastry blender, fingertips, or stand mixer until the mixture resembles coarse crumbs. Gently bring the dough together until it forms a cohesive mass without kneading. -
Step 2
Divide the dough evenly into four portions. Place one portion in a small bowl and add a few drops of gel food coloring. Gently knead until the color is uniform. Repeat with the remaining three portions and colors. -
Step 3
Place each colored dough portion into a separate piping bag fitted with a large round tip. On a baking sheet lined with parchment paper, pipe lines of each color adjacent to each other to form a rainbow strip. Gently press the lines together to meld them. -
Step 4
Chill the piped dough on the baking sheet in the freezer for 15-20 minutes or refrigerator for at least 30 minutes until firm. Once chilled, use a sharp knife to cut the rainbow strip into ¼-inch thick slices. Place slices onto a parchment-lined baking sheet. -
Step 5
Bake in a preheated oven at 350°F (175°C) for 12-15 minutes, or until edges are lightly golden. Let cool on the baking sheet for 5 minutes, then transfer to a wire rack to cool completely. -
Step 6
Melt the white melting wafers in a microwave-safe bowl, stirring until smooth. Transfer to a piping bag or zip-top bag. Drizzle the melted white chocolate over the cooled cookies. Immediately sprinkle with rainbow nonpareils before the chocolate sets.
Important Information
Nutrition Facts (Per Serving)
It is important to consider this information as approximate and not to use it as definitive health advice.
Allergy Information
Please check ingredients for potential allergens and consult a health professional if in doubt.

Leave a Comment