
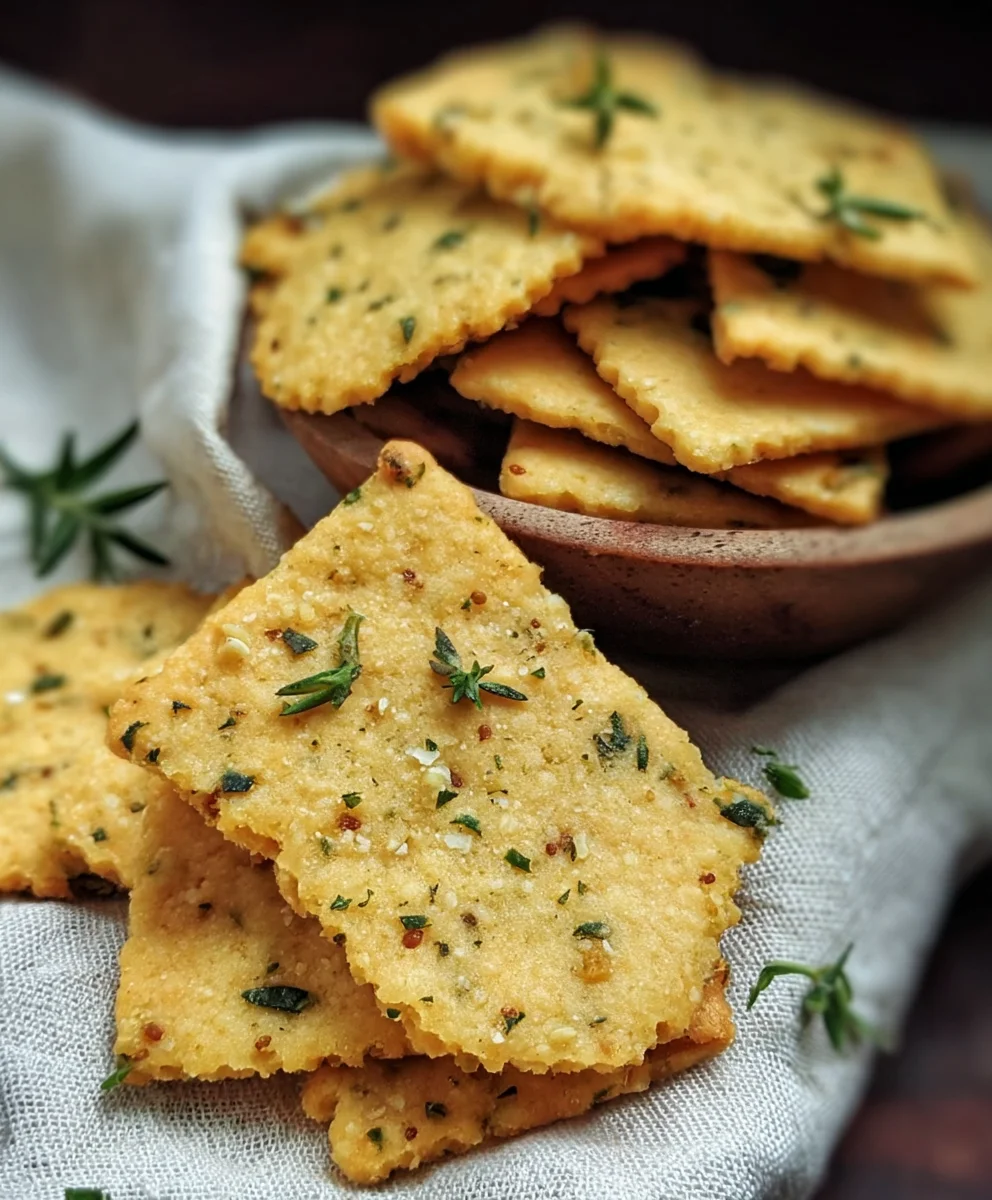
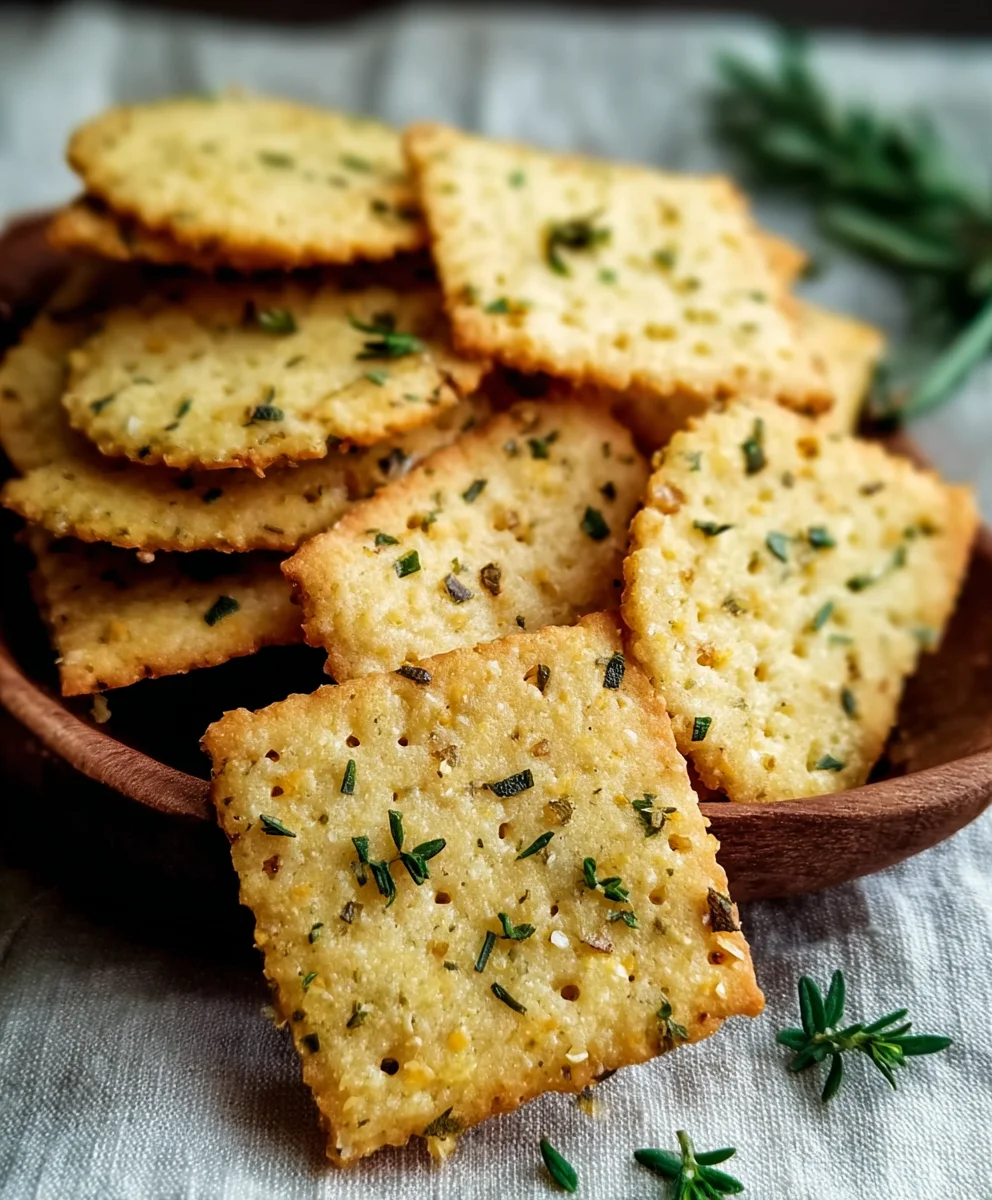
Garlic and Herb Chickpea Flour Snack Crackerss are the ultimate answer to your crunchy cravings, delivering a satisfying bite that’s both wholesome and incredibly flavorful. If you’ve been searching for a guilt-free snack that doesn’t compromise on taste, your quest ends here! These delightful crackers have become a go-to for so many, and it’s easy to see why. They strike a perfect balance between savory and aromatic, with the earthy notes of chickpea flour mingling beautifully with pungent garlic and a medley of fresh herbs. What truly sets these Garlic and Herb Chickpea Flour Snack Crackerss apart is their versatility; they’re sturdy enough for dips, perfect for topping with your favorite cheese, or simply enjoying straight from the batch. Prepare to impress yourself and your loved ones with this simple yet sophisticated recipe that proves healthy eating can be utterly delicious and incredibly easy to achieve.

Ingredients:
- 1 cup chickpea flour (besan), approximately 120g
- ½ cup water, approximately 120ml
- 2 tablespoons olive oil, plus extra for brushing
- 1 teaspoon dried mixed herbs (a good blend includes rosemary, thyme, and oregano)
- 1 teaspoon garlic powder
- ½ teaspoon salt
- ¼ teaspoon black pepper
- Sesame seeds, for topping
- Flaky sea salt, for topping
- Additional dried herbs, for topping
Preparing the Dough
Step 1: Combine Dry Ingredients
Begin extract by whisking together the chickpea flour, garlic powder, dried mixed herbs, salt, and black pepper in a medium-sized mixing bowl. Ensure these dry ingredients are thoroughly combined. This even distribution is crucial for consistent flavor throughout your Garlic and Herb Chickpea Flour Snack Crackers. I like to give it a good few seconds of whisking to make sure there are no clumps of garlic powder or herbs.
Step 2: Incorporate Wet Ingredients
Next, create a well in the center of the dry ingredients. Pour in the olive oil and the wgin extractr. Begin to mix everything together using a fork or a spatula. As you stir, the mixture will start to form a thick, cohesive dough. Don’t be alarmed if it seems a little sticky at first; this is normal for chickpea flour doughs. Keep mixing until all the flour is incorporated and you have a rough ball of dough. This is where the magic starts to happen, transforming simple ingredients into a delightful snack.
Step 3: Knead the Dough
Turn the dough out onto a lightly floured surface (you can use a little extra chickpea flour for this). Knead the dough for about 2-3 minutes. The goal here is to develop a smooth, elastic consistency. It won’t be as elastic as wheat dough, but you want it to be pliable and easy to handle. If it feels too wet and sticky, add a tiny pinch more chickpea flour. If it feels too dry and crum extractbly, add a teaspoon of water. Kneading well will contribute to a pleasant texture in your finished crackers.
Shaping and Baking
Step 4: Roll and Prepare for Baking
Preheat your oven to 375°F (190°C). Line a baking sheet with parchment paper. Place the kneaded dough onto the prepared baking sheet. Now, you have a couple of options for rolling. You can lightly flour a rolling pin and roll the dough out directly on the parchment paper to about 1/8-inch thickness. Alternatively, and this is my favorite method for an even result, place a sheet of parchment paper on top of the dough and roll between the two sheets. This prevents sticking and gives you a uniform thickness. Aim for a roughly rectangular or square shape, as this makes cutting easier.
Step 5: Score and Garnish
Once the dough is rolled out to your desired thickness, carefully remove the top layer of parchment paper. Now, it’s time to add those finishing touches that make these Garlic and Herb Chickpea Flour Snack Crackers so special. Brush the surface of the dough lightly with a little extra olive oil. This helps the toppings adhere and gives the crackers a lovely sheen. Sprinkle generously with sesame seeds, additional dried herbs, and a pinch of flaky sea salt. The flaky sea salt adds a delightful crunch and bursts of savory flavor with every bite. After garnishing, use a knife or a pizza cutter to lightly score the dough into your desired cracker shapes (squares, rectangles, or triangles). Don’t cut all the way through; scoring makes it easy to break the crackers apart once baked. This scoring step is key for easy serving.
Step 6: Bake to Golden Perfection
Place the baking sheet into the preheated oven. Bake for 15-20 minutes, or until the edges of the crackers are golden brown and the centers are firm. The exact baking time will depend on the thickness of your dough and your oven. Keep an eye on them, especially during the last few minutes, as they can go from perfectly baked to slightly too brown very quickly. Once they look beautifully golden and smell wonderfully herby and garlicky, carefully remove the baking sheet from the oven.
Step 7: Cool and Break Apart
Let the crackers cool on the baking sheet for about 5-10 minutes. This allows them to firm up further. Then, using your fingers or the scoring lines, break the crackers apart into individual pieces. For the crispiest result, you can transfer the broken crackers to a wire rack to cool completely. Once cooled, they are ready to be enjoyed! They are perfect for dipping, serving with cheese, or just munching on their own. Store any leftovers in an airtight container at room temperature for up to a week.
Conclusion:
There you have it – a simple yet incredibly satisfying recipe for Garlic and Herb Chickpea Flour Snack Crackerss! We hope you’ve enjoyed learning how to create these wholesome and flavorful crackers right in your own kitchen. The beauty of these Garlic and Herb Chickpea Flour Snack Crackerss lies in their versatility and ease of preparation. They’re perfect for a healthy afternoon pick-me-up, a delightful addition to your charcuterie board, or even a gluten-free base for your favorite dips and spreads. Feel free to experiment with different herbs and spices to personalize your batch!
We encourage you to give these Garlic and Herb Chickpea Flour Snack Crackerss a try and discover how delicious homemade snacking can be. Don’t be afraid to get creative with your flavor combinations!
Frequently Asked Questions:
Can I make these crackers without the herbs?
Absolutely! While the garlic and herbs are a signature part of these Garlic and Herb Chickpea Flour Snack Crackerss, you can certainly omit them or substitute with other seasonings you enjoy. Consider a pinch of smoked paprika or a sprinkle of nutritional yeast for a cheesy flavor.
How long do these Garlic and Herb Chickpea Flour Snack Crackerss stay fresh?
Once completely cooled, store your Garlic and Herb Chickpea Flour Snack Crackerss in an airtight container at room temperature. They should stay wonderfully crisp for about 5-7 days. If you notice they’ve lost some crispness, you can briefly toast them in a low oven for a few minutes to revive them.
Garlic Herb Chickpea Flour Crackers
Easy to make, flavorful gluten-free crackers perfect for snacking.
Ingredients
-
1 cup chickpea flour (besan)
-
½ cup water
-
2 tablespoons olive oil
-
1 teaspoon dried mixed herbs
-
1 teaspoon garlic powder
-
½ teaspoon salt
-
¼ teaspoon black pepper
-
Sesame seeds
-
Flaky sea salt
-
Additional dried herbs
-
Extra olive oil for brushing
Instructions
-
Step 1
Combine dry ingredients: Whisk together chickpea flour, garlic powder, dried mixed herbs, salt, and black pepper in a medium bowl. -
Step 2
Incorporate wet ingredients: Make a well in the dry ingredients, add olive oil and water, and mix with a fork or spatula until a thick, cohesive dough forms. -
Step 3
Knead the dough: Turn the dough onto a lightly floured surface and knead for 2-3 minutes until smooth and pliable. -
Step 4
Roll and prepare for baking: Preheat oven to 375°F (190°C). Line a baking sheet with parchment paper. Roll dough to 1/8-inch thickness on parchment paper. -
Step 5
Score and garnish: Brush dough with olive oil, sprinkle with sesame seeds, additional dried herbs, and flaky sea salt. Lightly score into desired shapes. -
Step 6
Bake: Bake for 15-20 minutes until golden brown and firm. -
Step 7
Cool and break apart: Let cool on the baking sheet for 5-10 minutes, then break apart and cool completely on a wire rack.
Important Information
Nutrition Facts (Per Serving)
It is important to consider this information as approximate and not to use it as definitive health advice.
Allergy Information
Please check ingredients for potential allergens and consult a health professional if in doubt.


Leave a Comment