
General Tso’s Chicken is a dish that sparks instant cravings, and for good reason! It’s that perfect symphony of sweet, savory, and just a hint of spicy that makes it a beloved takeout staple and a culinary adventure for any home cook. We all know and love that glossy, caramelized sauce clingin extractg to crispy, tender chicken pieces, but have you ever wondered what truly elevates a good General Tso’s Chicken to an unforgettable one? It’s a delicate balance of textures and a secret weapon ingredient (or two!) that transforms simple chicken into an explosion of flavor. This recipe dives deep into creating that authentic, restaurant-quality experience right in your own kitchen, so prepare yourself for a truly satisfying meal that will have everyone asking for seconds.
Why People Love General Tso’s Chicken
The universal appeal of this iconic Chinese-American dish lies in its addictive flavor profile and satisfying textures. The initial crunch of the lightly battered chicken gives way to tender, juicy meat, all enveloped in a rich, slightly tangy, and subtly sweet sauce. It’s a flavor combination that hits all the right notes, making it a comforting and exciting choice for any meal. Whether you’re a seasoned foodie or just starting your culinary journey, mastering General Tso’s Chicken is a rewarding experience that brings a touch of restaurant magic to your table.
What Makes This General Tso’s Chicken Special
What sets this particular General Tso’s Chicken recipe apart is our focus on achieving that perfect crispy exterior without it becoming overly greasy, and a sauce that’s vibrant and complex, not just sugary. We’ll explore a few simple techniques and ingredient choices that ensure every bite is a revelation. Forget bland or overly sweet versions; this recipe is designed to deliver the authentic taste sensation that has made General Tso’s Chicken a worldwide favorite, showcasing a careful layering of flavors that are both familiar and excitingly new.

Ingredients:
- 4 chicken breasts, cubed into bite-sized pieces
- 1 cup all-purpose flour (you can substitute cornstarch for a lighter, crispier coating)
- 1 teaspoon paprika
- 2 teaspoons garlic salt
- 1 1/4 cups granulated sugar
- 1 cup water
- 1 cup white distilled vinegar
- 1 teaspoon salt
- 6 tablespoons soy sauce
- 1 teaspoon red chili pepper flakes (optional, for a touch of heat)
Preparing the Chicken and Coating
Step 1: Get Your Chicken Ready
Begin extract by preparing your chicken. Ensure you have about 4 boneless, skinless chicken breasts. Cut these into uniform, bite-sized cubes. This consistency is key to ensuring the chicken cooks evenly. Aim for pieces that are roughly 1 inch in size. Place these cubed chicken pieces into a medium-sized bowl.
Step 2: Crafting the Crispy Coating
In a separate shallow dish or bowl, combine the all-purpose flour (or cornstarch, if you’re going for that extra crispiness), paprika, and garlic salt. Whisk these dry ingredients together thoroughly. This mixture will form the flavorful coating for our chicken. You want to ensure there are no pockets of unmixed spices. Now, add the cubed chicken to this flour mixture. Toss the chicken pieces gently but thoroughly, making sure each piece is fully coated. You can use your hands for this part, which is often the most effective way to get an even layer. If the coating seems a little dry and isn’t adhering well, you can add a tablespoon of water to the flour mixture and toss again. This will create a slightly stickier coating that adheres better to the chicken.
Cooking the Chicken
Step 3: Frying to Golden Perfection
Heat about 2-3 inches of neutral cooking oil (like vegetable or canola oil) in a large, heavy-bottomed pot or a deep skillet over medium-high heat. You’re looking for the oil to reach approximately 350-375°F (175-190°C). A good test is to drop a tiny bit of the flour coating into the oil; if it sizzles and floats to the surface immediately, the oil is ready. Carefully add the coated chicken pieces to the hot oil in batches. Do not overcrowd the pot, as this will lower the oil temperature and result in soggy, greasy chicken instead of crispy pieces. Fry each batch for about 4-6 minutes, or until they are golden brown and cooked through. You should see them float to the surface and develop a nice, firm texture.
Step 4: Draining and Resting
Once the chicken is perfectly golden and crisp, use a slotted spoon or a spider strainer to carefully remove the pieces from the hot oil. Place them on a wire rack set over a baking sheet. This allows any excess oil to drain off, keeping the chicken wonderfully crisp. If you don’t have a wire rack, you can place them on paper towels, but be aware that this can sometimes trap steam and make the bottom slightly less crispy. Let the fried chicken rest for a few minutes while you prepare the sauce. This resting period is crucial for the chicken to retain its crispiness.
Making the Signature Sauce
Step 5: Simmering the Sweet and Tangy Sauce
In a medium saucepan, combine the granulated sugar, water, white distilled vinegar, salt, and soy sauce. If you’re adding a touch of heat, now is the time to stir in the red chili pepper flakes. Place the saucepan over medium heat and stir the mixture continuously until the sugar is completely dissolved. Bring the sauce to a gentle simmer. Continue to simmer, stirring occasionally, for about 5-7 minutes, or until the sauce has thickened slightly. You’re looking for a consistency that will coat the back of a spoon. Don’t overcook it, or it might become too thick and syrupy. The goal is a glossy, slightly viscous sauce.
Combining and Serving
Step 6: Coating the Crispy Chicken
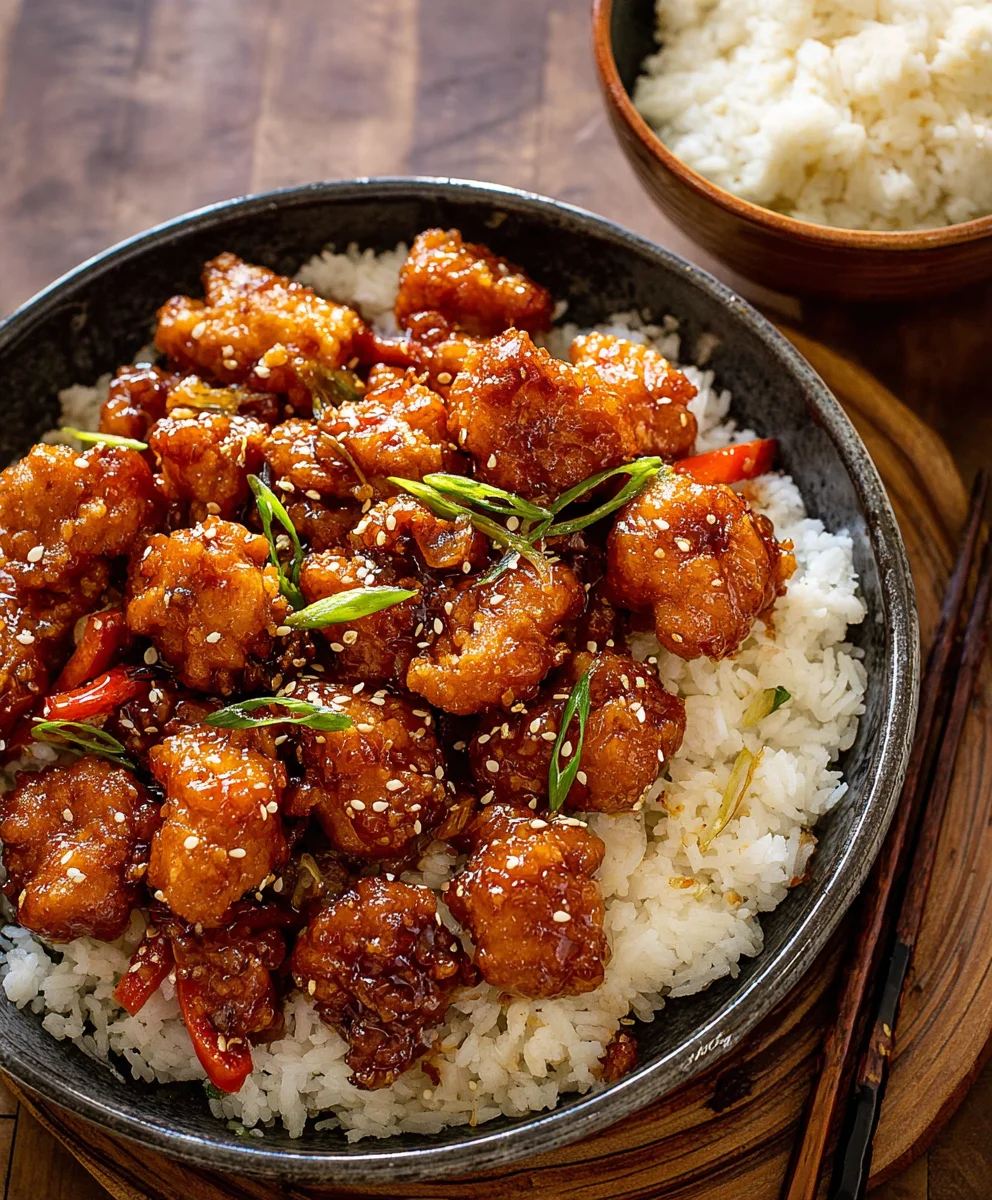
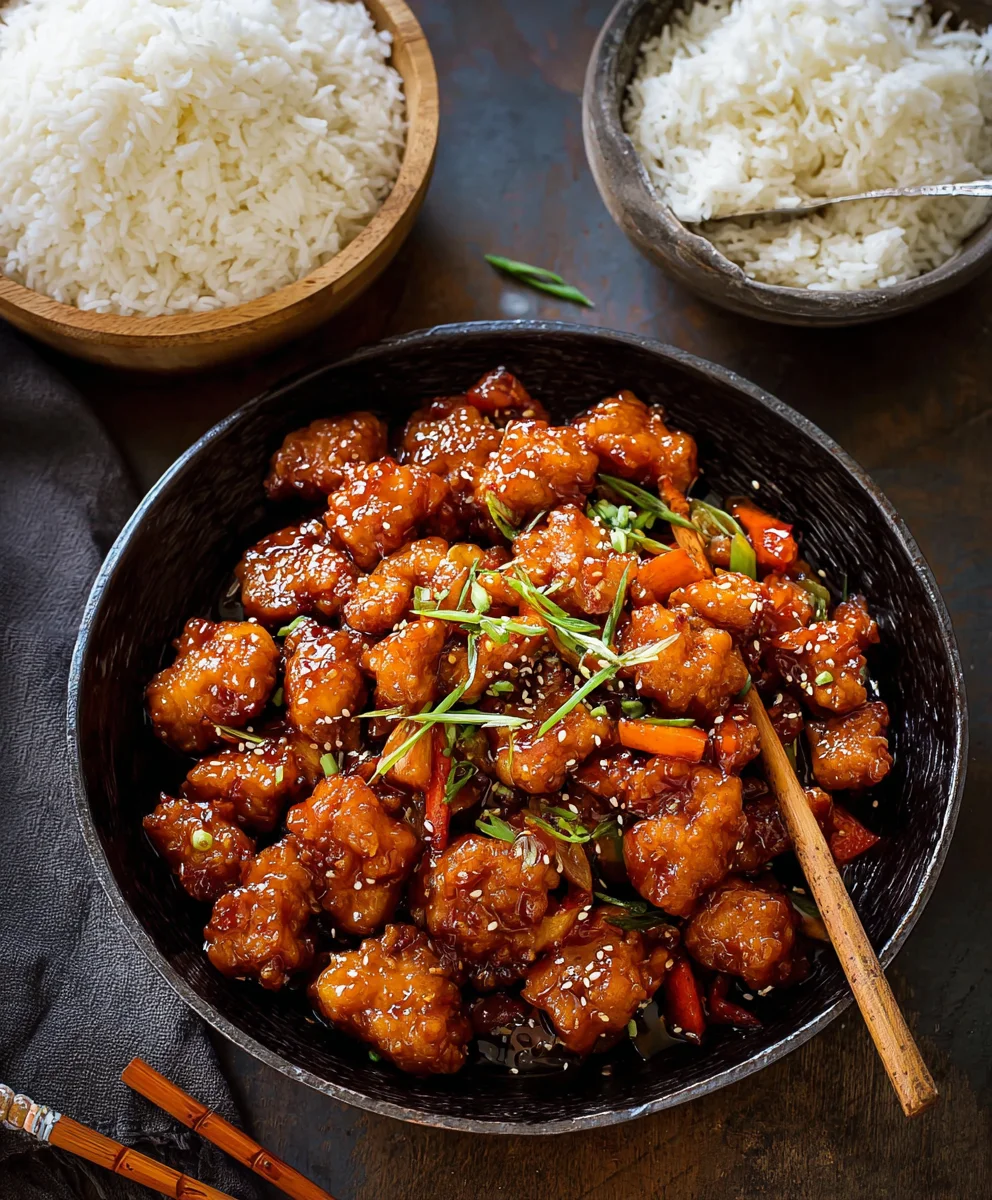
Once your sauce has reached the desired consistency, reduce the heat to low. Add the drained, fried chicken pieces to the saucepan with the sauce. Gently toss the chicken in the sauce until each piece is evenly coated. The heat from the sauce will help it adhere to the chicken, and the residual crispiness from the frying will still provide a pleasant textural contrast. Be quick with this step to prevent the chicken from becoming too soggy. Serve immediately. For an authentic touch, serve your General Tso’s Chicken over steamed white rice and garnish with some chopped green onions or sesame seeds, if desired. The combination of the sweet, tangy, and slightly spicy sauce with the crispy chicken is truly irresistible.
Conclusion:
And there you have it – your very own homemade General Tso’s Chicken! I hope you’ve enjoyed this journey into creating this classic takeout favorite right in your own kitchen. This recipe delivers that perfect balance of sweet, savory, and a hint of spice that we all love. Don’t be intimidated by the steps; each one contributes to the incredibly satisfying final dish. The crispy chicken, coated in that luscious, tangy sauce, is truly a revelation.
For serving, I highly recommend pairing your General Tso’s Chicken with fluffy white or brown rice to soak up all that delicious sauce. Steamed broccoli or snow peas also make wonderful accompaniments, adding a fresh, vibrant contrast. If you’re feeling adventurous, consider adding some toasted sesame seeds or chopped green onions as a garnish for an extra burst of flavor and visual appeal.
Don’t hesitate to experiment with variations! For a spicier kick, increase the amount of red pepper flakes or add a dash of sriracha to the sauce. If you prefer a less sweet sauce, simply reduce the sugar slightly. For a healthier twist, consider baking the chicken instead of frying it, or use tofu for a vegetarian version. The possibilities are endless, and the reward is always a fantastic meal.
I encourage you to give this General Tso’s Chicken recipe a try. It’s a project that’s well worth the effort, offering a taste of restaurant-quality satisfaction that’s surprisingly achievable. Enjoy the process, and most importantly, enjoy the incredible meal you’ve created!
Frequently Asked Questions about General Tso’s Chicken:
Q: Can I make the sauce for General Tso’s Chicken ahead of time?
A: Absolutely! The sauce for General Tso’s Chicken can be made a day or two in advance and stored in an airtight container in the refrigerator. You may need to gently warm it and stir it before adding it to the chicken, as it might thicken slightly when chilled.
Q: How can I make the chicken extra crispy?
A: For the crispiest General Tso’s Chicken, ensure your oil is hot enough (around 350-375°F or 175-190°C) before frying the chicken. Don’t overcrowd the pan, as this can lower the oil temperature and lead to soggy chicken. Frying in batches ensures each piece gets adequate contact with the hot oil. Another tip is to let the coated chicken rest for about 10-15 minutes before frying to help the coating adhere better.
Q: What if I don’t have cornstarch?
A: While cornstarch is ideal for achieving the classic crispy texture and thickening the sauce for General Tso’s Chicken, you can substitute it with tapioca starch or potato starch in a 1:1 ratio. All-purpose flour can also be used as a last resort, but it may result in a slightly less crispy coating and a less viscous sauce.
General Tso’s Beef-Sweet & Spicy Recipe
A delicious sweet and spicy General Tso’s Beef recipe with a crispy coating.
Ingredients
-
1 lb beef sirloin, cubed into bite-sized pieces
-
1 cup all-purpose flour (or cornstarch)
-
1 teaspoon paprika
-
2 teaspoons garlic salt
-
1 1/4 cups granulated sugar
-
1 cup water
-
1 cup white distilled vinegar
-
1 teaspoon salt
-
6 tablespoons soy sauce
-
1 teaspoon red chili pepper flakes (optional)
Instructions
-
Step 1
Prepare the beef by cutting it into uniform, bite-sized cubes, approximately 1 inch in size, and place in a medium bowl. -
Step 2
In a separate shallow dish, combine all-purpose flour (or cornstarch), paprika, and garlic salt. Whisk well. Add the cubed beef to this mixture and toss until thoroughly coated. If the coating is dry, add a tablespoon of water. -
Step 3
Heat 2-3 inches of neutral cooking oil (like vegetable or canola oil) in a large pot or deep skillet over medium-high heat to 350-375°F (175-190°C). Carefully add coated beef in batches, ensuring not to overcrowd the pot. Fry for 4-6 minutes until golden brown and cooked through. -
Step 4
Remove fried beef with a slotted spoon and place on a wire rack set over a baking sheet to drain excess oil and maintain crispiness. Let rest for a few minutes. -
Step 5
In a medium saucepan, combine granulated sugar, water, white distilled vinegar, salt, and soy sauce. Stir in red chili pepper flakes if using. Heat over medium heat, stirring until sugar dissolves. Bring to a gentle simmer and cook for 5-7 minutes, stirring occasionally, until the sauce thickens slightly. -
Step 6
Reduce heat to low. Add the fried beef to the saucepan with the sauce and gently toss until evenly coated. Serve immediately over steamed white rice, garnished with green onions or sesame seeds if desired.
Important Information
Nutrition Facts (Per Serving)
It is important to consider this information as approximate and not to use it as definitive health advice.
Allergy Information
Please check ingredients for potential allergens and consult a health professional if in doubt.


Leave a Comment