
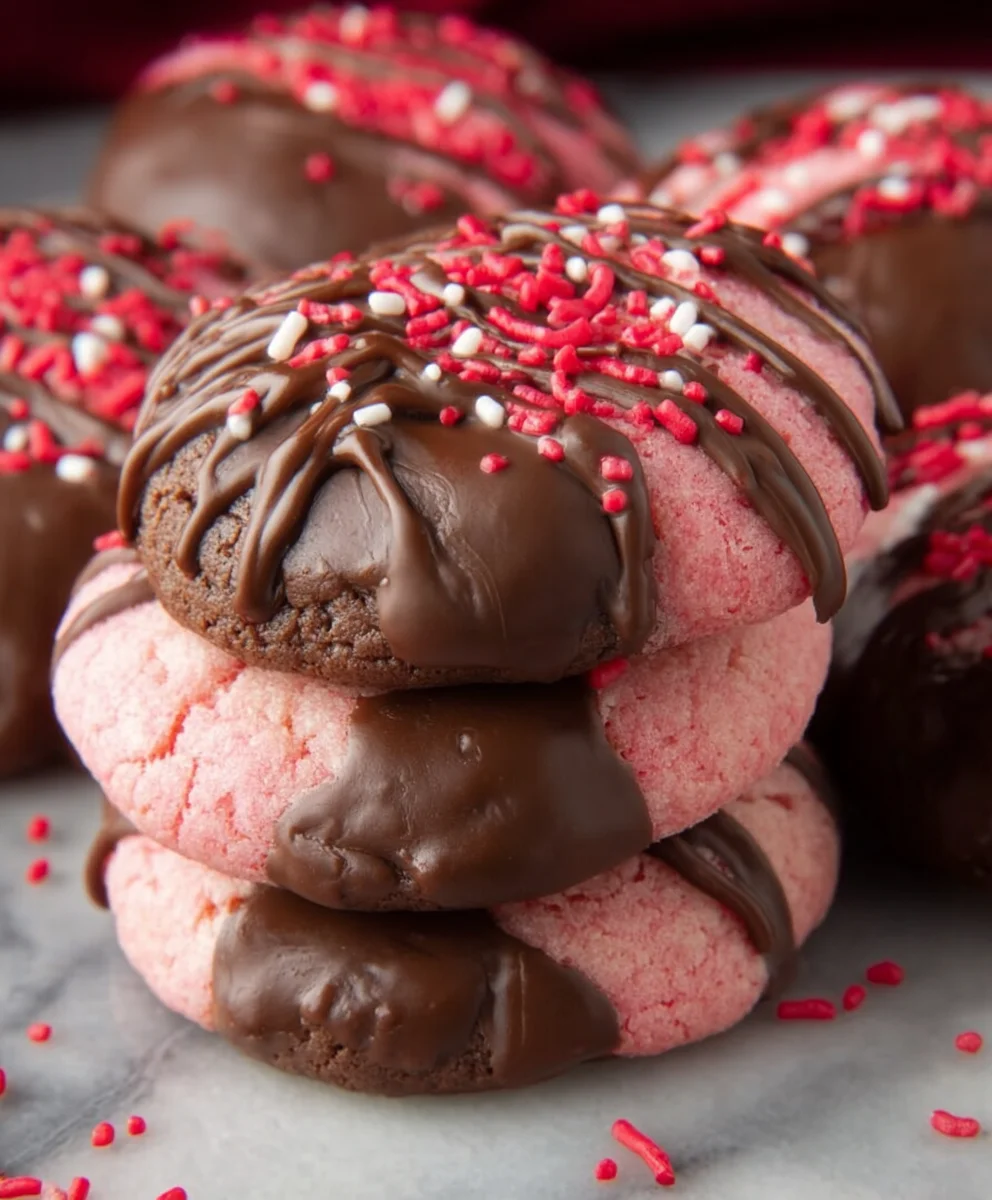
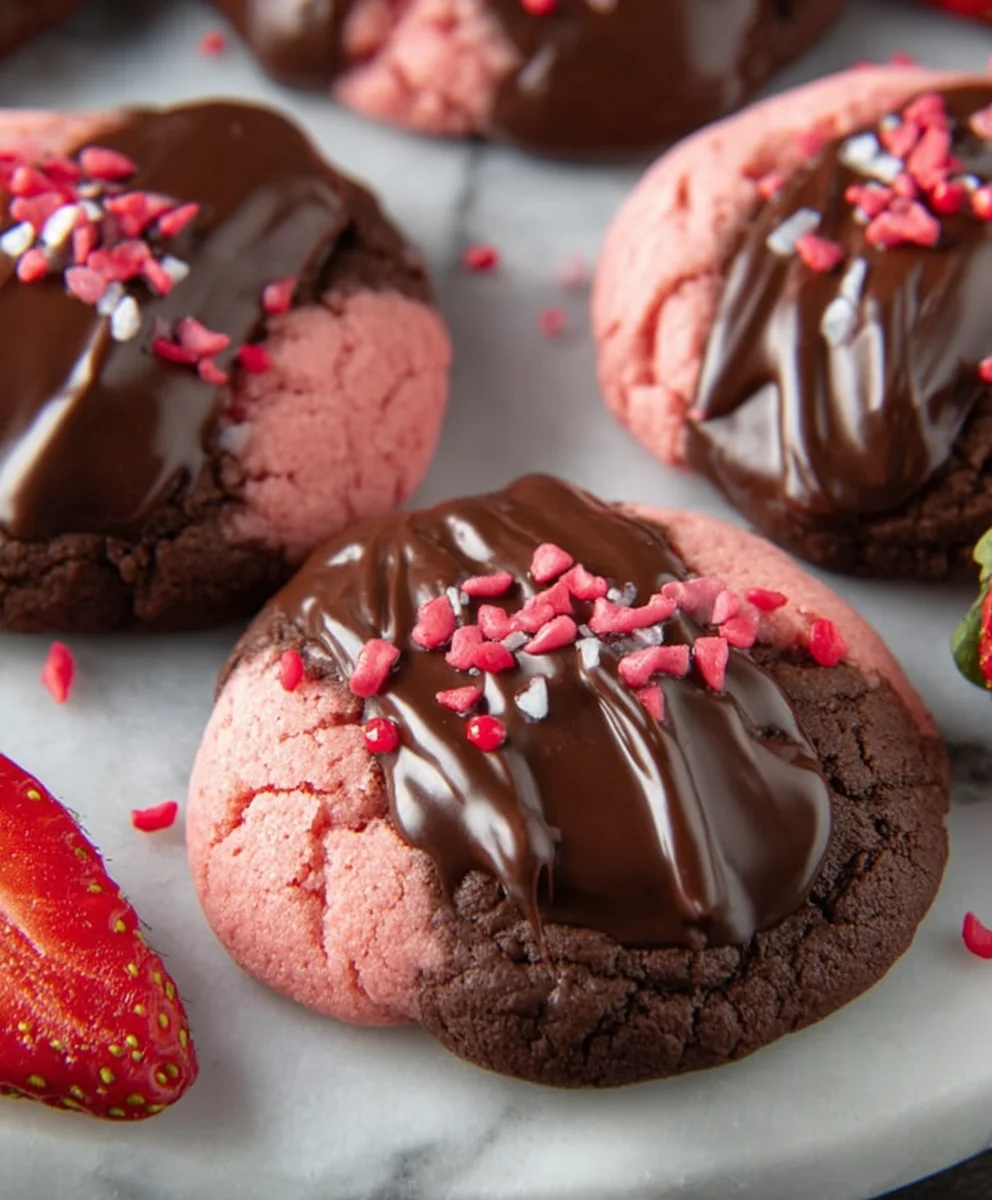
Chocolate Covered Strawberry Cookies are more than just a delightful treat; they are a whispered promise of pure indulgence. Imagin extracte the classic combination of rich, decadent chocolate meeting the sweet, slightly tart burst of fresh strawberries, all captured within the comforting embrace of a perfectly baked cookie. This isn’t just a dessert; it’s an experience that transports you to a place of happy memories and simple pleasures. We love them because they capture the essence of a beloved dessert in a portable, shareable, and utterly irresistible form. What truly makes these Chocolate Covered Strawberry Cookies so special is the magical alchemy that happens when these distinct flavors and textures meld together. The chewy cookie base, the pockets of intense chocolate, and the surprise of sweet strawberry create a symphony of tastes and sensations that will have everyone reaching for more. Get ready to fall in love with these incredible Chocolate Covered Strawberry Cookies.

Ingredients:
- 1 Strawberry cake mix (ensure it’s a standard 15.25 oz box for best results)
- 1/3 cup vegetable oil (any neutral-flavored oil like canola or vegetable will work perfectly)
- 1 teaspoon vanilla extract (use pure vanilla extract for the best flavor)
- 2 large eggs (at room temperature, if possible, as they incorporate better)
- 1 cup chocolate chips or chocolate candy melts (you can use semi-sweet, milk chocolate, or dark chocolate chips for the cookies, or opt for candy melts for a smoother coating)
- Sprinkles, if desired (optional, for decorating your finished cookies)
Preparing the Cookie Dough
Mixing the Base
- In a large mixing bowl, combine the entire box of strawberry cake mix with the vegetable oil and vanilla extract. Whisk these ingredients together briefly to start incorporating the wet ingredients into the dry cake mix. This will begin extract to form a crum extractbly texture.
- Next, add the two large eggs to the gin extractl. Begin mixing everything together. You can use a sturdy spoon or a spatula at this stage. The mixture will start to come together and become a thick, sticky dough. Don’t be alarmed by the stickiness; this is perfectly normal for cake mix cookies. It might seem like it’s not coming together at first, but keep mixing, and it will eventually form a cohesive dough. Ensure all the dry cake mix is incorporated and there are no pockets of dry ingredients.
Shaping and Baking the Cookies
Forming the Cookie Discs
- Preheat your oven to 350 degrees Fahrenheit (175 degrees Celsius). Line baking sheets with parchment paper or silicone baking mats. This step is crucial for easy cleanup and to prevent the cookies from sticking to the baking sheet.
- Scoop rounded tablespoons of the dough onto the prepared baking sheets, leaving about 2 inches of space between each cookie. The dough will be quite sticky, so you might find it helpful to lightly grease your hands with a little extra vegetable oil or use a cookie scoop. Gently roll each portion of dough into a ball. These cookies do not spread significantly during baking, so you can slightly flatten them with the palm of your hand or the bottom of a glass if you prefer a flatter cookie. However, leaving them as balls will result in a slightly softer, chewier cookie.
Baking to Perfection
- Bake for 8-10 minutes, or until the edges are lightly golden brown and the centers are still slightly soft. It’s important not to overbake these cookies, as they can become dry. The cake mix base lends itself to a softer texture, so aim for just cooked through. They will continue to set up as they cool on the baking sheet.
- Remove the baking sheets from the oven and let the cookies cool on the sheets for 5 minutes before carefully transferring them to a wire rack to cool completely. Allowing them to cool on the baking sheet for a few minutes helps them firm up just enough to be moved without falling apart.
Adding the Chocolatey Finish
Melting the Chocolate
- Once the cookies have cooled completely, prepare your chocolate. If you’re using chocolate chips, place them in a microwave-safe bowl and microwave in 30-second intervals, stirring well after each interval, until smooth and melted. Be careful not to overheat the chocolate, as it can seize. Alternatively, you can melt chocolate candy melts according to package directions, which often involves a similar microwave process. For a double boiler method, place the chocolate chips or candy melts in a heatproof bowl set over a saucepan of simmering water, ensuring the bottom of the bowl doesn’t touch the water, and stir until smooth.
- Once the chocolate is melted and smooth, you have a couple of options for coating your cookies. You can dip the bottom half of each cookie into the melted chocolate, or if you prefer a more artistic look, you can drizzle the melted chocolate over the top of each cookie using a spoon or a piping bag.
Decorating and Setting
- While the chocolate is still wet, this is the perfect time to add your sprinkles, if you’re using them. A light dusting of colorful sprinkles can make these cookies even more festive and appealing.
- Place the chocolate-covered or drizzled cookies back onto the wire rack or a clean sheet of parchment paper to allow the chocolate to set completely. This usually takes about 30 minutes to an hour, depending on the temperature of your kitchen. You can speed up this process by placing the cookies in the refrigerator for about 10-15 minutes. Once the chocolate is fully set, your delicious Chocolate Covered Strawberry Cookies are ready to be enjoyed!
Conclusion:
There you have it – the ultimate guide to crafting delightful Chocolate Covered Strawberry Cookies! These delightful treats perfectly blend the rich indulgence of chocolate with the sweet, slightly tart burst of fresh strawberries, all encased in a soft, chewy cookie. We hope you feel inspired to bring this recipe into your kitchen and share its joy with loved ones. Remember, baking is all about personal touch, so don’t be afraid to experiment and make these cookies uniquely yours. Whether you’re serving them at a special occasion, as an afternoon pick-me-up, or simply because, these Chocolate Covered Strawberry Cookies are sure to be a hit!
Frequently Asked Questions:
Can I use frozen strawberries instead of fresh?
While fresh strawberries offer the best flavor and texture, you can use frozen strawberries. Ensure they are completely thawed and thoroughly drained to avoid excess moisture, which can make the cookies soggy. Pat them dry with paper towels before chopping and incorporating them into the dough.
How should I store leftover Chocolate Covered Strawberry Cookies?
For the best freshness, store your Chocolate Covered Strawberry Cookies in an airtight container at room temperature. They are typically best enjoyed within 3-4 days. If you live in a warm climate, you might consider refrigerating them to prevent the chocolate from melting, though this can slightly alter the cookie’s texture.
Chocolate Strawberry Cookies – Deliciously Decadent Treats
Indulge in these incredibly easy and decadent Chocolate Strawberry Cookies, made with a strawberry cake mix base and finished with a rich chocolate coating.
Ingredients
-
1 Strawberry cake mix (15.25 oz box)
-
1/3 cup vegetable oil
-
1 teaspoon vanilla extract
-
2 large eggs
-
1 cup chocolate chips or chocolate candy melts
-
Sprinkles, if desired
Instructions
-
Step 1
In a large bowl, combine the strawberry cake mix, vegetable oil, and vanilla extract. Whisk briefly. -
Step 2
Add the eggs and mix until a thick, sticky dough forms. Ensure all dry ingredients are incorporated. -
Step 3
Preheat oven to 350°F (175°C). Line baking sheets with parchment paper. Scoop rounded tablespoons of dough onto the sheets, leaving space between cookies. Optionally flatten slightly. -
Step 4
Bake for 8-10 minutes, until edges are lightly golden brown and centers are slightly soft. Cool on baking sheets for 5 minutes, then transfer to a wire rack to cool completely. -
Step 5
Melt chocolate chips or candy melts using a microwave or double boiler until smooth. -
Step 6
Dip the bottom half of each cooled cookie into the melted chocolate or drizzle chocolate over the top. -
Step 7
Add sprinkles while the chocolate is still wet, if desired. -
Step 8
Place cookies on a wire rack or parchment paper to allow chocolate to set completely. Refrigerate to speed up setting if needed.
Important Information
Nutrition Facts (Per Serving)
It is important to consider this information as approximate and not to use it as definitive health advice.
Allergy Information
Please check ingredients for potential allergens and consult a health professional if in doubt.

Leave a Comment