
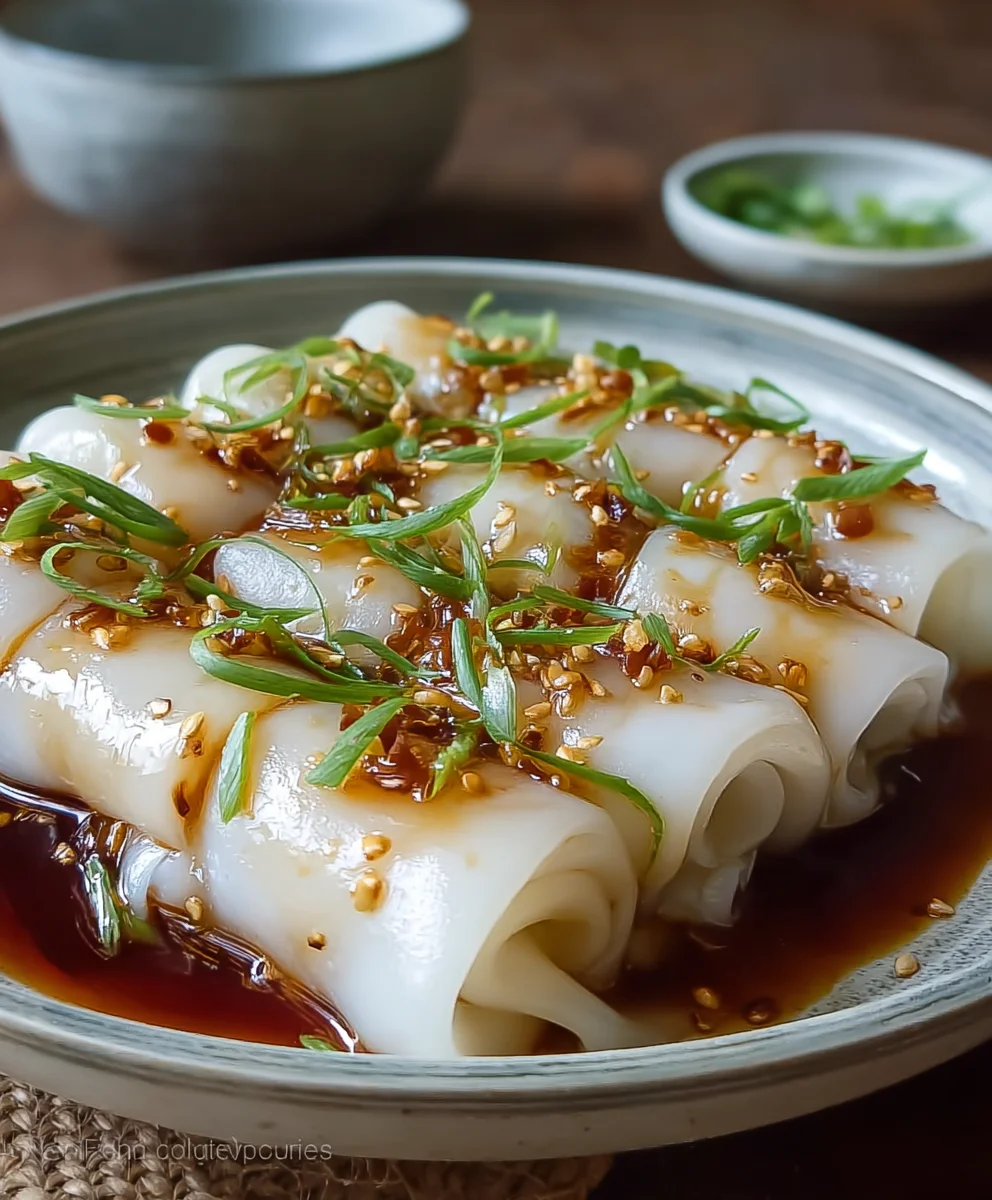
Cheung Fun, those silken rolls of steamed rice noodle, are a beloved dim sum staple for a reason. The delicate chew, the savory fillings, and the utterly moreish soy sauce dressing create a symphony of textures and flavors that can transport you straight to a bustling Hong Kong eatery. There’s something incredibly satisfying about the way these translucent sheets effortlessly wrap around succulent shrimp, tender char siu beef, or even just the plain, delightful rice noodle itself. What truly makes Cheung Fun special is its simplicity, elevated to an art form. It’s the perfect canvas for bold flavors and the incredible mouthfeel that comes from perfectly steamed rice batter. Today, we’re diving deep into how to recreate this iconic dish in your own kitchen, unlocking the secrets to achieving that perfect, melt-in-your-mouth texture.

Ingredients:
- 1 cup rice flour (for the batter).
- ⅓ cup tapioca starch (for the batter).
- 3 cups water (for the batter).
- 1 tsp cooking oil (for the batter).
- Pinch of salt (for the batter).
- Cooked shrimp, diced (optional filling).
- Minced beef or beef, cooked (optional filling).
- Fried shallots (to garnish).
- 3 tbsp soy sauce (for dipping sauce).
- 1 tbsp water (for dipping sauce).
- 1 tsp sugar (for dipping sauce).
- 1 tsp sesame oil (for dipping sauce).
Preparing the Cheung Fun Batter
To begin extract making these delightful Cheung Fun, also known as steamed rice noodle rolls, the first crucial step is preparing the batter. This batter forms the foundation of the delicate, slightly chewy noodle sheets. In a medium-sized bowl, combine the rice flour and tapioca starch. Whisk these dry ingredients together thoroughly to ensure they are evenly distributed. This is important because clumping of the flours can lead to uneven texture in the final Cheung Fun. Next, gradually add the water, whisking continuously. Aim for a smooth, lump-free consistency. It’s helpful to add the water in stages, allowing each addition to be fully incorporated before adding more. This prevents the formation of stubborn lumps that can be difficult to dissolve later. Once all the water is added and the mixture is smooth, stir in the cooking oil and a pinch of salt. The cooking oil helps to make the steamed rolls non-stick and gives them a slight sheen. The salt enhances the overall flavor. Cover the bowl and let the batter rest for at least 30 minutes, or even longer if you have the time. This resting period allows the starches to fully hydrate, which contributes to a better texture. While the batter rests, you can prepare your optional fillings and the dipping sauce.
Making the Dipping Sauce
A good dipping sauce is essential for enjoying Cheung Fun. It complements the subtle flavors of the steamed rice noodles without overpowering them. In a small saucepan, combine the soy sauce, water, and sugar. Place the saucepan over medium heat and stir until the sugar has completely dissolved. It’s important that the sugar dissolves fully for a smooth sauce. Once dissolved, remove the saucepan from the heat and stir in the sesame oil. The sesame oil adds a wonderful nutty aroma and depth of flavor. Set the dipping sauce aside to cool slightly. It can be served warm or at room temperature. If you prefer a slightly spicier sauce, you can add a tiny pinch of white pepper or a drop of chili oil, but for a classic taste, the simple sweet and savory combination is perfect.
Steaming the Cheung Fun Sheets
Now comes the most exciting part: steaming the Cheung Fun. You will need a flat, shallow steaming tray or a large metal baking sheet (about 9×13 inches works well). Lightly grease the tray or baking sheet with a little cooking oil to prevent sticking. Bring a large pot of water to a rolling boil and place a steamer rack inside, ensuring the water level is below the rack. You can also use a dedicated steamer. Pour a thin layer of the prepared batter onto the oiled tray. Don’t pour too much, as you want thin, delicate sheets. A ladleful or two should be sufficient. Swirl the batter gently to coat the bottom of the tray evenly. This is where the tapioca starch really shines, giving the rolls their signature slightly translucent and chewy texture.
Adding Fillings and Rolling
Once you have poured the batter onto the tray, immediately place the tray into the preheated steamer. Steam over high heat for about 2 to 3 minutes, or until the batter is just set and appears slightly opaque. You’ll notice it will become firm to the touch. If you are using fillings, carefully add your prepared cooked shrimp or minced beef onto the surface of the partially cooked noodle sheet while it is still in the steamer. Be quick, as you don’t want the filling to cook unevenly. Work swiftly but gently. Once the filling is in place, carefully remove the tray from the steamer. Using a spatula or a bench scraper, gently lift one edge of the steamed noodle sheet and carefully roll it up towards the filling. Try to keep the roll tight but not so tight that it tears. Once rolled, you can carefully slide it off the tray onto a clean surface or a serving plate. Repeat this process with the remaining batter, oiling the tray lightly between each sheet. Remember to keep the steamer lid on between batches to maintain a consistent temperature.
Serving Your Homemade Cheung Fun
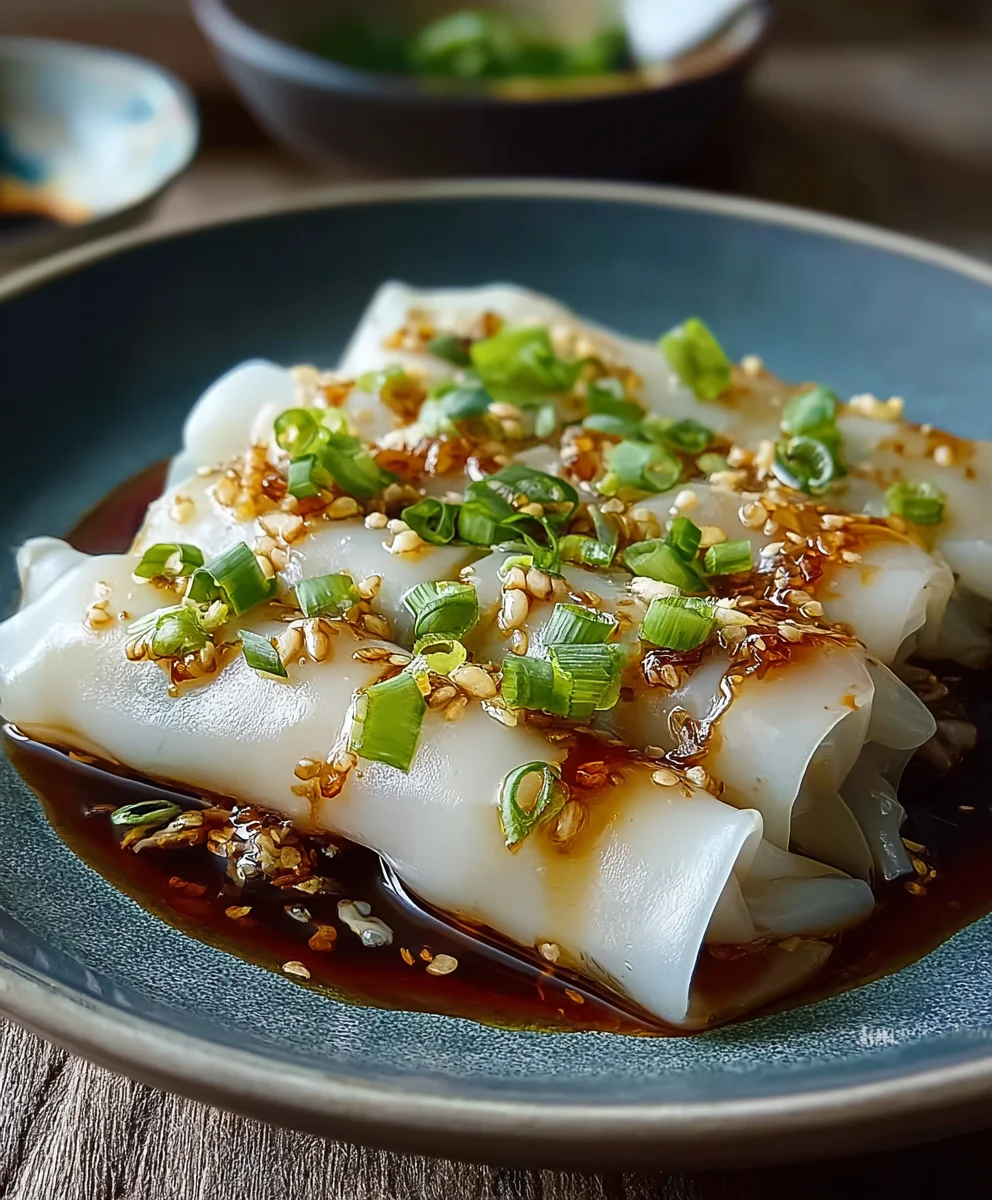
After you have steamed and rolled all your Cheung Fun, it’s time to prepare them for serving. You can leave them as long rolls or cut them into bite-sized pieces, typically about 1 to 1.5 inches long. Cutting them makes them easier to eat and share. Arrange the cut Cheung Fun on a serving platter. To finish, generously sprinkle the fried shallots over the top of the Cheung Fun. The fried shallots add a wonderful crunch and a savory, slightly sweet flavor that is characteristic of this dish. Drizzle a little of your prepared dipping sauce over the Cheung Fun, or serve the sauce on the side for individuals to add as much as they like. Serve immediately while they are warm and fresh for the best texture and taste experience. The warmth of the rolls with the savory sauce and crispy shallots is truly irresistible.
Conclusion:
We’ve reached the end of our delicious journey making Cheung Fun! This versatile dish, with its wonderfully soft and delicate rice noodle sheets, is truly a culinary delight. Whether you enjoyed the process of steaming them yourself or are simply excited to try them, the reward is a truly authentic and satisfying experience. The beauty of Cheung Fun lies in its adaptability, making it perfect for any meal.
For serving suggestions, I love to enjoy my Cheung Fun with a drizzle of sweet soy sauce and a sprinkle of toasted sesame seeds. A side of steamed gai lan (Chinese broccoli) or some pan-fried dumplings makes for a wonderfully balanced meal. Don’t be afraid to experiment with fillings! Classic options include shrimp, barbecued beef, or even thinly sliced beef. For a vegetarian twist, try shiitake mushrooms and bok choy.
I truly hope you feel inspired to create this wonderful Cheung Fun in your own kitchen. It’s a rewarding dish that’s sure to impress, and the satisfaction of making it from scratch is unparalleled. Enjoy every single bite!
Frequently Asked Questions about Cheung Fun:
Q: Can I make Cheung Fun ahead of time?
A: Yes, you can make the rice noodle sheets ahead of time and store them in an airtight container in the refrigerator for up to 2 days. Reheat them gently by steaming for a few minutes before serving to regain their soft texture.
Q: What if my Cheung Fun tears when I try to roll it?
A: Don’t worry if your Cheung Fun tears a little; it happens! The key is to ensure your batter is the right consistency and that you don’t overcook the noodles. Also, make sure to oil your steaming tray generously. If it tears, simply roll it up as best you can; it will still taste delicious!
Delicious Steamed Beef Cheung Fun
An easy recipe for making delicate and slightly chewy steamed rice noodle rolls filled with savory cooked beef.
Ingredients
-
1 cup rice flour (for the batter)
-
⅓ cup tapioca starch (for the batter)
-
3 cups water (for the batter)
-
1 tsp cooking oil (for the batter)
-
Pinch of salt (for the batter)
-
Minced beef, cooked (filling)
-
Fried shallots (to garnish)
-
3 tbsp soy sauce (for dipping sauce)
-
1 tbsp water (for dipping sauce)
-
1 tsp sugar (for dipping sauce)
-
1 tsp sesame oil (for dipping sauce)
Instructions
-
Step 1
Prepare the batter: In a bowl, whisk together rice flour and tapioca starch. Gradually add water while whisking until smooth. Stir in cooking oil and salt. Let rest for at least 30 minutes. -
Step 2
Make the dipping sauce: In a saucepan, combine soy sauce, water, and sugar. Heat until sugar dissolves. Remove from heat and stir in sesame oil. Set aside. -
Step 3
Steam the cheung fun sheets: Lightly oil a shallow steaming tray. Pour a thin layer of batter onto the tray, swirl to coat evenly, and steam over high heat for 2-3 minutes until set. -
Step 4
Add filling and roll: While the sheet is still in the steamer, add cooked minced beef. Carefully lift one edge of the steamed noodle sheet and roll it up tightly towards the filling. Slide off the tray. -
Step 5
Serve: Cut the rolled cheung fun into bite-sized pieces. Arrange on a platter, sprinkle with fried shallots, and drizzle with dipping sauce, or serve sauce on the side.
Important Information
Nutrition Facts (Per Serving)
It is important to consider this information as approximate and not to use it as definitive health advice.
Allergy Information
Please check ingredients for potential allergens and consult a health professional if in doubt.

Leave a Comment