
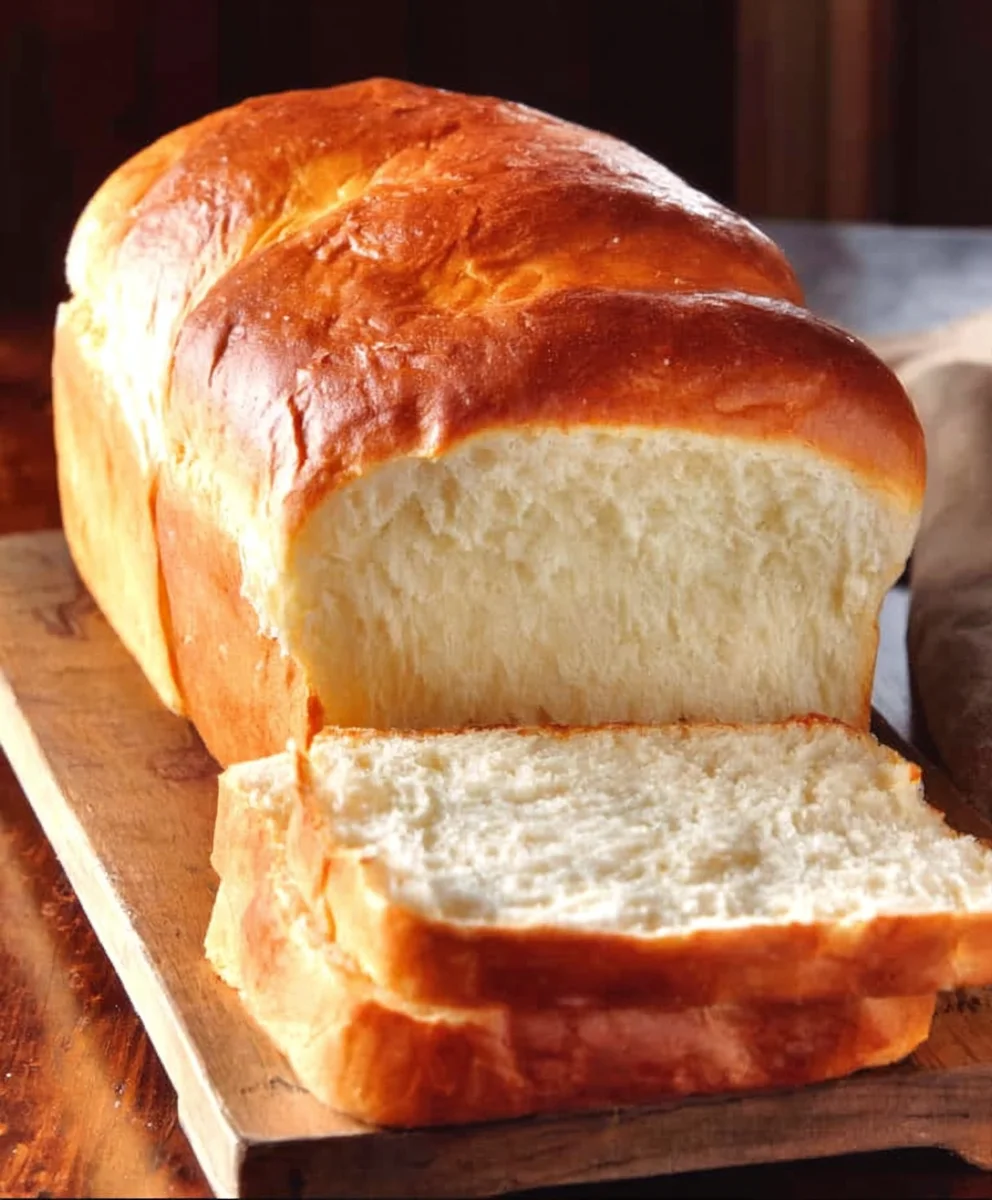
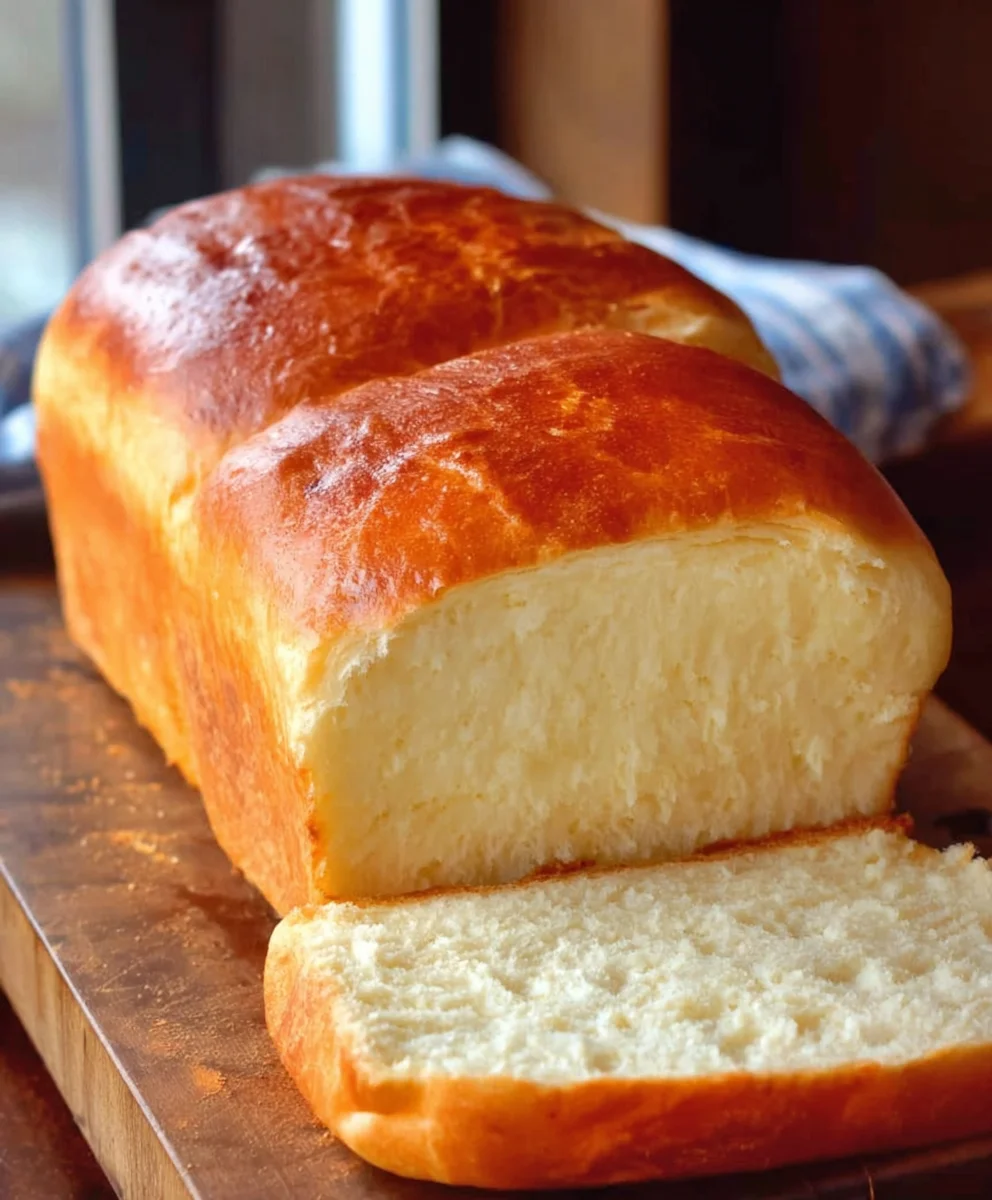
Amish White Bread Recipe perfection is within your reach! There’s a comforting aroma that fills the kitchen when a loaf of homemade Amish white bread bakes, a scent that instantly transports you to simpler times and evokes a feeling of warmth and tradition. People adore this bread for its incredibly soft, pillowy texture and its subtly sweet, clean flavor that pairs beautifully with almost anything. Whether it’s slathered with butter, dipped into soup, or used to create the ultimate sandwich, this classic is a beloved staple for a reason. What truly sets this Amish White Bread Recipe apart is its no-fuss approach, relying on simple, high-quality ingredients and a straightforward process that even begin extractner bakers can master. Get ready to experience the joy of creating a truly exceptional loaf of bread that will become a cherished part of your baking repertoire.

Ingredients:
- 1 cup water (warmed to 110F)
- 1 pinch ground gin extractger (optional – this is a little baker’s secret to help activate the yeast more quickly)
- 1 cup milk (warmed to 110F)
- 2/3 cup granulated sugar (you can certainly adjust this down if you prefer a less sweet bread)
- 1 1/2 tablespoons active dry yeast
- 1 1/2 teaspoons salt
- 1/4 cup vegetable oil (or 1/4 cup melted coconut oil, cooled to about 100F, or 1/4 cup melted unsalted butter)
- 5-1/2 cups bread flour (keep a little extra on hand, as you might need a bit more or less depending on humidity)
- 2 tablespoons unsalted butter (melted, for brushing)
Preparing the Dough
Activating the Yeast
In a large mixing bowl, combine the warm water (it should feel like a comfortably warm bath) and the warm milk. Add the active dry yeast to the liquid. If you’re using it, sprinkle in that pinch ofgin extractound ginger – it really does help give the yeast a gentle nudge to get going. Stir gently to combine. Let this mixture sit for about 5 to 10 minutes. You’ll know the yeast is alive and ready to work when it becomes foamy and bubbly on the surface. This indicates that the yeast is actively feeding on the sugars and producing carbon dioxide, which is essential for leavening the bread. If you don’t see any foam, your yeast might be expired, or the water was too hot or too cold, and you’ll need to start over with fresh yeast.
Mixing the Wet and Dry Ingredients
Once your yeast mixture is active and bubbly, add the granulated sugar to the bowl. The sugar provides food for the yeast but also contributes to the sweetness and golden-brown crust of the finished loaf. Next, pour in your chosen fat: the vegetable oil, melted and cooled coconut oil, or melted butter. Stir everything together until it’s well combined. Now it’s time to start incorporating the flour. Add the salt to the flour before adding it to the wet ingredients. This ensures the salt is evenly distributed and doesn’t directly come into contact with the yeast in a way that could inhibit gin extract activity. Begin adding the bread flour, about a cup at a time, mixing after each addition. A sturdy spoon or a dough whisk works well for this initial mixing.
Kneading the Dough
Developing the Gluten
Once the dough starts to pull away from the sides of the bowl and becomes shaggy, turn it out onto a lightly floured surface. This is where the magic of kneading happens. Start by gently folding the dough over on itself and then pushing down and away with the heels of your hands. Rotate the dough a quarter turn and repeat the process. It might feel sticky at first, but resist the urge to add too much extra flour – a little stickiness is okay. As you knead, the gluten strands within the flour will develop, creating a strong, elastic network that will trap the gases produced by the yeast, allowing the bread to rise beautifully. Continue kneading for about 8 to 10 minutes. You’re looking for a smooth, elastic dough that springs back when gently poked. If it’s still very sticky, add a tablespoon of flour at a time until it’s manageable.
First Rise
Lightly grease a clean large bowl with a little bit of oil or cooking spray. Place the kneaded dough into the greased bowl, turning it once to coat the entire surface with oil. This prevents the dough from drying out as it rises. Cover the bowl tightly with plastic wrap or a clean kitchen towel. Find a warm, draft-free spot in your kitchen for the dough to rise. An oven that has been turned off after being preheated for a minute or two is often an ideal spot. Allow the dough to rise for 1 to 1.5 hours, or until it has doubled in size. The dough should look puffy and airy.
Shaping and Second Rise
Punching Down and Shaping
Once the dough has doubled, gently punch it down to release the air that has accumulated. Turn the dough out onto your lightly floured work surface again. For a classic loaf, shape the dough into a round or oblong shape that will fit into your greased loaf pan. To do this, I like to gently flatten the dough into a rectangle, then tightly roll it up from one of the shorter sides, pinching the seam closed as I go. Tuck in the ends to create a neat loaf shape. Place the shaped dough into a greased 9×5 inch loaf pan.
Second Rise and Baking Preparation
Cover the loaf pan loosely with plastic wrap or a clean kitchen towel. Let the dough rise again in a warm place for about 30 to 45 minutes, or until it has nearly doubled in size and looks nicely puffed up over the rim of the pan. While the dough is on its second rise, preheat your oven to 375F (190C).
Baking the Bread
Baking to Golden Perfection
Once the dough has completed its second rise and the oven is preheated, carefully place the loaf pan in the center of the oven. Bake for 30 to 35 minutes. You’ll know the bread is done when the crust is a deep golden brown and the internal temperature reaches 190-200F (88-93C) when measured with an instant-read thermometer inserted into the center of the loaf. You can also tap the bottom of the loaf; if it sounds hollow, it’s usually done.
Cooling and Finishing Touches
As soon as the bread comes out of the oven, immediately invert it onto a wire cooling rack. This is crucial to prevent the bottom crust from becoming soggy from steam. While the bread is still warm, brush the top with the 2 tablespoons of melted butter. This adds a lovely sheen and a subtle richness to the crust. Let the bread cool completely on the wire rack for at least an hour before slicing. This allows the internal structure of the bread to set properly, ensuring clean slices and the best texture.
Conclusion:
There you have it – your very own Amish White Bread Recipe! This recipe delivers a loaf that is wonderfully soft, slightly sweet, and boasts that perfect airy crum extractb. It’s a testament to simple, honest ingredients and a time-honored baking tradition. We hope you’ve enjoyed the process of creating this delicious bread. Now comes the best part: enjoying it! We love serving our Amish White Bread Recipe warm, slathered with butter, or as the foundation for hearty sandwiches. It’s also fantastic toasted and served alongside soups or stews. Don’t be afraid to experiment! For a delightful twist, consider adding a touch of honey to the dough for extra sweetness, or incorporate a handful of poppy seeds or sesame seeds for added texture and flavor.
The aroma filling your kitchen as this bread bakes is simply non-intoxicating, and the satisfaction of pulling a golden-brown loaf from your oven is unmatched. Give this Amish White Bread Recipe a try, and you’ll quickly understand why it’s a beloved classic. Happy baking!
Frequently Asked Questions about Amish White Bread Recipe:
Q1: Can I freeze the Amish White Bread Recipe once it’s baked?
Absolutely! Once the bread has cooled completely, you can wrap it tightly in plastic wrap, followed by a layer of aluminum foil or a freezer-safe bag. It will stay fresh in the freezer for up to 3 months. Thaw it at room temperature or gently reheat slices in a toaster or oven.
Q2: My Amish White Bread Recipe didn’t rise as much as I expected. What could have gone wrong?
Several factors can affect the rise. Ensure your yeast was fresh and active (you can test it by dissolving it in warm water with a pinch of sugar; it should become foamy). Also, make sure the dough was proofed in a warm, draft-free environment. Sometimes, cooler kitchen temperatures can slow down the rising process.
Q3: What kind of flour is best for the Amish White Bread Recipe?
For the classic soft texture of Amish White Bread, all-purpose flour is ideal. It provides a good balance of protein and starch for a rum extractder crumb and a decent rise. While bread flour can be used for a chewier loaf, all-purpose flour is the traditional choice for this particular recipe.
Authentic Amish White Bread Recipe – Best Homemade Loaf
A classic Amish white bread recipe for a delicious, soft, and homemade loaf.
Ingredients
-
1 cup water, warmed to 110F
-
1 pinch ground ginger extract (optional)
-
1 cup milk, warmed to 110F
-
2/3 cup granulated sugar
-
1 1/2 tablespoons active dry yeast
-
1 1/2 teaspoons salt
-
1/4 cup vegetable oil
-
5-1/2 cups bread flour
-
2 tablespoons unsalted butter, melted
Instructions
-
Step 1
In a large mixing bowl, combine warm water and warm milk. Add active dry yeast and optional ground ginger extract. Stir gently and let sit for 5-10 minutes until foamy. -
Step 2
Add granulated sugar and your chosen fat (vegetable oil, melted coconut oil, or melted butter) to the yeast mixture. Stir well. Add salt to the bread flour, then gradually add the flour to the wet ingredients, mixing until a shaggy dough forms. -
Step 3
Turn the dough onto a lightly floured surface and knead for 8-10 minutes until smooth and elastic. Place dough in a lightly greased bowl, turn to coat, cover, and let rise in a warm place for 1-1.5 hours, or until doubled. -
Step 4
Gently punch down the dough. Shape into a loaf that fits a greased 9×5 inch loaf pan. Place in the pan, cover loosely, and let rise again for 30-45 minutes until nearly doubled. -
Step 5
Preheat oven to 375F (190C). Bake for 30-35 minutes until golden brown and the internal temperature reaches 190-200F (88-93C). -
Step 6
Immediately invert the bread onto a wire cooling rack. While warm, brush the top with melted butter. Let cool completely for at least an hour before slicing.
Important Information
Nutrition Facts (Per Serving)
It is important to consider this information as approximate and not to use it as definitive health advice.
Allergy Information
Please check ingredients for potential allergens and consult a health professional if in doubt.


Leave a Comment